In 2021, an AT&T landline price increase finally gave my grandma the push she needed to get rid of her landline phone service. I have been encouraging my family to use their Google Voice lines for many years, but some of them have still held on to their expensive landline service. A hangup for my grandma was not wanting to lose her primary phone number, so I set off to see about porting it to Google Voice.
Google Voice, for some reason, will not port a landline number directly. I came across some other articles online, like this one from The Cord Cutting Report, which I found helpful throughout my process. So, I thought I’d document my experience for the future reference of myself and anyone else who may find it useful.
TracFone as a number porting intermediary.
Numerous guides I’d read online suggested using a prepaid cell phone carrier, such as Ting, to port the number away from the landline service. This process would transition the phone number into a mobile number, which Google Voice is willing and able to port over to their service.
I decided to use TracFone, since I have used them personally for many years, as has most of my family. As a result of my long time as a customer, I had an old Android phone laying around from a previous TracFone service term, and was able to get it activated on the network again – so I did not even have to buy a burner phone, I already had it!
I’ve read that others have experienced problems with their number porting due to information not matching up on the two accounts. It seems that things like the billing zip code on the credit card used to order the service, and other factors can impact the process. So, to attempt to minimize any such issues, I added my old phone to my grandma’s TracFone account, and we ordered the service using her credit card. This way, all of the billing and account information will match her AT&T landline service.
I began the process on a Thursday night, knowing it may take 1-2 business days, not knowing whether it would be done before the weekend or not. But, there was no rush here. I’d been informed through my research that it was a good idea to wait at least 1 full week between porting the number to TracFone and trying to port it again, so with this intention in mind, nobody was in any hurry.
The Porting Process – Initial Issues
Having personally never ported a number before, I wasn’t totally familiar with the process and what it would entail. I began the process on TracFone’s website, which asked me for the AT&T account number and password\PIN for the account I wanted to port the number from.
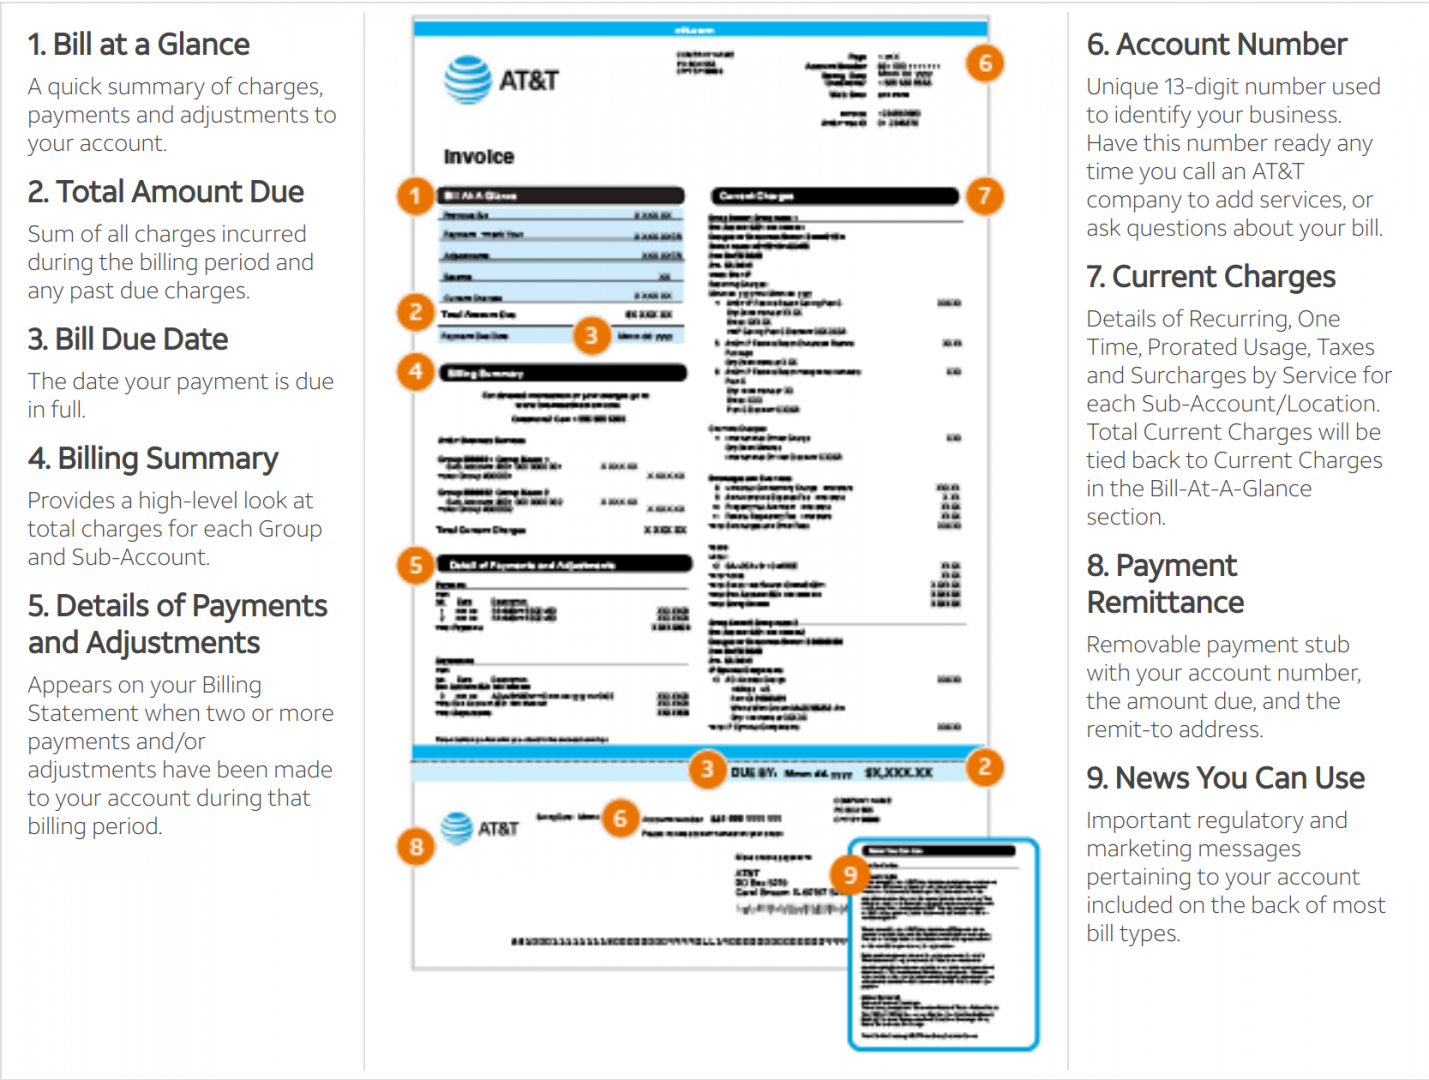
The account number could be found on the top right corner of the AT&T landline bill.
It seemed completely clear, although there was some awkward spacing in the information. For the sake of this example so I can provide a workable example with a non-real account number, let’s say her phone number was (111) 222-3456. And let’s say the account PIN was 7654.
The information appearing as “Account Number” on the AT&T bill was formatted like this: 111 222-3456 765 4
I tried all possible combinations of these numbers on TracFone’s website, but it said everything I entered was an invalid account number. I came across this Reddit thread from someone else who had the same issue. The thread seemed to conclude that the account number would be 13 digits, so from our example, I assumed the correct account number would be 1112223456765. The thread noted it was necessary to select “Other” as the carrier, not “AT&T” because the account number was still not a “valid” AT&T account number, according to the form.
I figured I could call TracFone support, but I also figured there was no harm in trying this, and if it didn’t work I could fall back to calling support. So, I went ahead and did as suggested, entering the account number as 1112223456765 and the PIN as 7654.
The Wait Begins
After entering the information, TracFone appeared to accept the order and begin the porting process. They provided the following guidance:
| The transfer process is in progress and should take a few hours to complete. In some cases, it could take as long as 2 business days. It may take longer for landline phone numbers. During this time, your current phone will still work. After your CURRENT phone stops working: 1. Call *22890 from your NEW phone to initiate the Activation process. 2. When the activation is complete, make a call. – If the activation or call fails, wait a few minutes and call * again. |
For kicks, I tried to activate the phone several hours later, and unsurprisingly, the activation was not successful. The wait was now on to see how many days \ business days the transfer would take, and if it would even be successful at all.
Unexpected Issues
Unfortunately, there was a hangup in my plan. Tracfone called us the next day to notify us that the phone we were trying to activate was too old, and no longer supported by the network. I was somewhat surprised, considering I still know at least one person actively using the same model phone on Tracfone’s network, but since the temporary phone I had was a 3G phone, they probably are no longer activating 3G phones since that network is in the process of being decommissioned by major carriers, like AT&T.
I really didn’t want to buy a phone for the sole purpose of using for a week, so I started asking around, and was fortunate to find a friend with an old 4G unlocked phone they were no longer using. I was able to borrow their phone and use a very cheap TracFone BYOD SIM card to attempt to activate it on TracFone’s network.
The process of activating the second phone was difficult the first time, the first agent I called was unable to find the service card we had paid for on the previous phone, and told me that the account number I had from AT&T was invalid for the number port. (This turned out to not be true – the information outlined above IS correct.)
I called back a second time the next day, after calling AT&T to verify the account number, and got a different TracFone rep who was able to overcome all of the problems the first rep couldn’t. Finally, the transfer process was underway! I was told it would take 2 days to complete the porting process, since it was a landline. It sounded like they would have to actually communicate with AT&T via email and send over documentation, it would not be a quick automated process (maybe this is why Google refuses to do it!).
Successful TracFone Port!
After two days, as promised, the number was ported and I was able to activate the phone on TracFone’s network. I made a test call to myself and confirmed it came from the old landline number.
Various articles and forum threads I’d read online suggested that I should wait 1 week before trying to port the number again. So, I decided to wait a little extra. The port completed on a Wednesday, and I decided to do the second port the following Sunday, when I could go over to Grandma’s house and finish setting up her Obi200 box.
Porting to Google
The port to Google was a fairly straightforward process overall, but a lot of the information I’d found online concerning how to port out of TracFone had been incorrect.
I began here, on this Google KB post which provides the link to the page to start the number porting process.
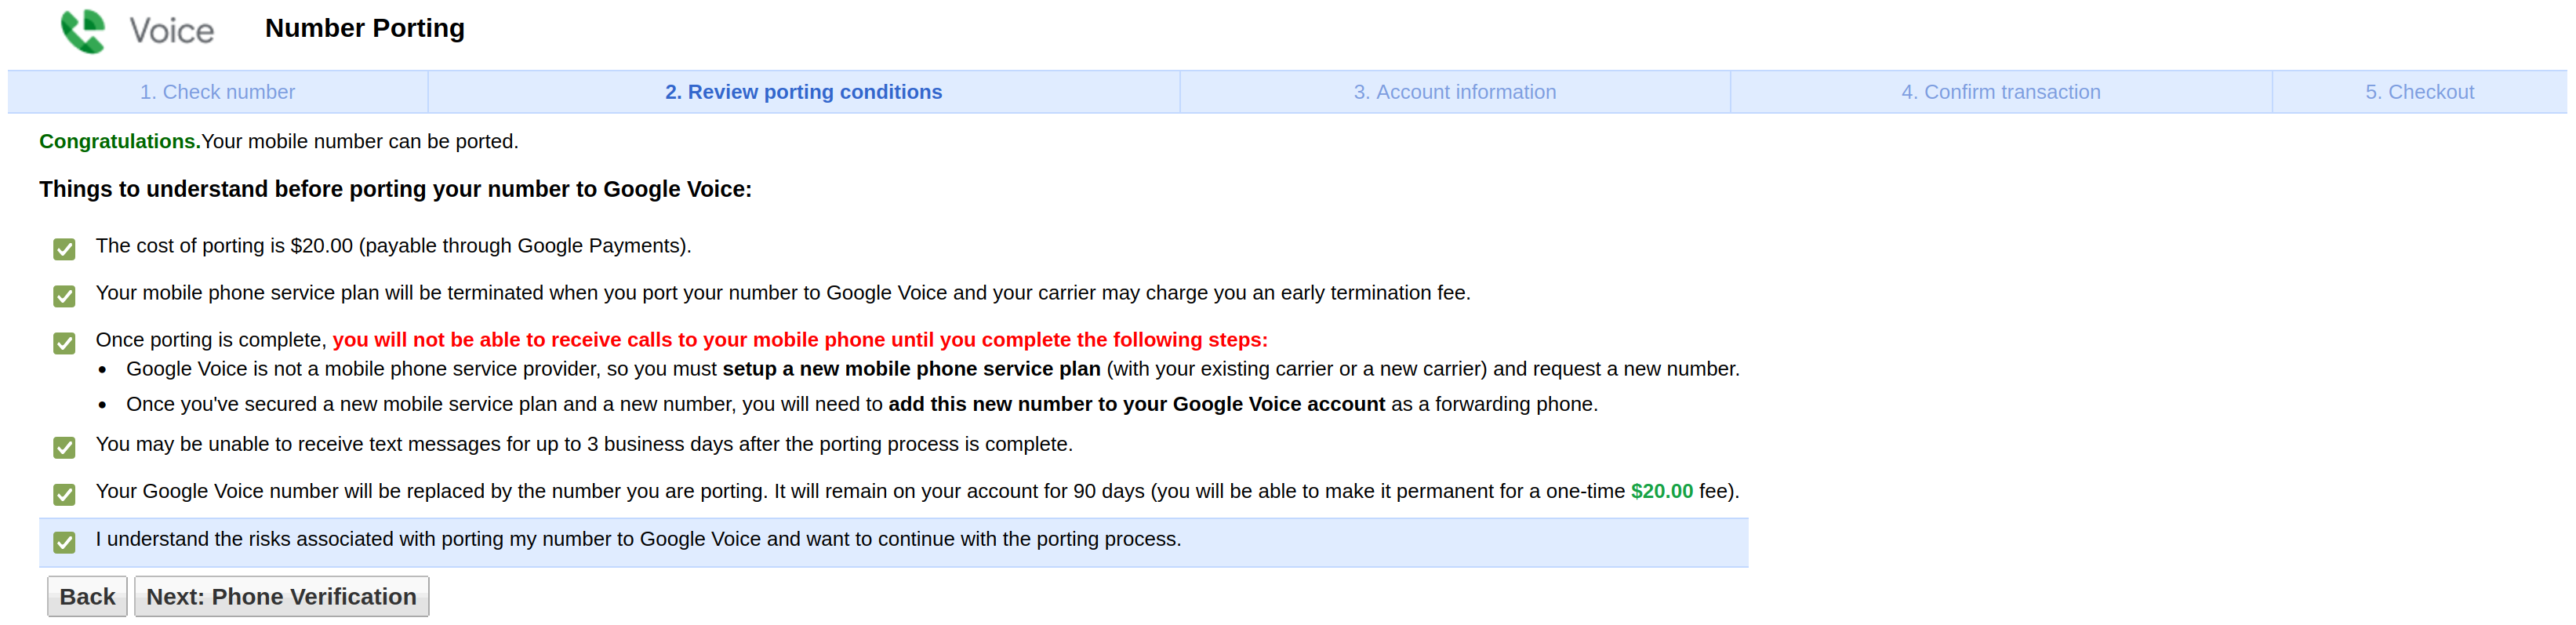
The first step was to enter the phone number and check portability, this was where we failed before, since Google did not support porting the AT&T landline. This time, success! Google said the number was eligible for porting. Once on the next screen, they provide the following terms and details:
The next step was to fill out contact information for the phone number being ported (the billing address and details on the TracFone account). Note that the carrier shows up as Verizon, I was expecting this, since I used the Verizon compatible BYOD SIM.
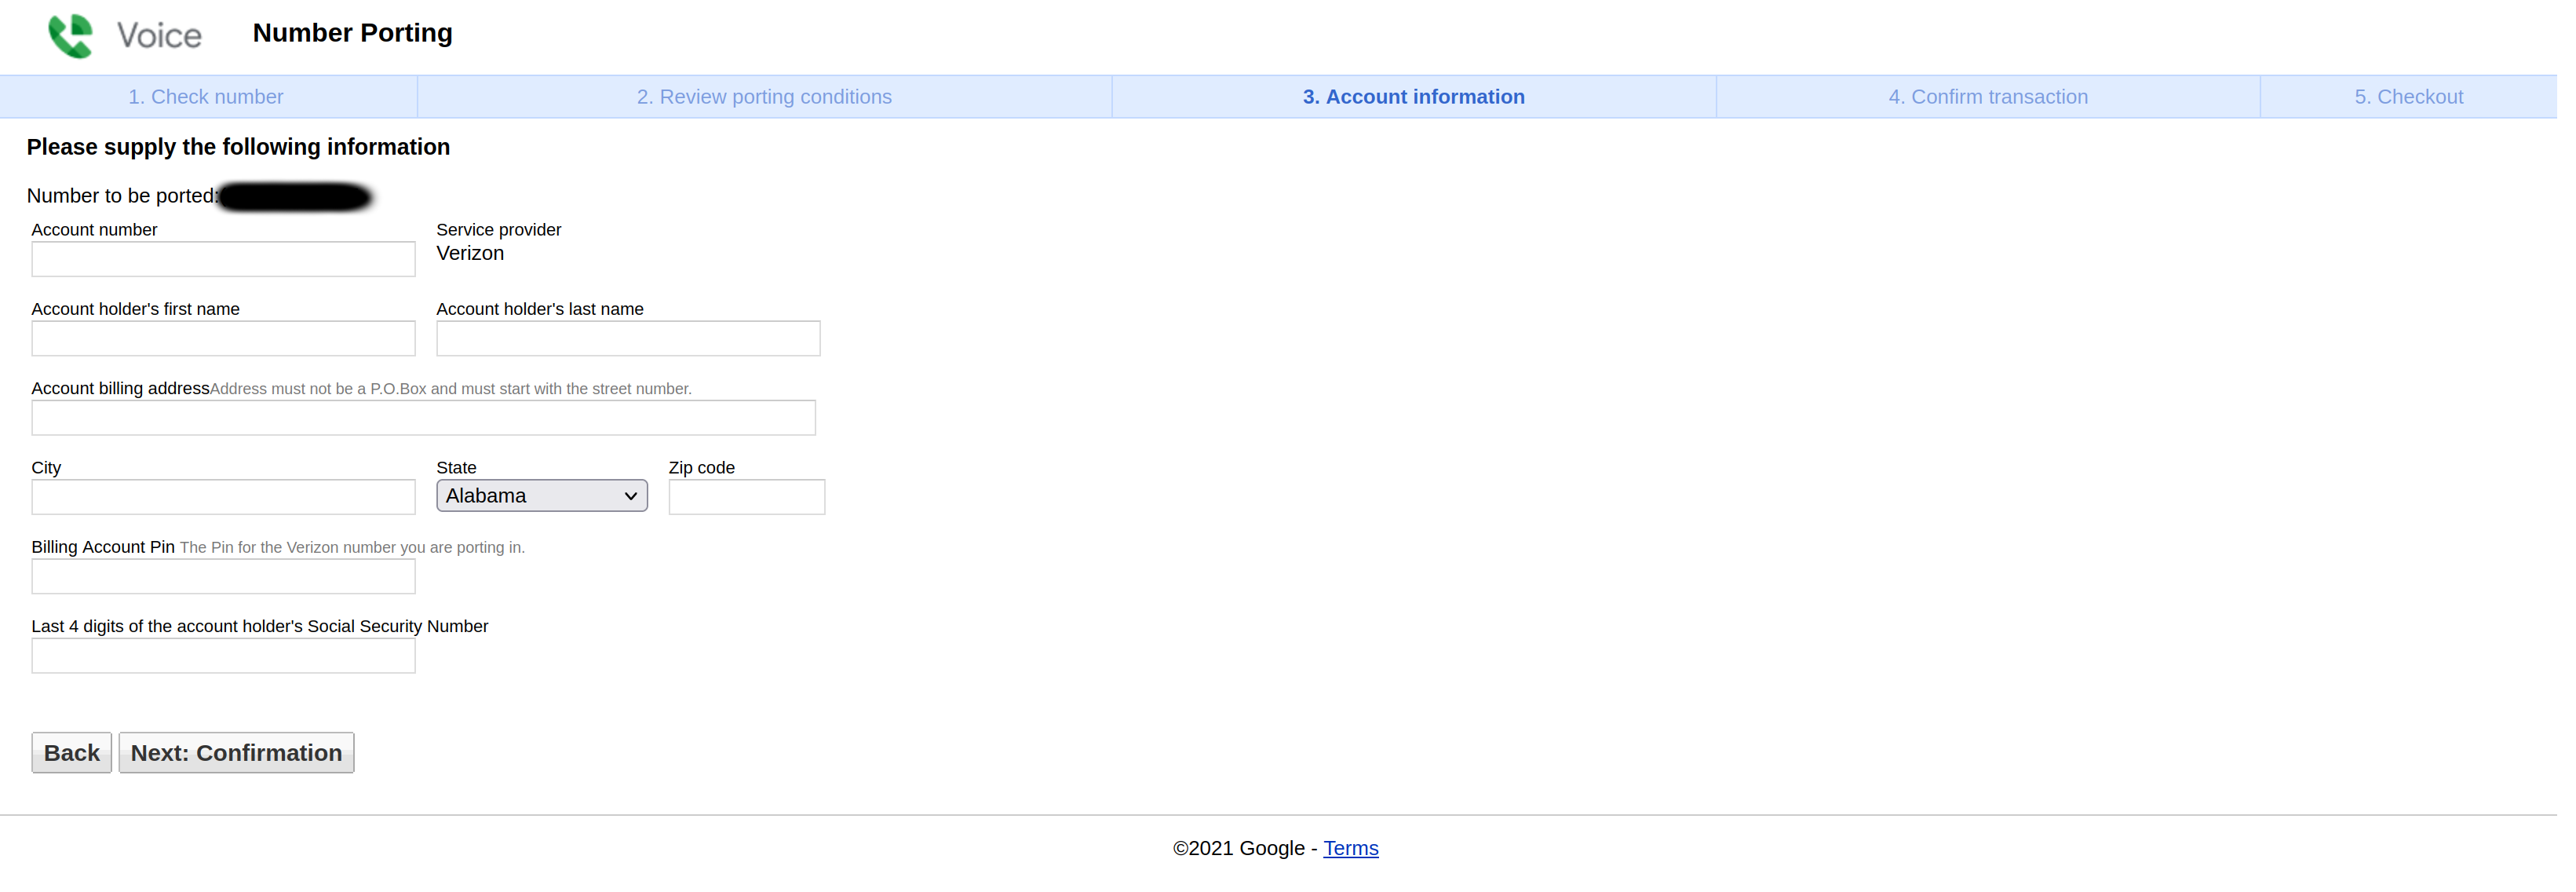
This was where the slight issues began. Every piece of information I found online, including this article from Best Cellular, stated that the “Account Number” for a TracFone BYOD device was the last 15 digits of the SIM card. As far as the 4 digit PIN, information I found online varied from “TracFone doesn’t use PINs, so you should enter 0000” to “TracFone doesn’t use PINs, so you should enter any 4 digit number”. I decided to enter a 4 digit security PIN I knew existed on the account.
Unfortunately, the port request was immediately rejected due to a bad account number. I was provided the option to correct the account number, but didn’t know what the right information was. I really was not looking forward to calling TracFone and asking them how to port away the number they’d just ported in a week earlier, but I decided to give it a shot.
Fortunately, the agent I got at the TracFone number porting department was very helpful, and didn’t seem to care at all about what I was doing. They initially thought I was right to be using the last 15 digits of the SIM card too, but then found another account number in the system that I didn’t have. They provided it to me, and I entered it in the Google form, along with the 4 digit account security PIN. This time, the port was accepted!
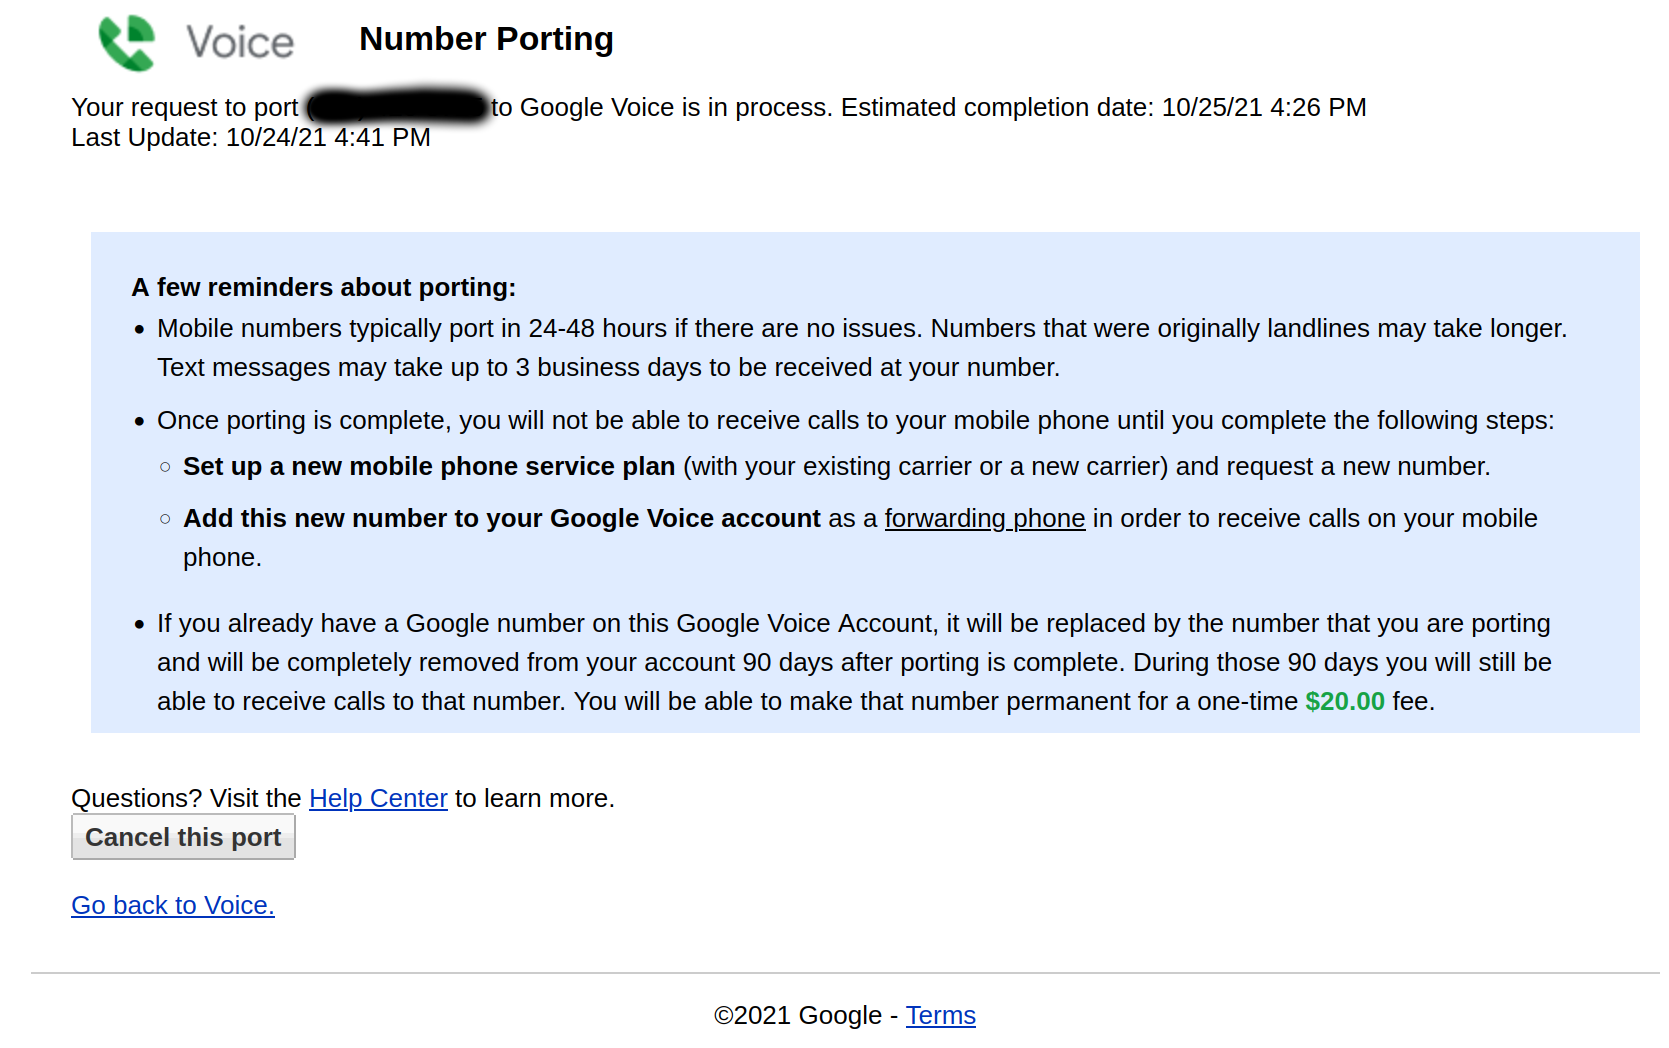
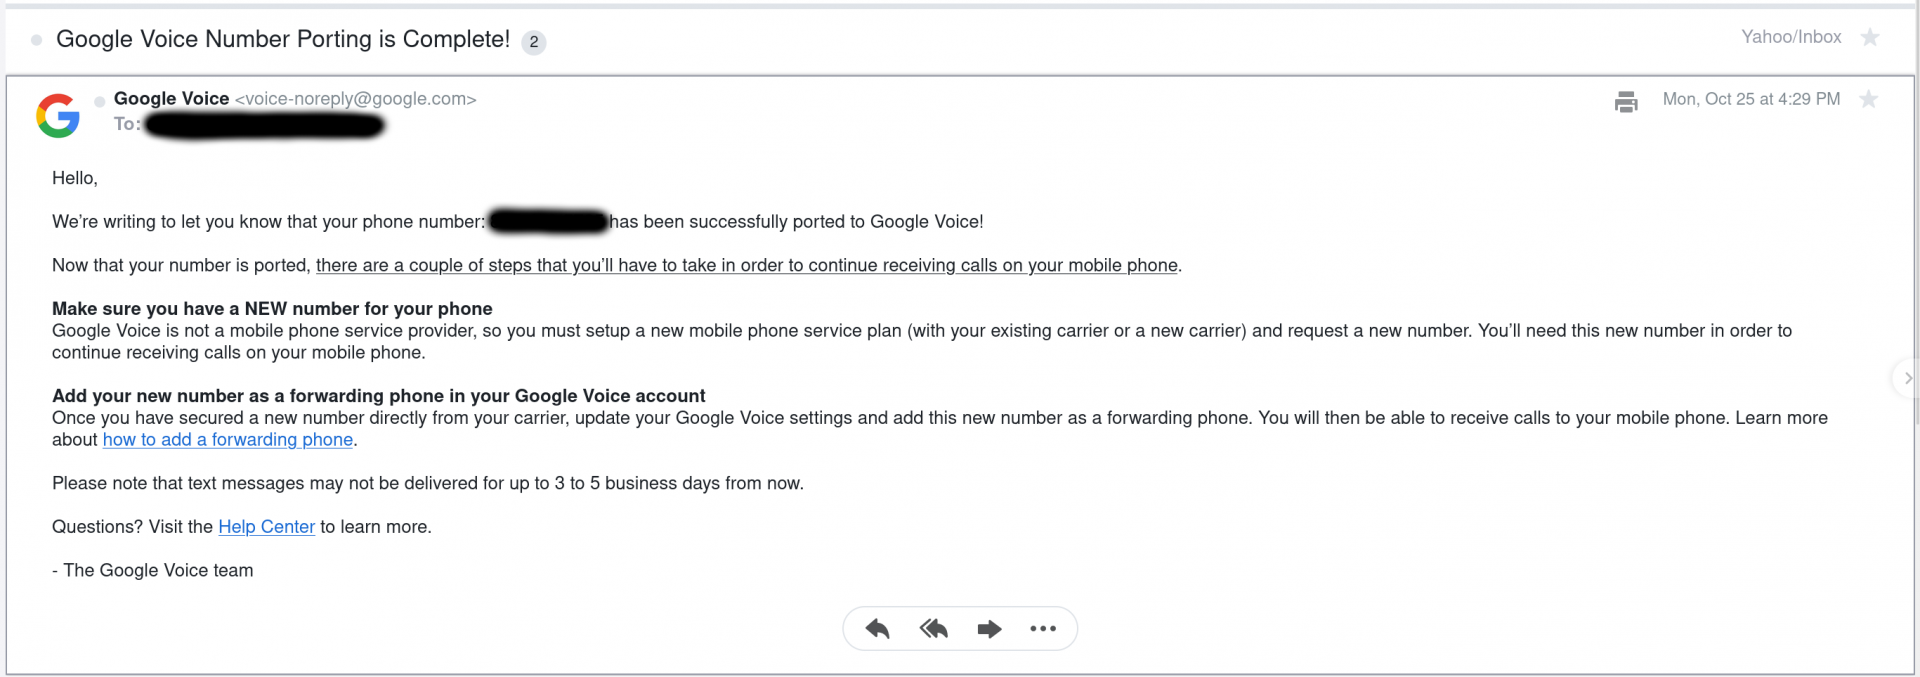
I was disappointed that it was going to take another 24 hours, I thought the port would be fairly immediate now that it was a mobile number. I’m not sure if the delay was normal, because it was a landline, or because I made a mistake on the form the first time. Either way, Google was very timely and completed the port request exactly when they said they would. The next day, we received an email notifying us it was complete!
Closing Thoughts
This was my first time ever porting a phone number in any capacity, and I was trying to do something somewhat unsupported… All in all, this process was as easy as I could have asked for. There were certainly some snags along the way, which were learning experiences for me, but I would definitely do this again in the future if someone else in my family asks for assistance getting rid of their landline. Hopefully someone else out there will also find this information useful if you are trying to do the same process, or wondering what will be involved and how hard it will be. Happy porting!

Recent Comments