• About Binary Impulse
  • BashBytes
Binary Impulse

Author Archives: Dan

Cheap spectrum analysis for wireless

February 9, 2013 2:14 PM / Leave a Comment / Dan

When I was going through college for networking I learned to hate wireless.  I had come to learn that it was insecure, unreliable, unpredictable, and difficult to troubleshoot.  I got into a job I love and then the wireless era began.  We are now implemented hundreds of new wireless network devices a year.  We have built out our infrastructure with a lot of time and planning and so far have been quite successful.  We use primarily Cisco equipment with some Ubiquiti back-hauls for some of our outdoor setups.  Cisco provides some very basic spectrum information, for someone who has done some in-depth work with wireless and Cisco this is enough information.  It doesn’t seem to provide any visual representation of the network which can be had to explain to upper management.  Spectrum analyzers can be thousands of dollars and for what we are doing we don’t need something that granular.  We need something to tell use when channels are overloaded/consumed with interference and if antenna’s are aligned properly during setup.

We bought a few Ubiquiti bridges a while back and noticed the AirOS product line has a built in spectrum analysis.  This is handy when selecting channels as it ensures you are not selecting a channel already in use.  We have been watching Ubiquiti for some time now and when we started running into some issues with our client wireless access I went out and bought a Ubiquiti Bullet M5 and an M2.  I think total for the both I paid about $140 (includes adapters and some antennas I had lying around).  As you might guess the M2 runs off of the 2.4Ghz spectrum and the M5 runs off the 5.8Ghz spectrum.  With the Bullets, a switch, and a windows laptop/netbook and power source we can easily run up and diagnose a problem.  This setup is also very mobile and could be brought out into the field to be worked on (barring a power source of course).

At this point in time I have been unsuccessful in getting the spectrum analysis software working in anything other than windows.

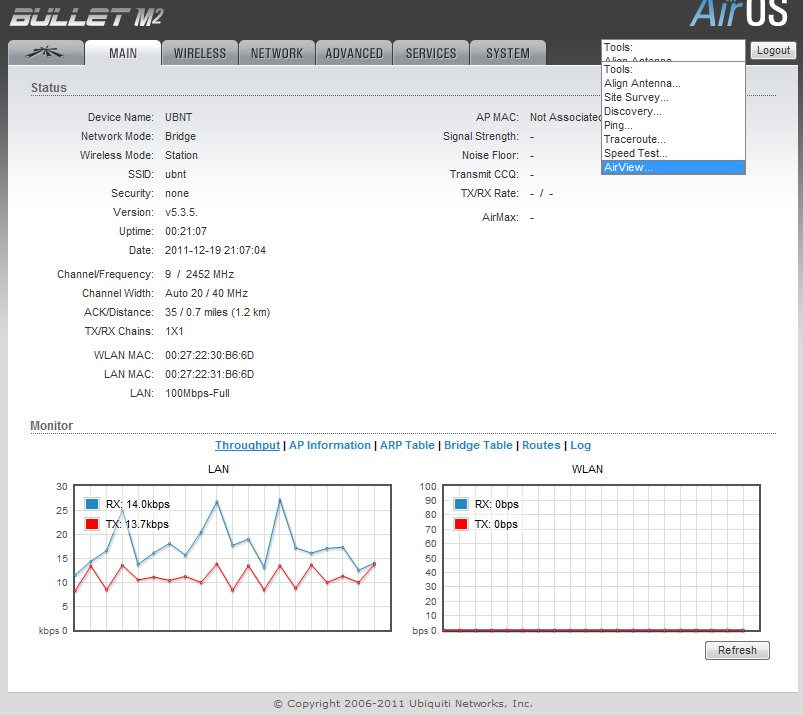
I am going to assume you can get the default information for the Ubiquiti Bullet and login.  My bullet is completely stock, no configuration needed to do what I will show you.  After logging in you get some beautiful throughput graphs and other good troubleshooting information.  There is also a drop down menu near the logout button which provides you with an AirView option.  AirView is the spectrum analyzer software.

Screenshot - 02092013 - 01:15:35 PM

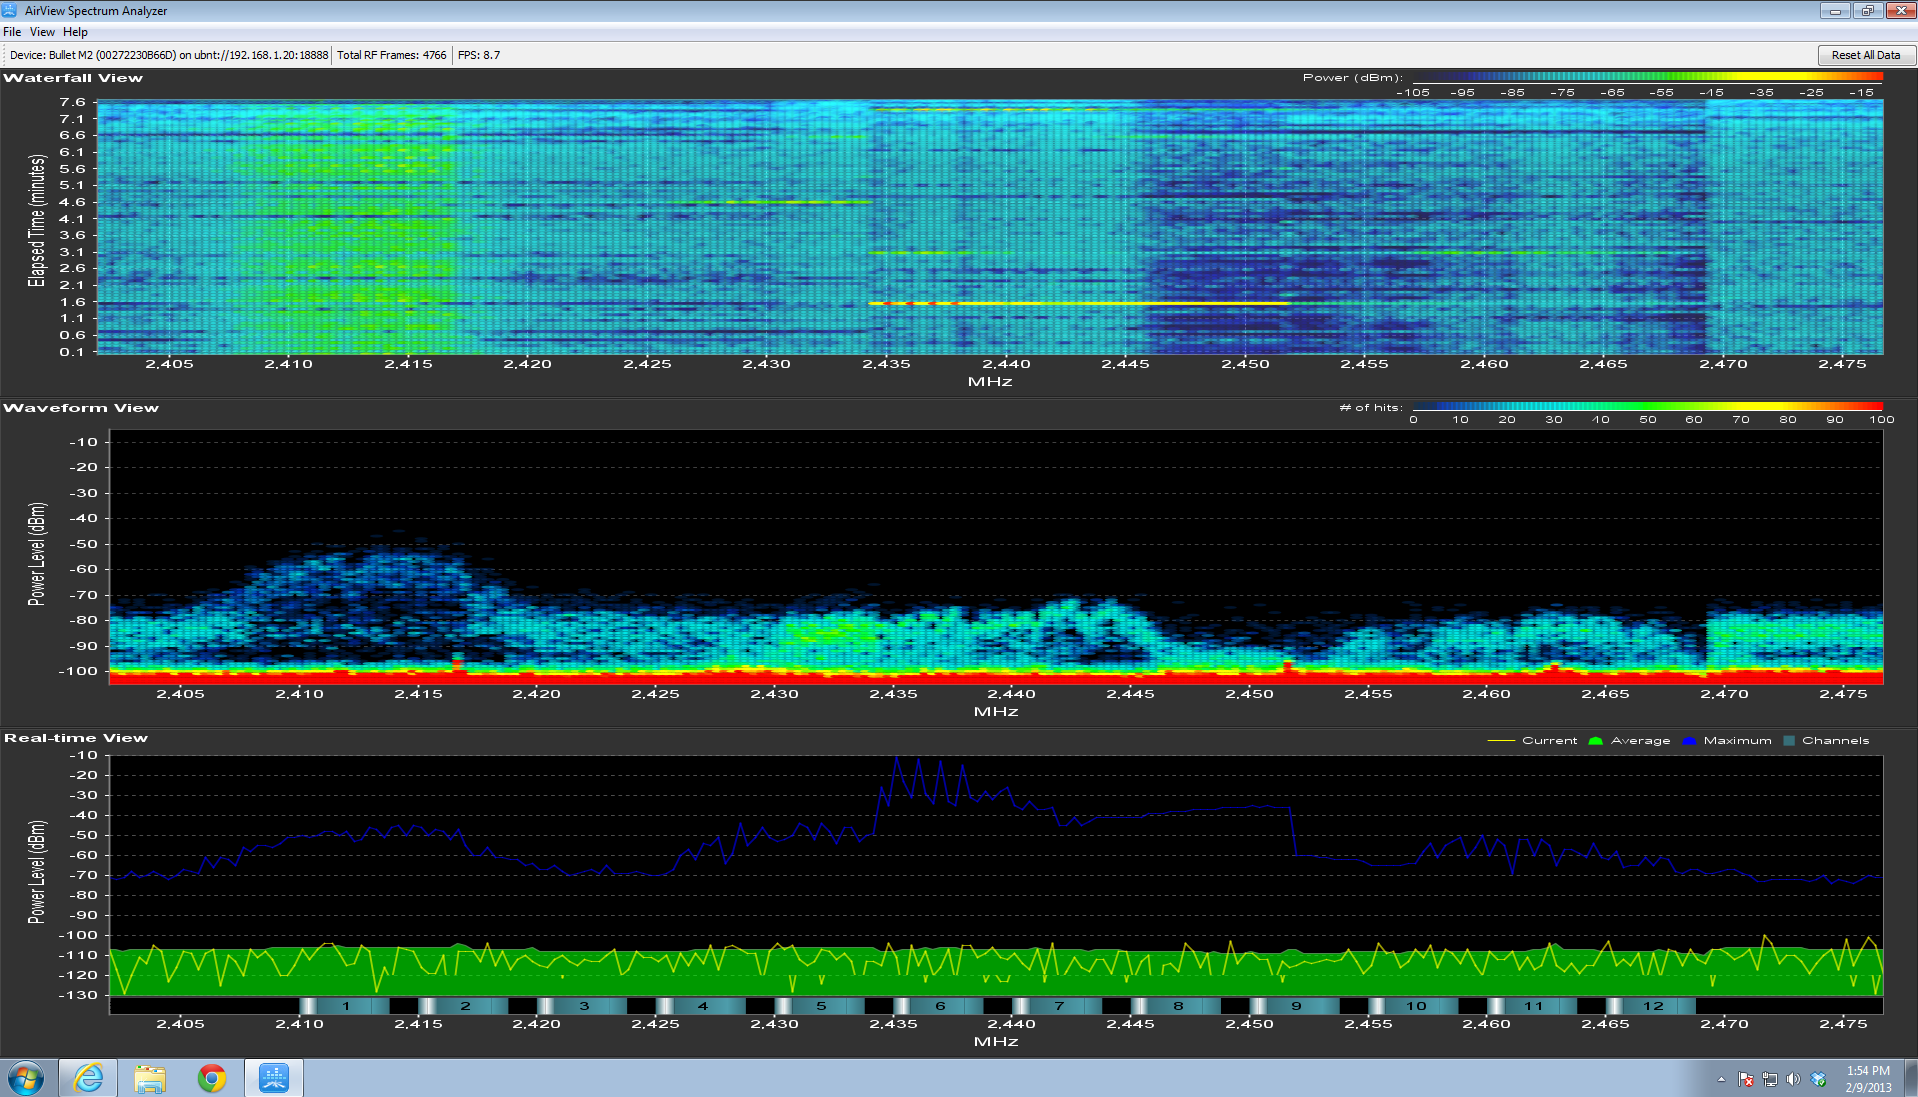
Airview is a Java Network Launch Protocol application which obviously requires Java.  The analyzer in my virtual machine runs about 9 frames a second and shows pretty close to real time the actual spectrum.  Here is a 2.4Ghz snapshot of my work where our 2.4Ghz spectrum is very overloaded. Sadly this is with only a few clients in the area.


Screenshot - 02092013 - 01:54:43 PM

The top visual: Waterfall ViewThis is a good representation of channel utilization over time.  You can clearly see if a client is connected and on what channel.

The middle visual: Waveform View
This is a good visual of how often you get a signal at a certain power or signal strength.

The bottom view:  Real-time View
This is good for seeing what is happening right this second compared to the average and maximum power levels recorded.  After letting this run for a few minutes you can compare spikes and hopefully identify any problems.

I plan on using these to make future recommendations to clients and potential trend information over a period of time.  This could help identify possible interferers that could be as simple and intermittent as a microwave.  These pictures will be invaluable when trying to explain to upper management how or why we are having problems, and what should be done to correct it.

 

Posted in: How-To's, Musings / Tagged: analysis, cheap, spectrum, Ubiquiti

Quick and easy MSRDP script

January 30, 2013 10:06 AM / Leave a Comment / Dan

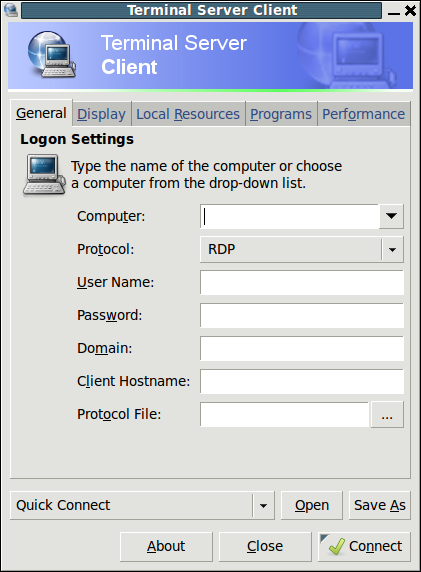
I love Linux, but as we all know we have to work on windows computers usually on a day-to-day basis.  We have servers we constantly have to RDP (remote desktop) into to work with active directory, etc.  The Terminal server client in 10.04 was all buggy and when you closed the window it would reconnect in 30 seconds.  This was especially annoying when you left a session open on your locked computer on the other side of the building and needed to hop on real quick to do something.

ubuntu-Terminal-Server-Client

I found out that the problem was that certain libraries had bee updated and caused this bug.   I decided using rdesktop for a while would suffice and created a launcher on my panel to run this command.  It wasn’t pretty for the longest time, a bash terminal asking for usernames, etc.  I really didn’t like it.  I stumbled across zenity a while ago and decided to use that to hide the password and pass that to the rdesktop command.  It is pretty simple actually.
I prefer to hard-code my username and domain in so that I don’t have to constantly fill it out, however more zenity windows could easily be added if more security or flexibility would be needed.  I saved this into a script, made it executable, and then created a launcher to run the script.  I haven’t spent much time on it but I could not just put this code into a launcher and run it (on XFCE, I suppose other frontends like gnome2 or unity might work).

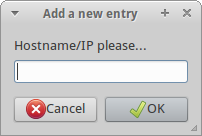
rdesktop -u <Username> -d <domain> -g 1280x1024 $(zenity --entry --text="Hostname/IP please...") -p $(zenity --password --text="Password Please...")

The code above in a launcher provides these dialogue boxes:

Username

password


Zenity provides a lot of flexibility in bash scripting so end users don’t have to see a techy/confusing bash window to do something simple.  Zenity options:

OPTIONS
       This program follows the usual  GNU  command  line  syntax,  with  long
       options starting with two dashes (`-').

       Dialog options

       --calendar
              Display calendar dialog

       --entry
              Display text entry dialog

       --error
              Display error dialog

       --file-selection
              Display file selection dialog

       --info Display info dialog

       --list Display list dialog

       --notification
              Display notification

       --progress
              Display progress indication dialog

       --question
              Display question dialog

       --text-info
              Display text information dialog

       --warning
              Display warning dialog

       --scale
              Display scale dialog

       --color-selection
              Display color selection dialog

       --password
              Display password dialog

       --forms
              Display forms dialog

We will definitely be using zenity to make some things more user friendly…

Posted in: How-To's, Musings / Tagged: bash, mstsc, rdp, script, zenity

Shattered Hard Drive

January 26, 2013 3:34 PM / Leave a Comment / Dan

I recently had a laptop brought down for not working.  It had no cosmetic issues that looked like it had dropped however the student had noticed that when the laptop was shook…  violently shook, it sounded like there was loose parts inside.  I pulled the drive out to see if I could recover any data off of it and noticed that the sound was coming from the hard drive.  I immediately knew something was very wrong and that chances of recovery were slim to none.  Told the student I would try and sent him off.

I then took the hard drive apart… and all of my years experience I have not seen this first hand yet.  The platters were shattered.

I have stripped the sound because names were mentioned.  It also took me a minute to find the screw under the sticker.

Posted in: Musings / Tagged: hard drivem, harddrive, hdd, shattered

WAN Load Balancing

January 26, 2013 1:23 PM / Leave a Comment / Dan

We ran into an issue at work where we needed faster Internet (or more bandwidth,)…  The prices for our current ISP’s were higher than we had hoped for faster Internet, but we would like fail over as well as additional load balancing.  With teachers and students depending on the Internet so much we cannot afford not to have the Internet working well.  Our current provider’s downtime was unrealistically low (single digit hours a year) and we were VERY happy with the service.  Increasing our speed with that provider was not very cost beneficial compared to other providers.  So we started considering load balancing/fail-over with a second or third provider.

We investigated several commercial options as well as potential open source options.  We LOVE open source but something as critical as this we wouldn’t want to have to ever really troubleshoot.  We looked at solutions that were computers with specialty designed OS’s, as well as specialty hardware.

We had discussed deeply whether a standard computer hardware (with replaceable hardware) would be better than a hardware device designed to do what we wanted.  Ultimately we came to the conclusion that the software or features would make the decision.

We ended up going with a Ecessa Powerlink 600 which is a load balancer for both inbound and outbound connections,WAN fail-over, and Ecessa fail-over if two units are purchased.  We get the device setup with our current single 11Mb/11Mb fiber connection and were dieing to get more connections on the device.  A few weeks later we were able to get 100Mb/5Mb cable connection in and immediately saw the differences and how Ecessa was load balancing between the two connections.  Within the first week we had also had notices of our new cable modem dropping in and out however end user experience was not effected.

We were able to eventually load balance:

  • 11Mb down/11Mb up extremely reliable but expensive fiber connection
  • 50Mb down/50Mb up reliable wireless connection
  • 100Mb down/5Mb up least reliable cable connection

This provides us with a total usable bandwidth of 161Mb down/67Mb up, with the fastest potential download speed of 100Mb down, 50Mb up depending on the WAN interface you happen to fall on.  This also provides fail-over on any of the connections so that we can immediately fail-over to another connection without major interruption to end-users.

This link is also capable of load balancing incoming connections if set to an authoritative DNS server however we are currently not implementing that due to current network structure and time involved to implement that.  Although the time is not much, we are pressed to finish other projects right now.  That being said, we will be implementing this in the future.

I can say that installation was EXTREMELY easy with tech support.  Without the tech support the device would not be as straight forward as most would hope, advanced users ‘could’ struggle to get it setup.  We provided some simple information and they sent us a configuration file which was uploaded to the device.  They pretty well configured the device remotely and sent us the file.

We got it up and running and it has been running fantastic for over 100 days; even during ISP failures on our cable modem.  Our end users do not notice any issues when we fail-over.

When you setup Ecessa WAN links you type in the IP’s of 3 hosts to ping continuously.  When 2 of them fail the PL600 fails that link until they come back.  This ensures a good solid reliable connection for the end users.  We see out links during the day sporadically fail-over from time to time and have not had any complaints from end users.

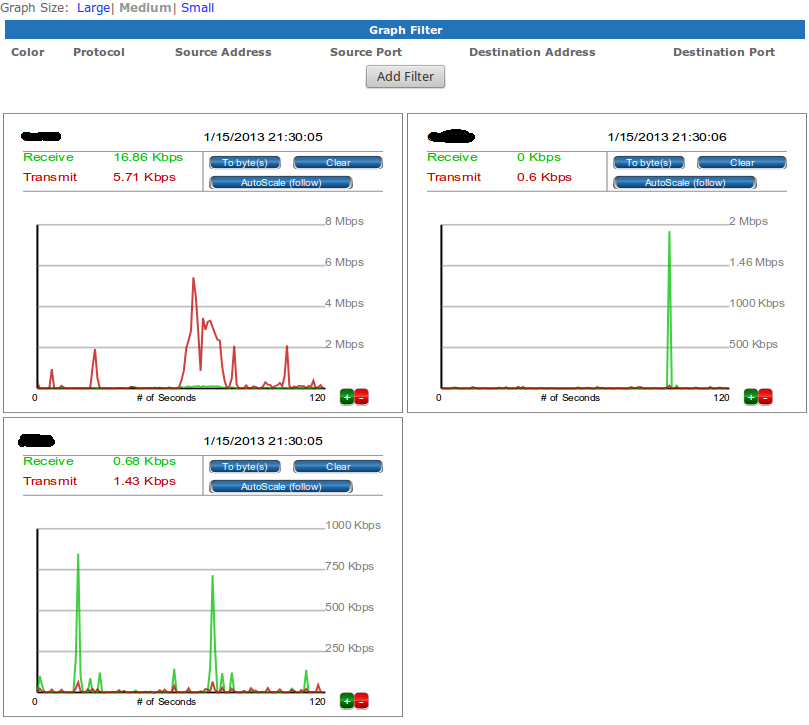
During troubleshooting we can VERY easily see what WAN links are up and down, if there were problems, and what speeds are.  Screenshot - 01152013 - 09:30:12 PM


Jan 15 21:04:06 PowerLink PL600_00250725: Web authentication succeeded for root from ::ffff:68.190.160.87
Jan 15 19:11:05 PowerLink PL600_00250725: Web authentication succeeded for root from ::ffff:68.190.160.87
Jan 14 15:02:28 PowerLink PL600_00250725: Link Link3: Testpoint #1: Status change: PASS
Jan 14 15:02:12 PowerLink PL600_00250725: Link Link3: Testpoint #1: Status change: FAIL
Jan 14 14:43:17 PowerLink PL600_00250725: Link Link3: Testpoint #3: Status change: PASS
Jan 14 14:43:00 PowerLink PL600_00250725: Link Link3: Testpoint #3: Status change: FAIL
Jan 14 14:31:08 PowerLink PL600_00250725: Link Link3: Testpoint #2: Status change: PASS
Jan 14 14:30:50 PowerLink PL600_00250725: Link Link3: Testpoint #2: Status change: FAIL
Jan 14 12:45:59 PowerLink PL600_00250725: Link Link3: Testpoint #2: Status change: PASS
Jan 14 12:45:41 PowerLink PL600_00250725: Link Link3: Testpoint #2: Status change: FAIL
Jan 14 04:33:55 PowerLink PL600_00250725: Link Link1: Testpoint #3: Status change: PASS
Jan 14 04:33:48 PowerLink PL600_00250725: Link Link1: Testpoint #1: Status change: PASS
Jan 14 04:33:46 PowerLink PL600_00250725: PowerLink refresh - done
Jan 14 04:33:46 PowerLink PL600_00250725: PowerLink refresh - status
Jan 14 04:33:46 PowerLink PL600_00250725: Link: Link1: Status change: UP
Jan 14 04:33:46 PowerLink PL600_00250725: Link Link1: Testpoint #2: Status change: PASS
Jan 14 04:33:44 PowerLink PL600_00250725: PowerLink refresh - done
Jan 14 04:33:44 PowerLink PL600_00250725: PowerLink refresh - status
Jan 14 04:33:44 PowerLink PL600_00250725: Link: Link1: Status change: DOWN
Jan 14 04:33:41 PowerLink PL600_00250725: Link Link1: Testpoint #1: Status change: FAIL

We have found the Powerlink Extremely effective and  HUGE cost savings.  In about 1 year the device will pay itself off compared to if we would purchase a very fast reliable Internet connection.  We are looking for a second to setup as a redundant fail-over in the years to come.

Posted in: Musings / Tagged: Ecessa, Networking

Affordable Wireless Bridge with Unlicensed Frequencies

January 1, 2013 3:19 PM / Leave a Comment / Dan

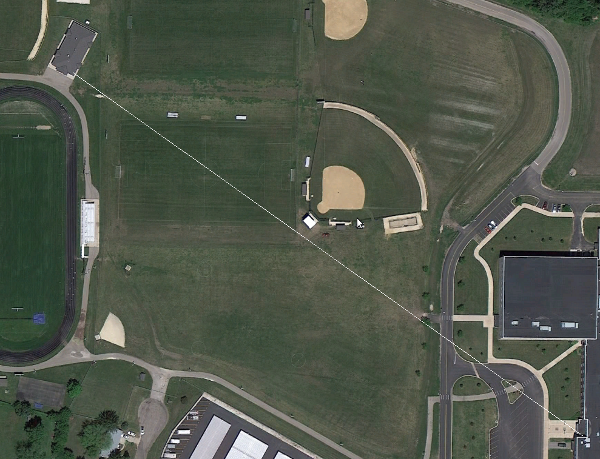
I am a big advocate of not using wireless whenever possible for many reasons; security, interference, reliability, scale-ability, etc.  However the alternative can be extremely pricey, and just out of the question.  Our work has a building about 1400 Ft away from our primary building.  Its current network usage is nonexistent and although some feel our usage will be minimal.  I believe once we have Internet access out there we will see a much larger demand.  I am one who believes in doing it right the first time so it doesn’t have to be done again. Overbuilding is the key for longevity.  I am a big fan of Cisco equipment but in this build-out we will not be using Cisco.  They do offer some enterprise grade bridges but their cost is a little out of our budget on this project.

I played around with how to get the most amount of throughput on this, considered building two Linux boxes with directional antenna’s, priced out equipment, and came the conclusion that if we wanted a reliable connection we should go with equipment designed for what we are trying to do.  Kirk referred me to Ubiquiti We ended up purchasing the Ubiquiti Powerbridge M5 for $250 a radio (or $500 a pair).  This provides a 100Mb link on the 5.8 GHz spectrum which provides 23 non-overlapping channels compared to 2.4 GHz which only has 3.  These specific antennas are also ISP/carrier grade with a supposed distance of 20 kilometer range (don’t worry we turn the transmit power down 😛 ).

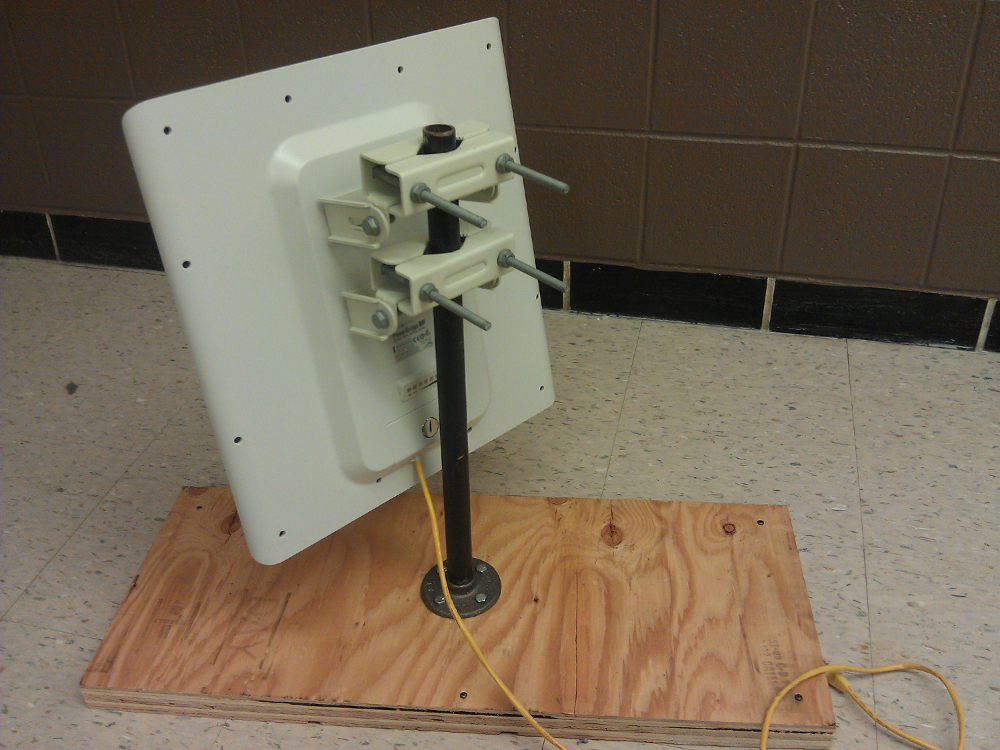
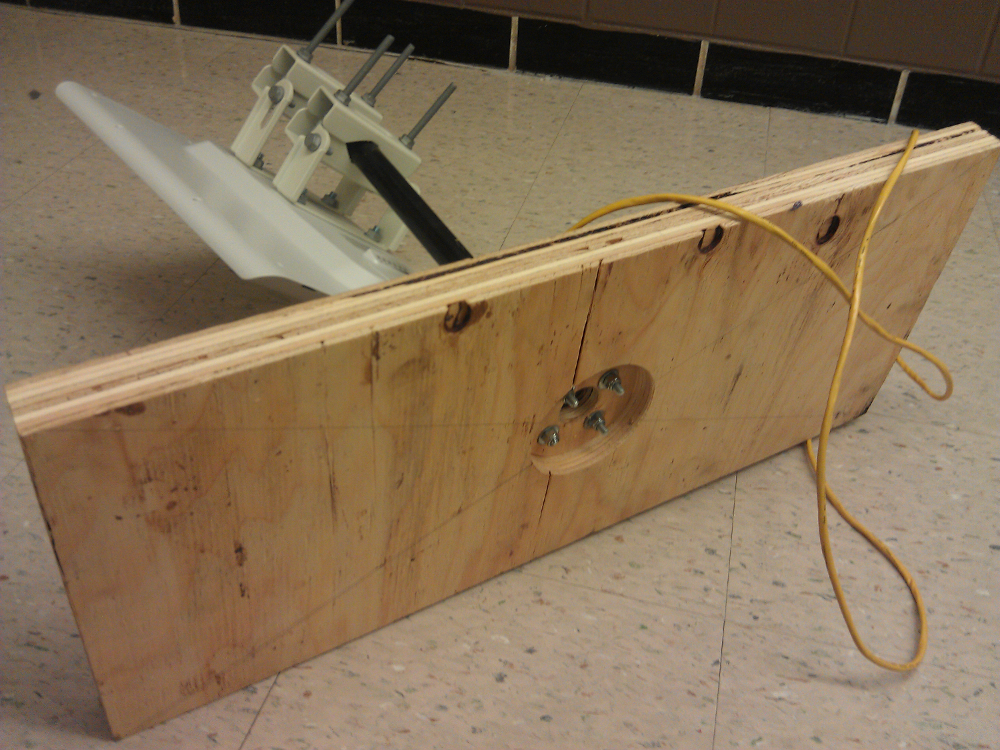
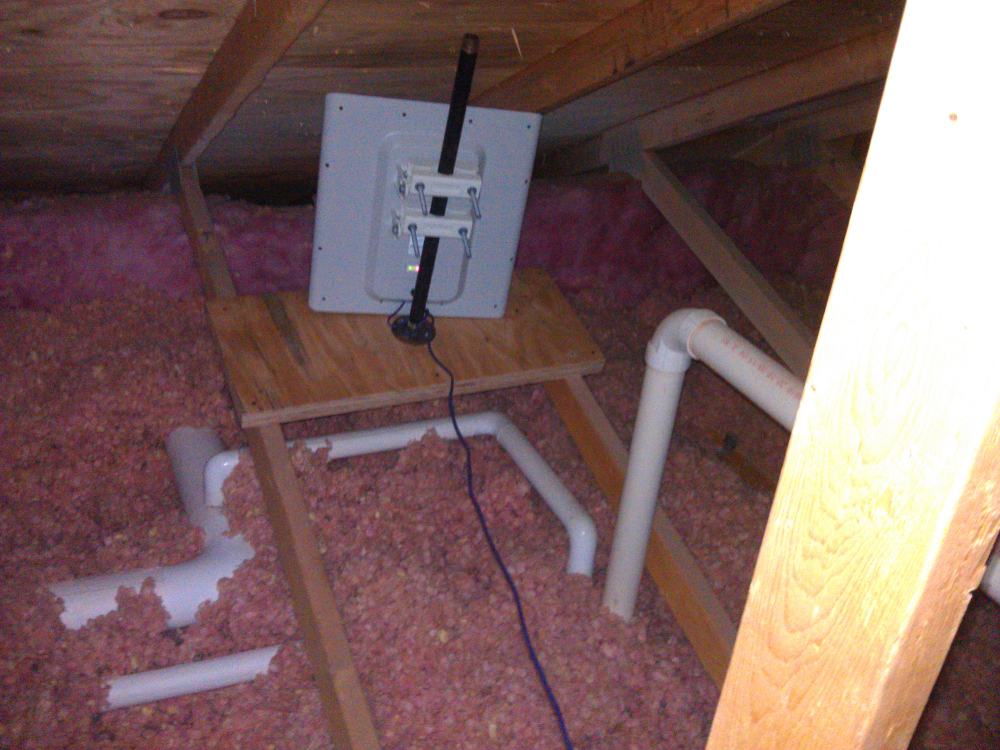
Once they arrived I went back to maintenance and grabbed some black pipe and a some scrap 3/4 In plywood.  In no time I whipped together a quick stand for testing.  I wanted something heavy on the bottom, the right size to screw into rafters when we finalized our testing, and cheap.  I also wanted to design it so I could set it on my counter top and not have to worry about scratching it up.  I was happy with the results, and the price… FREE

2013-01-01 14.22.21-scaled 2013-01-01 14.22.39-scaled

We did some testing and found what we had predicted.  These antennas were WAY OVERKILL when it comes to range and current needed throughput… and that means that they were perfect!

They come with a built in spectrum analyzer to detect interference.  Due to our location we did not have any issues with that.  Kirk or I will post some more on the ubiquiti spectrum analyzer software at a later time.  My only complaint with that software is that it only runs on windows… and Linux is my primary OS…

Screenshot-[Concession-Bridge-MCHS] - Main - Chromium

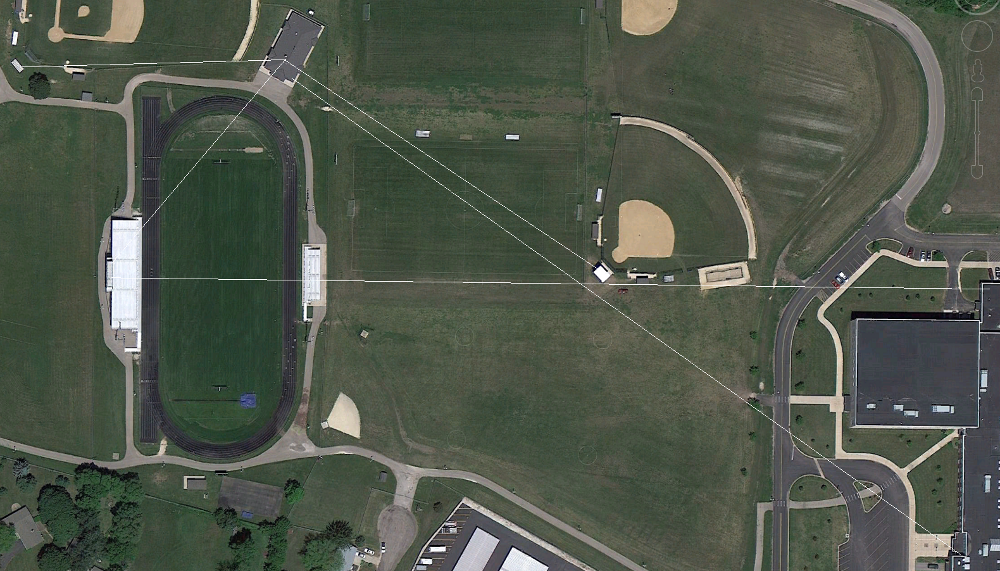
Here is a screenshot of our current setup.  SSID, MAC Addresses, IP’s are all blacked out for obvious reasons.  This is the current link seen below.  This link is about 1400 feet.

Screenshot-Google Earth

2012-10-12 15.14.53-scaled

2012-10-12 15.15.13-scaled

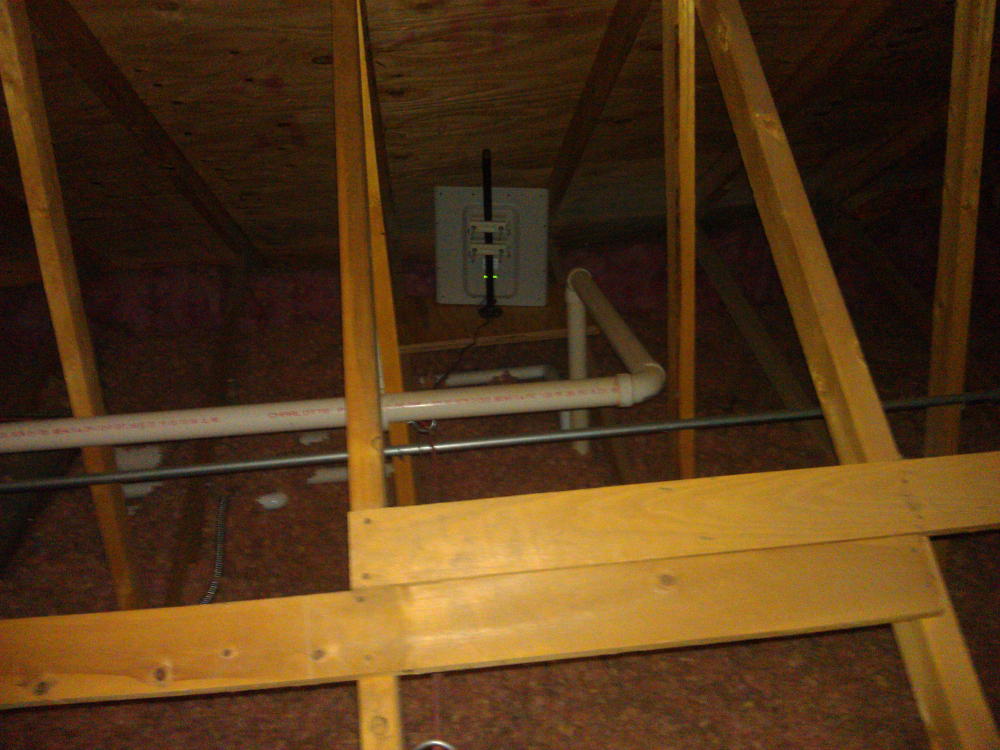
These are outdoor rated antennas however I feel much safer having them under the protective roof.  I know that under an asphalt roof such as this that we will have greater signal loss, that partially why we purchased the antennas we did, to help compensate for that.

Since we have done this we are now streaming video games live to the Internet.  Our usage will be growing more and more with the quality of the video being sent to the Internet.  More and more people will want access, which is why we went with something like this rather than a 54Mb 802.11g connection.

The cost to pull this off with Cisco Aironet devises would have easily been closer to 3 times the cost.  We get a Cisco AP for about $600.  We would need 2 AP’s, plus cables, plus antennas.  We pulled this off at about $500, with a faster link.  Reliability will be determined later.  Currently we have been up for 60 days without problems.

With the success of this link and demand growing to all edges of our sports fields, we plan on building a redundant wireless network of our outbuildings for a minimal cost.

Screenshot-Google Earth-1

We will be putting Cisco AP’s out there to provide edge security/connectivity.

And just because they are rated for 20 kilometer does not mean you can shoot them through trees….  I couldn’t get them do go .5 mile through some trees.

NOTE:  Awesome Android app to help aim this equipment is “true bearing”.  With my minimal experience with some of the longer range equipment this could be very helpful IMHO.

Posted in: Musings / Tagged: Networking, Ubiquiti, Wireless Networking

Post Navigation

← Older Posts
Newer Posts →

Pages

  • About Binary Impulse
  • BashBytes

Recent Posts

  • My UBook X Linux Tablet Adventure and how I learned more than I ever thought I would need to know about accelerometer drivers
  • Migrating Proxmox Hypervisor’s Boot Volume ZFS Mirror To New (Smaller) Disks
  • OPNsense Performance Tuning for Multi-Gigabit Internet
  • Reddit Deplatforms Popular Microsoft Software Swap Subreddit
  • Comcast Upgrades Gigabit Pro from 3Gbps to 6Gbps!
May 2025
M T W T F S S
 1234
567891011
12131415161718
19202122232425
262728293031  
« Apr    

Recent Comments

  • jasonistre on OPNsense Performance Tuning for Multi-Gigabit Internet
  • Nick on OPNsense Performance Tuning for Multi-Gigabit Internet
  • Kirk Schnable on OPNsense Performance Tuning for Multi-Gigabit Internet
  • nick on OPNsense Performance Tuning for Multi-Gigabit Internet
  • Eric on My UBook X Linux Tablet Adventure and how I learned more than I ever thought I would need to know about accelerometer drivers

Categories

  • How-To's
  • Humorous
  • Musings
  • Newsworthy
  • Other

Meta

  • Register
  • Log in
  • Entries feed
  • Comments feed
  • WordPress.org
© Copyright 2025 - Binary Impulse
Infinity Theme by DesignCoral / WordPress