Tag Archives: Networking

Configuration of OVH IP Failover on VMs

Background
I have had a server with OVH for the past several years, and one of the things that took me many months of research, as well as trial and error, to get right was my IP address configuration for virtual machines.  The documentation available from OVH has been consistently lacking these past few years on how to properly configure it.

Debian \ Ubuntu systems will add to the complications, because they do not agree with the necessary configuration.  If you try to add it traditionally, just by editing /etc/network/interfaces, you will most likely end up with no default gateway when you’re all said and done, and your connection still won’t work.

For the first few months I was with OVH, I was launching my networking through a shell script in a cron job, because configuring it with /etc/network/interfaces just didn’t seem possible.


What You Need For This Guide \ Assumptions About Your Setup
1. A dedicated server on the OVH network.  This guide has been tested in the Roubaix datacenter, Gravelines datacenter, and the BHS datacenter.
2. A virtualization platform installed, and a virtual switch bridged with your network interface.  I have been using VMWare, and a vSwitch bridged with my eth0 interface.  This guide should be applicable to any virtualization suite (Xen, OpenVZ, etc) as long as your networking is bridged.
3. A Debian \ Ubuntu VM.  You can apply the knowledge gained from this guide to other operating systems (eg. CentOS) but the configuration will be different as the files are located in different places and are parsed differently.
4. A purchased IP range.  You can purchase IP addresses from OVH in your Manager Panel.


Gather Your Information \ Initial Setup On OVH Side
1. Your dedicated server’s Main IP will be needed for this guide.   Say, for example, your main IP is 123.4.5.67.
2. Your dedicated server’s Gateway IP will be needed for this guide.  On the OVH network, this is the first three octets of your main IP, ending in 254.  For 123.4.5.67, the gateway is 123.4.5.254.
3. A Fail Over IP Range registered with OVH.  You can register any size IP block, and you can pick any IP from the block.  Say for example, you bought 5.6.77.8/29.  All of the Fail Over IPs are usable at OVH, so you have available all 8 IPs from 5.6.77.8 to 5.6.77.15 for use for your VMs.  You can purchase an IP block from your Manager Panel.
4. A Registered VM MAC Address associated on OVH’s routers.  Without this step, your connection will not work.  You can register VM MACs in your Manager Panel.


How To Register A VM MAC Address
In the new OVH Manager panel, you can register a VM MAC address by going to the “Manage IPs” page, clicking the gear icon next to the IP(s) you want to assign to the VM, and clicking “Add A Virtual MAC”.  You can choose an existing MAC address if you are assigning more than 1 IP, otherwise OVH will assign a new MAC address to you, and you will edit your VM preferences so your network interface has this MAC address.  Make sure you select the MAC address type “VMWare” if you are using a VMWare server, as this will generate MAC addresses which VMWare will accept.  You can use type “OVH” for any other virtualization platform.  The “name of virtual machine” field is just for your notes, and can be anything.


Operating System Installation
Install Debian \ Ubuntu to the VM, from a full install media.  Do not plan on doing a network install, as this guide does not cover how to make the OVH networking functional during installation; only after installation.  Skip the step for setting up networking during the installer, leave it unconfigured.


Setting Up /etc/network/interfaces
Now that you have your operating system installed, you are ready to configure your /etc/network/interfaces file.  This guide assumes that eth0 is your Internet interface. I will use IP addresses from the example above under “Gather Your Information”.  Do not use these addresses, substitute your own IP addresses.

auto eth0
iface eth0 inet static
	address 5.6.77.8
	netmask 255.255.255.255
	broadcast 5.6.77.8
	post-up route add 123.4.5.254 dev eth0
	post-up route add default gw 123.4.5.254
	post-down route del default gw 123.4.5.254
	post-down route del 123.4.5.254 dev eth0

A few things to note, for anyone asking any technical questions about what I just did above:

  • You should choose 1 IP address from your IP block.  If you want to add more, see the further instructions below.  This IP is the Main IP of your VM.
  • Regardless of the size of your block, you will treat the IP address as a /32 with a netmask 255.255.255.255.
  • Because you are using a /32, the network\broadcast IP is your IP.
  • Your default gateway should be the same as your dedicated server’s default gateway.  DO NOT try to use what should logically be the gateway IP for your IP block, and DO NOT try to set your dedicated server itself as the gateway.  The IP block is irrelevant, the gateway is always the dedicated server’s gateway IP.
  • The routes have to be added this way, because the configuration is not valid.  The gateway should not be reachable from this network range, because it’s a /32.  However, the gateway will be reachable anyway, and adding the routes this way should work.


DNS Resolution
You will also need to edit your /etc/resolv.conf to put a DNS name server in there, otherwise your server will be able to ping other IPs, but it will not be able to resolve DNS.  You can just put a line in there, like this line which uses the public OpenDNS resolver:

nameserver 208.67.222.222


Want To Add More IPs?
Sometimes it is desirable to have more than one IP address on your server.  You can easily add additional IPs from any IP block as an alias IP.  You don’t need to configure any additional gateways, because the gateway is always your dedicated server gateway.  You can purchase as many IP blocks as you want, and assign them all this way, it doesn’t matter if they are totally different IP ranges.  In the example below, I will add 2 additional IPs from the IP range I used as an example, 5.6.77.8/29.

auto eth0:1
	iface eth0:1 inet static
	address 5.6.77.9/32

auto eth0:2
	iface eth0:2 inet static
	address 5.6.77.10/32


Having Problems?
If you are having any problems, please review these items:

  • First, reboot the VM to ensure that all of the networking changes you made are fully applied.
  • Can you ping your default gateway?  If not, did your route persist?  Run “route -n” and see if the route is there.  If it isn’t there, try adding it manually by running the commands in the post-up in /etc/network/interfaces.  See if you get any errors.
  • Did you configure DNS?  Try pinging just an IP address, (eg. ping 4.2.2.1) and see if you get any response.
  • Did you remember to register a MAC address, and did you change the MAC address for the VM?  Run “ifconfig eth0” and make sure the MAC address shown matches what’s registered in your OVH Manager Panel.


Need Further Assistance?
As always, feel free to leave a comment below if you need any assistance.  I will be happy to help!

WAN Load Balancing

We ran into an issue at work where we needed faster Internet (or more bandwidth,)…  The prices for our current ISP’s were higher than we had hoped for faster Internet, but we would like fail over as well as additional load balancing.  With teachers and students depending on the Internet so much we cannot afford not to have the Internet working well.  Our current provider’s downtime was unrealistically low (single digit hours a year) and we were VERY happy with the service.  Increasing our speed with that provider was not very cost beneficial compared to other providers.  So we started considering load balancing/fail-over with a second or third provider.

We investigated several commercial options as well as potential open source options.  We LOVE open source but something as critical as this we wouldn’t want to have to ever really troubleshoot.  We looked at solutions that were computers with specialty designed OS’s, as well as specialty hardware.

We had discussed deeply whether a standard computer hardware (with replaceable hardware) would be better than a hardware device designed to do what we wanted.  Ultimately we came to the conclusion that the software or features would make the decision.

We ended up going with a Ecessa Powerlink 600 which is a load balancer for both inbound and outbound connections,WAN fail-over, and Ecessa fail-over if two units are purchased.  We get the device setup with our current single 11Mb/11Mb fiber connection and were dieing to get more connections on the device.  A few weeks later we were able to get 100Mb/5Mb cable connection in and immediately saw the differences and how Ecessa was load balancing between the two connections.  Within the first week we had also had notices of our new cable modem dropping in and out however end user experience was not effected.

We were able to eventually load balance:

  • 11Mb down/11Mb up extremely reliable but expensive fiber connection
  • 50Mb down/50Mb up reliable wireless connection
  • 100Mb down/5Mb up least reliable cable connection

This provides us with a total usable bandwidth of 161Mb down/67Mb up, with the fastest potential download speed of 100Mb down, 50Mb up depending on the WAN interface you happen to fall on.  This also provides fail-over on any of the connections so that we can immediately fail-over to another connection without major interruption to end-users.

This link is also capable of load balancing incoming connections if set to an authoritative DNS server however we are currently not implementing that due to current network structure and time involved to implement that.  Although the time is not much, we are pressed to finish other projects right now.  That being said, we will be implementing this in the future.

I can say that installation was EXTREMELY easy with tech support.  Without the tech support the device would not be as straight forward as most would hope, advanced users ‘could’ struggle to get it setup.  We provided some simple information and they sent us a configuration file which was uploaded to the device.  They pretty well configured the device remotely and sent us the file.

We got it up and running and it has been running fantastic for over 100 days; even during ISP failures on our cable modem.  Our end users do not notice any issues when we fail-over.

When you setup Ecessa WAN links you type in the IP’s of 3 hosts to ping continuously.  When 2 of them fail the PL600 fails that link until they come back.  This ensures a good solid reliable connection for the end users.  We see out links during the day sporadically fail-over from time to time and have not had any complaints from end users.

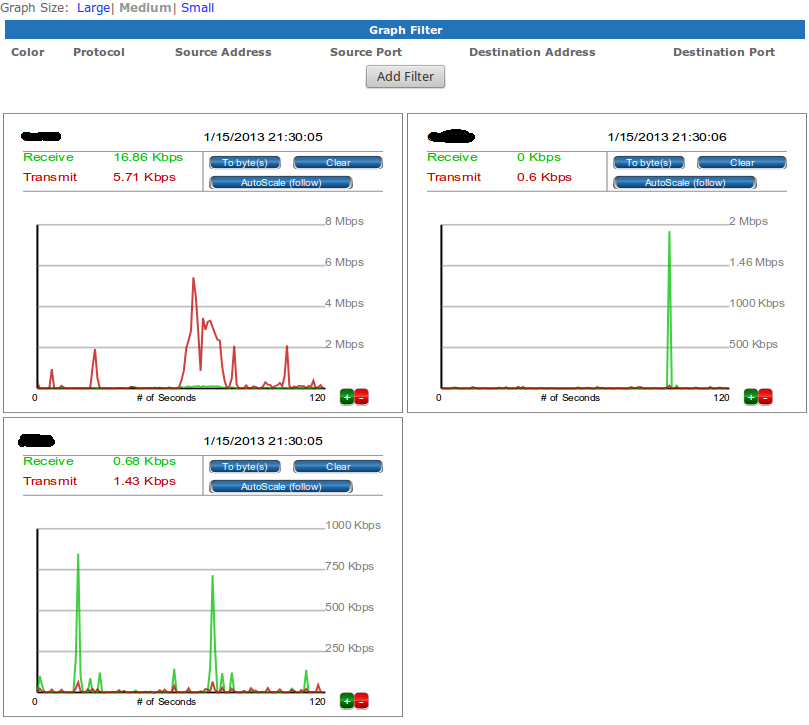
During troubleshooting we can VERY easily see what WAN links are up and down, if there were problems, and what speeds are.  Screenshot - 01152013 - 09:30:12 PM


Jan 15 21:04:06 PowerLink PL600_00250725: Web authentication succeeded for root from ::ffff:68.190.160.87
Jan 15 19:11:05 PowerLink PL600_00250725: Web authentication succeeded for root from ::ffff:68.190.160.87
Jan 14 15:02:28 PowerLink PL600_00250725: Link Link3: Testpoint #1: Status change: PASS
Jan 14 15:02:12 PowerLink PL600_00250725: Link Link3: Testpoint #1: Status change: FAIL
Jan 14 14:43:17 PowerLink PL600_00250725: Link Link3: Testpoint #3: Status change: PASS
Jan 14 14:43:00 PowerLink PL600_00250725: Link Link3: Testpoint #3: Status change: FAIL
Jan 14 14:31:08 PowerLink PL600_00250725: Link Link3: Testpoint #2: Status change: PASS
Jan 14 14:30:50 PowerLink PL600_00250725: Link Link3: Testpoint #2: Status change: FAIL
Jan 14 12:45:59 PowerLink PL600_00250725: Link Link3: Testpoint #2: Status change: PASS
Jan 14 12:45:41 PowerLink PL600_00250725: Link Link3: Testpoint #2: Status change: FAIL
Jan 14 04:33:55 PowerLink PL600_00250725: Link Link1: Testpoint #3: Status change: PASS
Jan 14 04:33:48 PowerLink PL600_00250725: Link Link1: Testpoint #1: Status change: PASS
Jan 14 04:33:46 PowerLink PL600_00250725: PowerLink refresh - done
Jan 14 04:33:46 PowerLink PL600_00250725: PowerLink refresh - status
Jan 14 04:33:46 PowerLink PL600_00250725: Link: Link1: Status change: UP
Jan 14 04:33:46 PowerLink PL600_00250725: Link Link1: Testpoint #2: Status change: PASS
Jan 14 04:33:44 PowerLink PL600_00250725: PowerLink refresh - done
Jan 14 04:33:44 PowerLink PL600_00250725: PowerLink refresh - status
Jan 14 04:33:44 PowerLink PL600_00250725: Link: Link1: Status change: DOWN
Jan 14 04:33:41 PowerLink PL600_00250725: Link Link1: Testpoint #1: Status change: FAIL

We have found the Powerlink Extremely effective and  HUGE cost savings.  In about 1 year the device will pay itself off compared to if we would purchase a very fast reliable Internet connection.  We are looking for a second to setup as a redundant fail-over in the years to come.

Affordable Wireless Bridge with Unlicensed Frequencies

I am a big advocate of not using wireless whenever possible for many reasons; security, interference, reliability, scale-ability, etc.  However the alternative can be extremely pricey, and just out of the question.  Our work has a building about 1400 Ft away from our primary building.  Its current network usage is nonexistent and although some feel our usage will be minimal.  I believe once we have Internet access out there we will see a much larger demand.  I am one who believes in doing it right the first time so it doesn’t have to be done again. Overbuilding is the key for longevity.  I am a big fan of Cisco equipment but in this build-out we will not be using Cisco.  They do offer some enterprise grade bridges but their cost is a little out of our budget on this project.

I played around with how to get the most amount of throughput on this, considered building two Linux boxes with directional antenna’s, priced out equipment, and came the conclusion that if we wanted a reliable connection we should go with equipment designed for what we are trying to do.  Kirk referred me to Ubiquiti We ended up purchasing the Ubiquiti Powerbridge M5 for $250 a radio (or $500 a pair).  This provides a 100Mb link on the 5.8 GHz spectrum which provides 23 non-overlapping channels compared to 2.4 GHz which only has 3.  These specific antennas are also ISP/carrier grade with a supposed distance of 20 kilometer range (don’t worry we turn the transmit power down 😛 ).

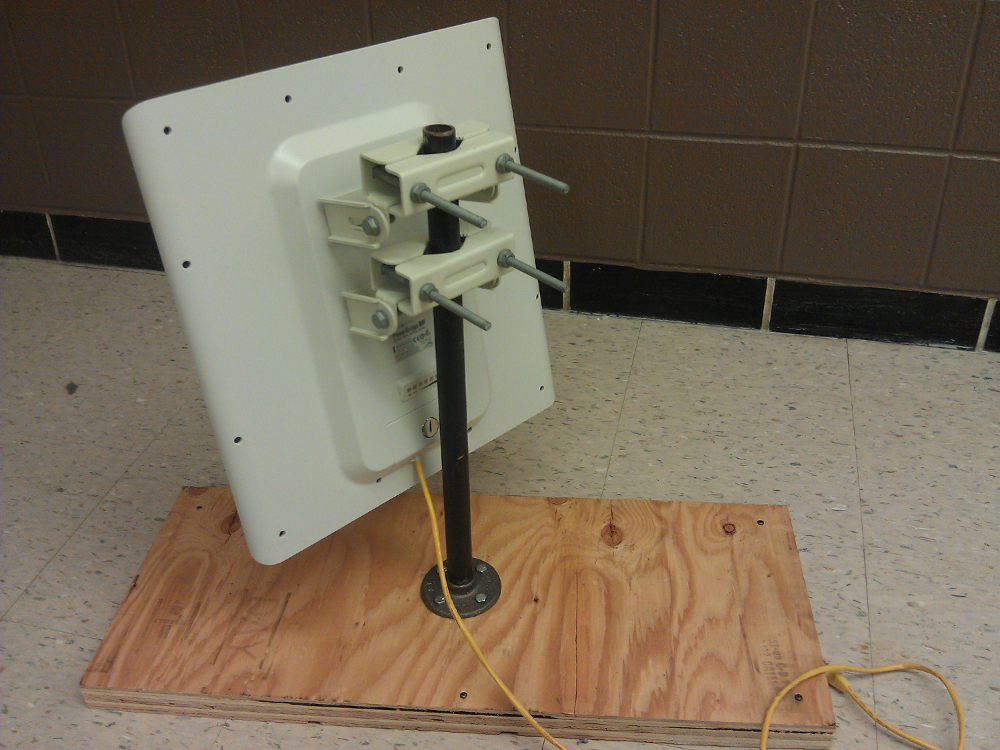
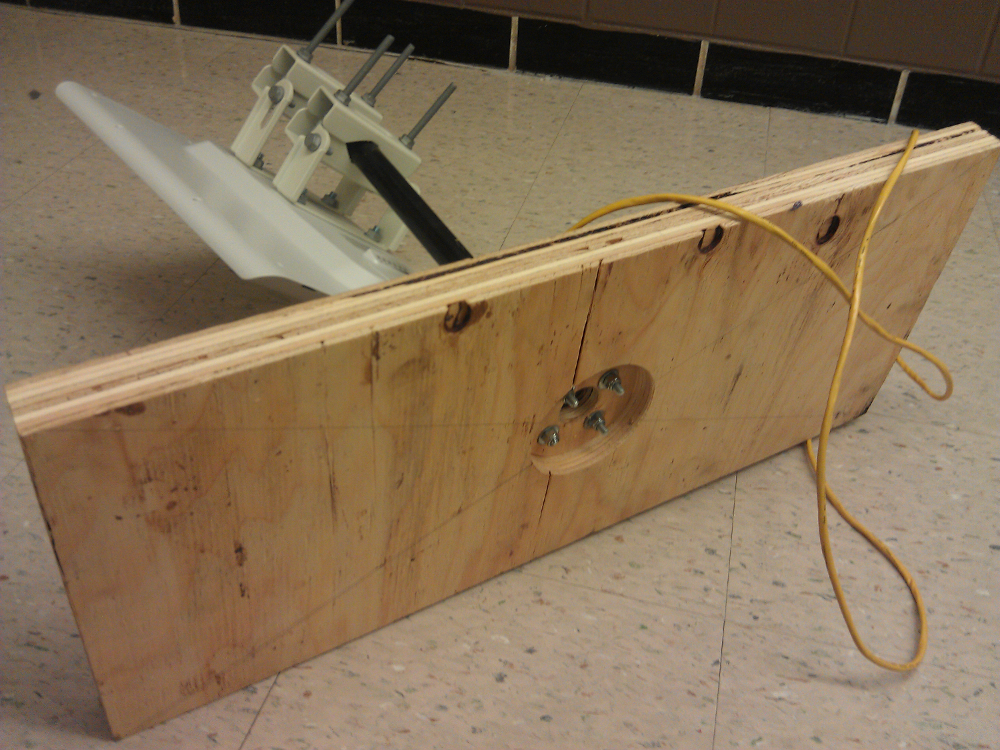
Once they arrived I went back to maintenance and grabbed some black pipe and a some scrap 3/4 In plywood.  In no time I whipped together a quick stand for testing.  I wanted something heavy on the bottom, the right size to screw into rafters when we finalized our testing, and cheap.  I also wanted to design it so I could set it on my counter top and not have to worry about scratching it up.  I was happy with the results, and the price… FREE

2013-01-01 14.22.21-scaled 2013-01-01 14.22.39-scaled

We did some testing and found what we had predicted.  These antennas were WAY OVERKILL when it comes to range and current needed throughput… and that means that they were perfect!

They come with a built in spectrum analyzer to detect interference.  Due to our location we did not have any issues with that.  Kirk or I will post some more on the ubiquiti spectrum analyzer software at a later time.  My only complaint with that software is that it only runs on windows… and Linux is my primary OS…

Screenshot-[Concession-Bridge-MCHS] - Main - Chromium

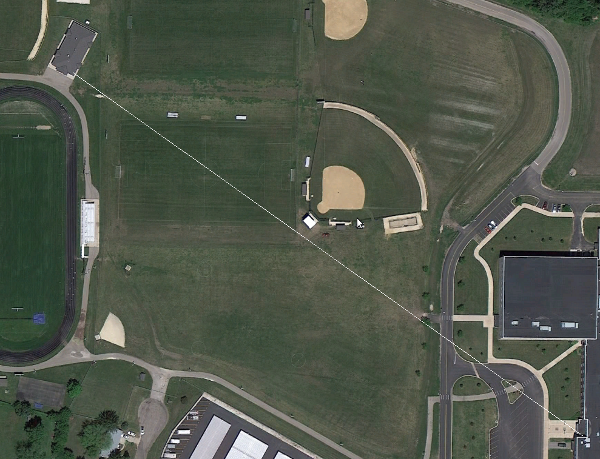
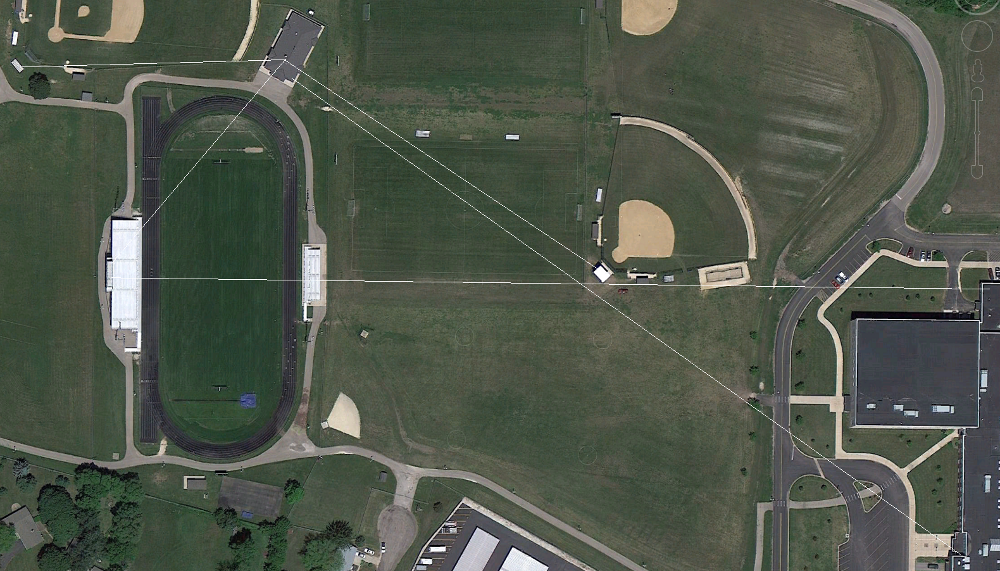
Here is a screenshot of our current setup.  SSID, MAC Addresses, IP’s are all blacked out for obvious reasons.  This is the current link seen below.  This link is about 1400 feet.

Screenshot-Google Earth

2012-10-12 15.14.53-scaled

2012-10-12 15.15.13-scaled

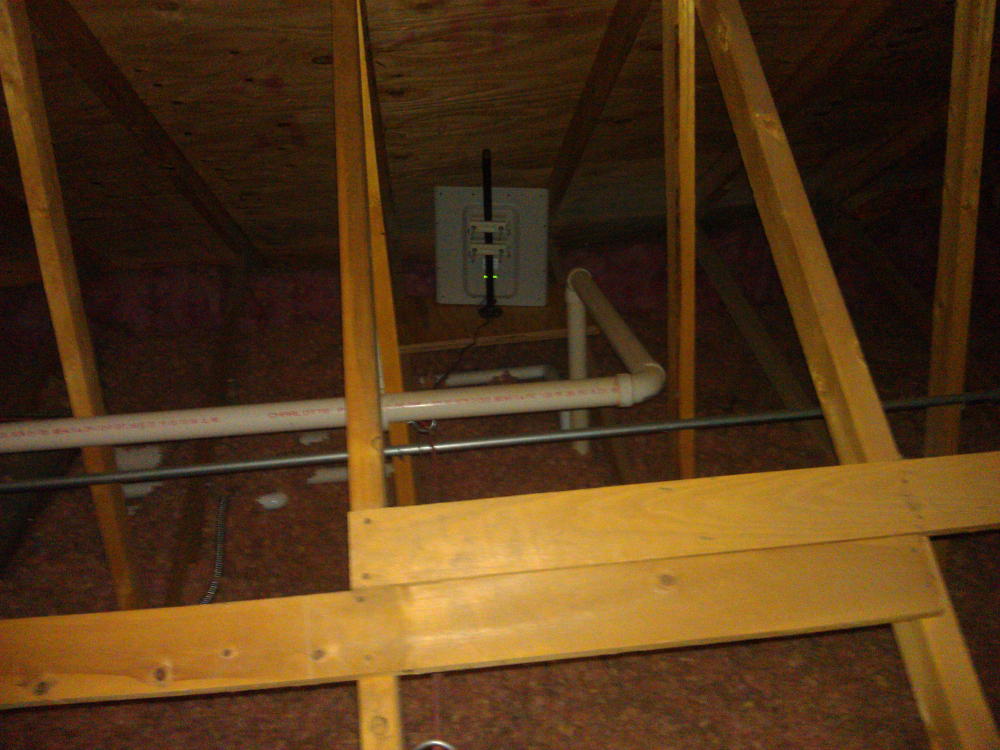
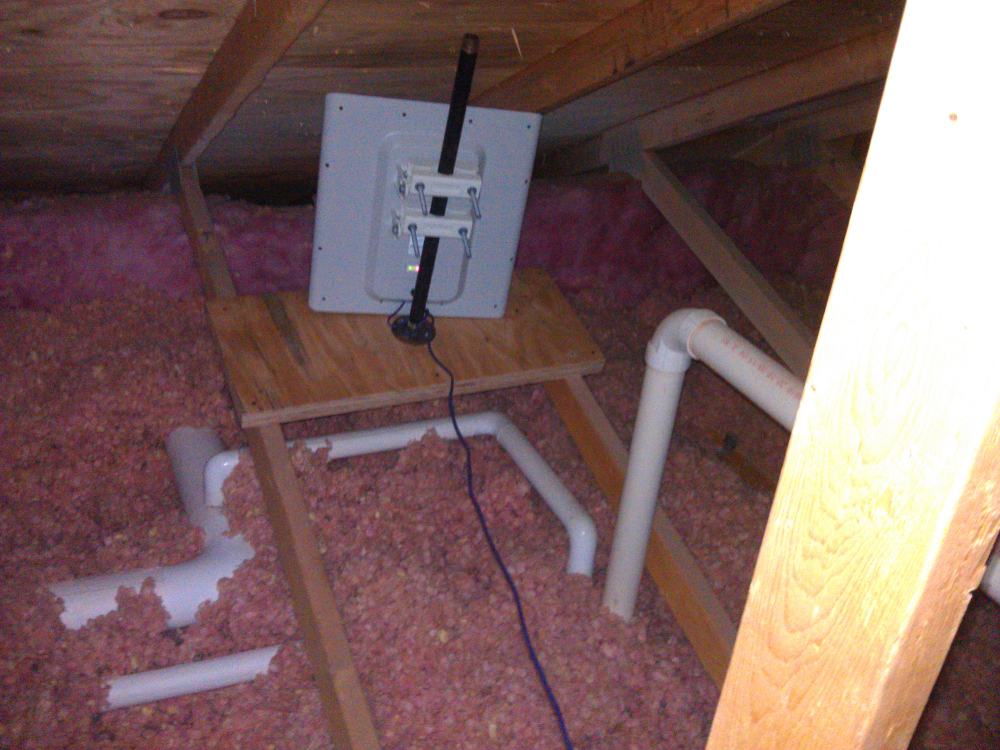
These are outdoor rated antennas however I feel much safer having them under the protective roof.  I know that under an asphalt roof such as this that we will have greater signal loss, that partially why we purchased the antennas we did, to help compensate for that.

Since we have done this we are now streaming video games live to the Internet.  Our usage will be growing more and more with the quality of the video being sent to the Internet.  More and more people will want access, which is why we went with something like this rather than a 54Mb 802.11g connection.

The cost to pull this off with Cisco Aironet devises would have easily been closer to 3 times the cost.  We get a Cisco AP for about $600.  We would need 2 AP’s, plus cables, plus antennas.  We pulled this off at about $500, with a faster link.  Reliability will be determined later.  Currently we have been up for 60 days without problems.

With the success of this link and demand growing to all edges of our sports fields, we plan on building a redundant wireless network of our outbuildings for a minimal cost.

Screenshot-Google Earth-1

We will be putting Cisco AP’s out there to provide edge security/connectivity.

And just because they are rated for 20 kilometer does not mean you can shoot them through trees….  I couldn’t get them do go .5 mile through some trees.

NOTE:  Awesome Android app to help aim this equipment is “true bearing”.  With my minimal experience with some of the longer range equipment this could be very helpful IMHO.