Tag Archives: Ubuntu

Configuration of OVH IP Failover on VMs

Background
I have had a server with OVH for the past several years, and one of the things that took me many months of research, as well as trial and error, to get right was my IP address configuration for virtual machines.  The documentation available from OVH has been consistently lacking these past few years on how to properly configure it.

Debian \ Ubuntu systems will add to the complications, because they do not agree with the necessary configuration.  If you try to add it traditionally, just by editing /etc/network/interfaces, you will most likely end up with no default gateway when you’re all said and done, and your connection still won’t work.

For the first few months I was with OVH, I was launching my networking through a shell script in a cron job, because configuring it with /etc/network/interfaces just didn’t seem possible.


What You Need For This Guide \ Assumptions About Your Setup
1. A dedicated server on the OVH network.  This guide has been tested in the Roubaix datacenter, Gravelines datacenter, and the BHS datacenter.
2. A virtualization platform installed, and a virtual switch bridged with your network interface.  I have been using VMWare, and a vSwitch bridged with my eth0 interface.  This guide should be applicable to any virtualization suite (Xen, OpenVZ, etc) as long as your networking is bridged.
3. A Debian \ Ubuntu VM.  You can apply the knowledge gained from this guide to other operating systems (eg. CentOS) but the configuration will be different as the files are located in different places and are parsed differently.
4. A purchased IP range.  You can purchase IP addresses from OVH in your Manager Panel.


Gather Your Information \ Initial Setup On OVH Side
1. Your dedicated server’s Main IP will be needed for this guide.   Say, for example, your main IP is 123.4.5.67.
2. Your dedicated server’s Gateway IP will be needed for this guide.  On the OVH network, this is the first three octets of your main IP, ending in 254.  For 123.4.5.67, the gateway is 123.4.5.254.
3. A Fail Over IP Range registered with OVH.  You can register any size IP block, and you can pick any IP from the block.  Say for example, you bought 5.6.77.8/29.  All of the Fail Over IPs are usable at OVH, so you have available all 8 IPs from 5.6.77.8 to 5.6.77.15 for use for your VMs.  You can purchase an IP block from your Manager Panel.
4. A Registered VM MAC Address associated on OVH’s routers.  Without this step, your connection will not work.  You can register VM MACs in your Manager Panel.


How To Register A VM MAC Address
In the new OVH Manager panel, you can register a VM MAC address by going to the “Manage IPs” page, clicking the gear icon next to the IP(s) you want to assign to the VM, and clicking “Add A Virtual MAC”.  You can choose an existing MAC address if you are assigning more than 1 IP, otherwise OVH will assign a new MAC address to you, and you will edit your VM preferences so your network interface has this MAC address.  Make sure you select the MAC address type “VMWare” if you are using a VMWare server, as this will generate MAC addresses which VMWare will accept.  You can use type “OVH” for any other virtualization platform.  The “name of virtual machine” field is just for your notes, and can be anything.


Operating System Installation
Install Debian \ Ubuntu to the VM, from a full install media.  Do not plan on doing a network install, as this guide does not cover how to make the OVH networking functional during installation; only after installation.  Skip the step for setting up networking during the installer, leave it unconfigured.


Setting Up /etc/network/interfaces
Now that you have your operating system installed, you are ready to configure your /etc/network/interfaces file.  This guide assumes that eth0 is your Internet interface. I will use IP addresses from the example above under “Gather Your Information”.  Do not use these addresses, substitute your own IP addresses.

auto eth0
iface eth0 inet static
	address 5.6.77.8
	netmask 255.255.255.255
	broadcast 5.6.77.8
	post-up route add 123.4.5.254 dev eth0
	post-up route add default gw 123.4.5.254
	post-down route del default gw 123.4.5.254
	post-down route del 123.4.5.254 dev eth0

A few things to note, for anyone asking any technical questions about what I just did above:

  • You should choose 1 IP address from your IP block.  If you want to add more, see the further instructions below.  This IP is the Main IP of your VM.
  • Regardless of the size of your block, you will treat the IP address as a /32 with a netmask 255.255.255.255.
  • Because you are using a /32, the network\broadcast IP is your IP.
  • Your default gateway should be the same as your dedicated server’s default gateway.  DO NOT try to use what should logically be the gateway IP for your IP block, and DO NOT try to set your dedicated server itself as the gateway.  The IP block is irrelevant, the gateway is always the dedicated server’s gateway IP.
  • The routes have to be added this way, because the configuration is not valid.  The gateway should not be reachable from this network range, because it’s a /32.  However, the gateway will be reachable anyway, and adding the routes this way should work.


DNS Resolution
You will also need to edit your /etc/resolv.conf to put a DNS name server in there, otherwise your server will be able to ping other IPs, but it will not be able to resolve DNS.  You can just put a line in there, like this line which uses the public OpenDNS resolver:

nameserver 208.67.222.222


Want To Add More IPs?
Sometimes it is desirable to have more than one IP address on your server.  You can easily add additional IPs from any IP block as an alias IP.  You don’t need to configure any additional gateways, because the gateway is always your dedicated server gateway.  You can purchase as many IP blocks as you want, and assign them all this way, it doesn’t matter if they are totally different IP ranges.  In the example below, I will add 2 additional IPs from the IP range I used as an example, 5.6.77.8/29.

auto eth0:1
	iface eth0:1 inet static
	address 5.6.77.9/32

auto eth0:2
	iface eth0:2 inet static
	address 5.6.77.10/32


Having Problems?
If you are having any problems, please review these items:

  • First, reboot the VM to ensure that all of the networking changes you made are fully applied.
  • Can you ping your default gateway?  If not, did your route persist?  Run “route -n” and see if the route is there.  If it isn’t there, try adding it manually by running the commands in the post-up in /etc/network/interfaces.  See if you get any errors.
  • Did you configure DNS?  Try pinging just an IP address, (eg. ping 4.2.2.1) and see if you get any response.
  • Did you remember to register a MAC address, and did you change the MAC address for the VM?  Run “ifconfig eth0” and make sure the MAC address shown matches what’s registered in your OVH Manager Panel.


Need Further Assistance?
As always, feel free to leave a comment below if you need any assistance.  I will be happy to help!

Installing HP Array Configuration Utility (HP ACU) on Ubuntu

Updated for 16.04.

This guide will help you get up and running with HP’s command line Array Configuration Utility (ACU) on Ubuntu.  This guide may will be especially useful if you have an HP Proliant server, or an HP P400 \ P410 RAID card or similar.

Install the HP Linux Repository

echo "deb http://downloads.linux.hpe.com/SDR/downloads/MCP/ubuntu xenial/current non-free" >> /etc/apt/sources.list.d/hp.list

Install HP Linux Repository GPG Key

wget -qO - http://downloads.linux.hpe.com/SDR/downloads/MCP/GPG-KEY-mcp | sudo apt-key add -

 Prepare For The Installation

sudo apt-get update

Install Packages

sudo apt-get install cpqacuxe hpacucli hpsmh

HP Array Configuration Utility Is Now Installed!

If you’ve never used the Array Configuration Utility before, here’s a cheat sheet for the commands you might want: http://binaryimpulse.com/2013/09/hp-array-configuration-utility-command-cheat-sheet/

I may do a write-up on some of the more useful commands at a later time.  For now, here’s what you should try to see if everything’s working.  (Along with sample output from my server.)

root@Server:~# hpacucli ctrl all show status

Smart Array P410 in Slot 3
   Controller Status: OK
   Cache Status: OK

root@Server:~# hpacucli ctrl all show config

Smart Array P410 in Slot 3                (sn: ##############  )

   array A (SATA, Unused Space: 0  MB)

      logicaldrive 1 (19.1 TB, RAID 5, OK)

      physicaldrive 1I:0:1 (port 1I:box 0:bay 1, SATA, 3 TB, OK)
      physicaldrive 1I:0:2 (port 1I:box 0:bay 2, SATA, 3 TB, OK)
      physicaldrive 1I:0:3 (port 1I:box 0:bay 3, SATA, 3 TB, OK)
      physicaldrive 1I:0:4 (port 1I:box 0:bay 4, SATA, 3 TB, OK)
      physicaldrive 2I:0:5 (port 2I:box 0:bay 5, SATA, 3 TB, OK)
      physicaldrive 2I:0:6 (port 2I:box 0:bay 6, SATA, 3 TB, OK)
      physicaldrive 2I:0:7 (port 2I:box 0:bay 7, SATA, 3 TB, OK)
      physicaldrive 2I:0:8 (port 2I:box 0:bay 8, SATA, 3 TB, OK)

   SEP (Vendor ID PMCSIERA, Model  SRC 8x6G) 250 (WWID: ##############)

root@Server:~#

I may do some subsequent write-ups on the HP Array Configuration Utility.  Please feel free to ask questions in the comments section, but please keep in mind that I’m still learning to use this tool as well.

HP Array Configuration Utility Command Cheat Sheet

New to the HP Array Configuration Utility?  Me too, so I did some Googling and found an awesome cheat sheet.  I don’t want to steal any credit from its original authors, but I do think it should be reposted for archival.  I’d like a copy of it for my own reference, so I decided to toss it here on Binary Impulse so others might stumble across it.

Here’s the original article: http://www.datadisk.co.uk/html_docs/redhat/hpacucli.htm

Utility Keyword abbreviations
Abbreviations chassisname = ch
controller = ctrl
logicaldrive = ld
physicaldrive = pd
drivewritecache = dwc
hpacucli utility
hpacucli # hpacucli 

# hpacucli help

Note: you can use the hpacucli command in a script

Controller Commands
Display (detailed) hpacucli> ctrl all show config
hpacucli> ctrl all show config detail
Status hpacucli> ctrl all show status
Cache hpacucli> ctrl slot=0 modify dwc=disable
hpacucli> ctrl slot=0 modify dwc=enable
Rescan hpacucli> rescan 

Note: detects newly added devices since the last rescan

Physical Drive Commands
Display (detailed) hpacucli> ctrl slot=0 pd all show
hpacucli> ctrl slot=0 pd 2:3 show detail 

Note: you can obtain the slot number by displaying the controller configuration (see above)

Status hpacucli> ctrl slot=0 pd all show status
hpacucli> ctrl slot=0 pd 2:3 show status
Erase hpacucli> ctrl slot=0 pd 2:3 modify erase
Blink disk LED hpacucli> ctrl slot=0 pd 2:3 modify led=on
hpacucli> ctrl slot=0 pd 2:3 modify led=off
Logical Drive Commands
Display (detailed) hpacucli> ctrl slot=0 ld all show [detail]
hpacucli> ctrl slot=0 ld 4 show [detail]
Status hpacucli> ctrl slot=0 ld all show status
hpacucli> ctrl slot=0 ld 4 show status
Blink disk LED hpacucli> ctrl slot=0 ld 4 modify led=on
hpacucli> ctrl slot=0 ld 4 modify led=off
re-enabling failed drive hpacucli> ctrl slot=0 ld 4 modify reenable forced
Create # logical drive – one disk
hpacucli> ctrl slot=0 create type=ld drives=1:12 raid=0 

# logical drive – mirrored
hpacucli> ctrl slot=0 create type=ld drives=1:13,1:14 size=300 raid=1

# logical drive – raid 5
hpacucli> ctrl slot=0 create type=ld drives=1:13,1:14,1:15,1:16,1:17 raid=5

Note:
drives – specific drives, all drives or unassigned drives
size – size of the logical drive in MB
raid – type of raid 0, 1 , 1+0 and 5

Remove hpacucli> ctrl slot=0 ld 4 delete
Expanding hpacucli> ctrl slot=0 ld 4 add drives=2:3
Extending hpacucli> ctrl slot=0 ld 4 modify size=500 forced
Spare hpacucli> ctrl slot=0 array all add spares=1:5,1:7
Display (detailed) hpacucli> ctrl all show config
hpacucli> ctrl all show config detail
Status hpacucli> ctrl all show status
Cache hpacucli> ctrl slot=0 modify dwc=disable
hpacucli> ctrl slot=0 modify dwc=enable
Rescan hpacucli> rescan 

Note: detects newly added devices since the last rescan

Installing & Configuring A Vanilla Wolfenstein Enemy Territory Dedicated Server On Ubuntu Linux

Background

Wolfenstein Enemy Territory is a free-to-play multiplayer game, based on World War II “Allies vs. Axis” style combat.  It is a first-person shooter game, but it has objective-based gameplay.  Players will perform tasks such as escorting tanks, stealing gold, repairing radio transmitters and delivering stolen documents to the transmitter, building tank barriers, dynamiting protection walls, and other objectives based on the map.  The objective-based gameplay makes Enemy Territory a uniquely fun gaming experience, with the classic FPS aspects gamers crave.  Enemy Territory is not one of those games where you look at your kill statistics, you’re too busy defending your objective or advancing on your enemy!

The Goal of This How-To

At the end of this how-to, you should have a vanilla Enemy Territory running.  You will be able to install Enemy Territory on a Windows client, connect to the server, and play Enemy Territory online!

Installing The Vanilla Enemy Territory Server

First, we need to download the Linux Enemy Territory game files.  It is necessary to install the entire game in order to have a dedicated server, but no GUI is needed, you can do all of this through an SSH session if you choose.

You can obtain Wolfenstein Enemy Territory on various websites on the Internet, but for the purposes of longevity of the links in this how-to, I will use the files hosted on The United Federation of Gaming (as I have control over these files).

Download the game:

wget http://www.unitedfederationofgaming.com/dist/wolfet/linux/et-linux-2.60.x86.zip

Download the latest patch for the game:

wget http://www.unitedfederationofgaming.com/dist/wolfet/linux/ET-2.60b-linux.zip

Extract the Zip files:

unzip et-linux-2.60.x86.zip

unzip ET-2.60b-linux.zip

Make the installer executable:

chmod +x et-linux-2.60.x86.run

Run the installer:

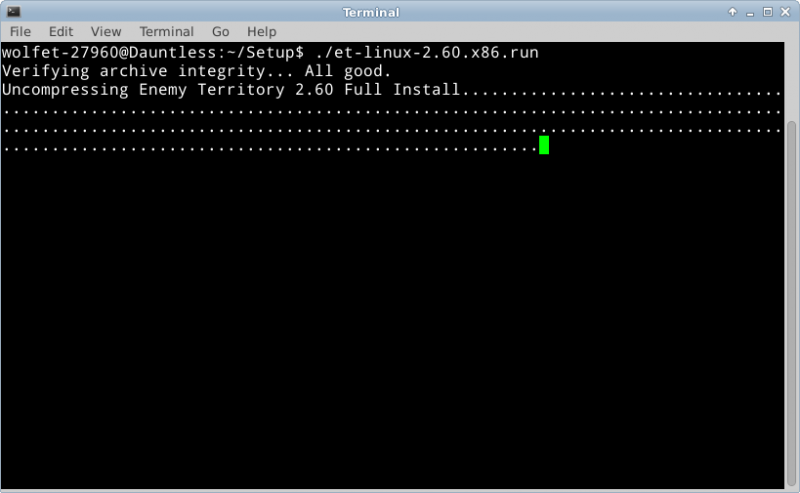
./et-linux-2.60.x86.run

Screenshot - 07202013 - 01:53:06 PM


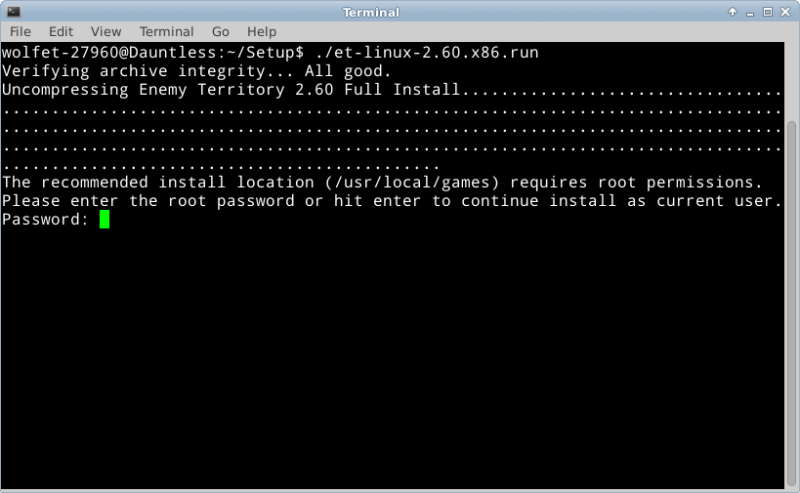
Screenshot - 07202013 - 01:53:22 PM


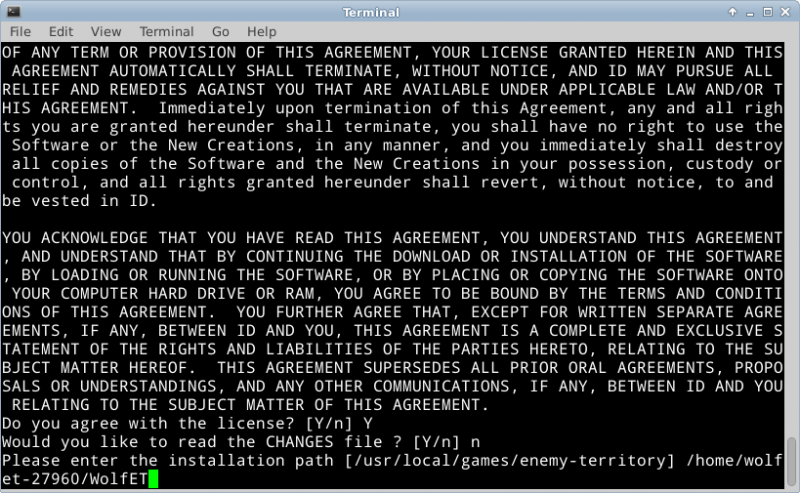
It is okay to continue as a limited user, and install the game in your home folder.

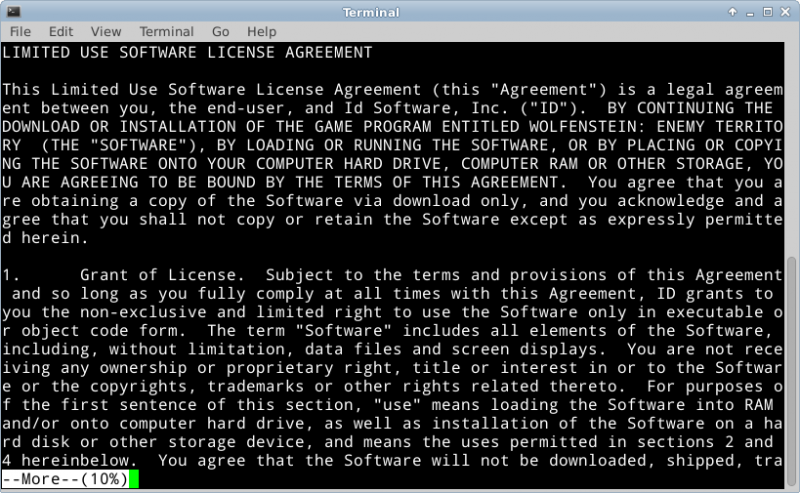
Screenshot - 07202013 - 01:53:34 PM


Press the Space Bar to quickly scroll through the license agreement.

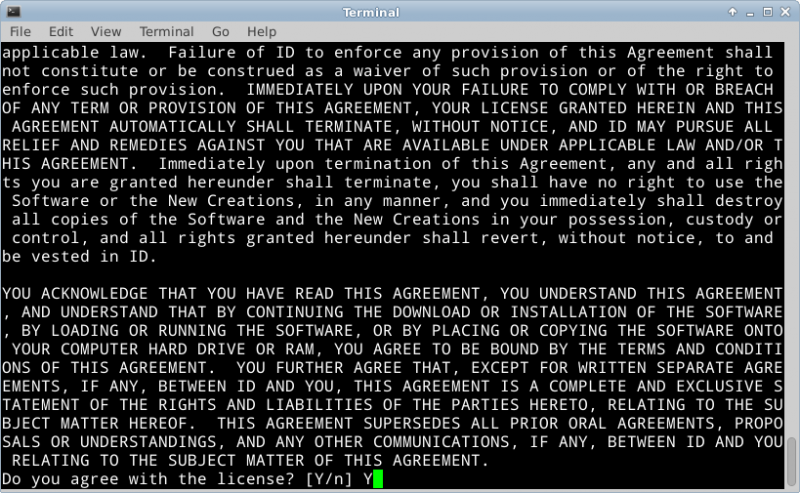
Screenshot - 07202013 - 01:54:33 PM


Type “Y” and hit Enter to accept the license agreement.

Screenshot - 07202013 - 02:02:26 PM

Press “n” and hit Enter to avoid reading the CHANGES file.

Type in a path to install the game to.  I recommend installing into your home folder, unless you have a good reason not to.  I installed to my home folder, in a folder called WolfET.

When prompted about where to put the symbolic links.  Symbolic links are basically just shortcuts, so this question is very non-important.  I put them in my home folder, in a folder called WolfETLinks.

If you get an error message like “No write permission to /path/to/symlink/folder” make sure the directory exists by using the mkdir command to create it.

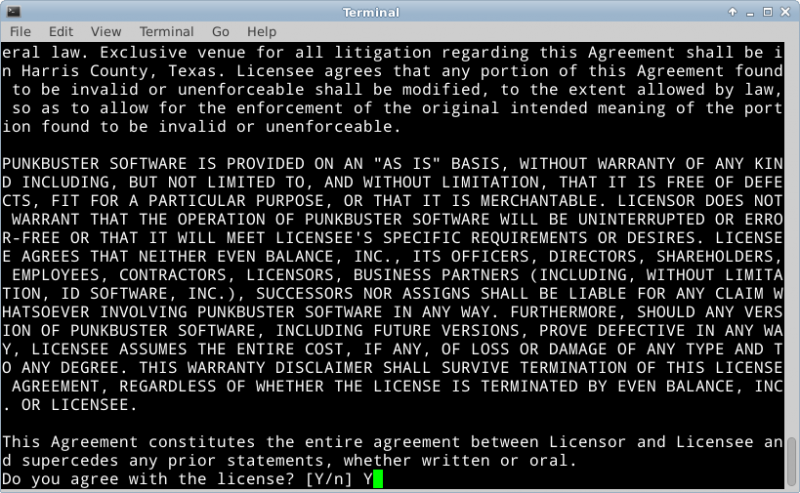
When asked about installing the PunkBuster client/server files, type “Y” and hit enter.

Screenshot - 07202013 - 02:09:14 PM


Again, use the Space Bar to scroll through the license agreement.  Press “Y” and hit Enter to accept it.

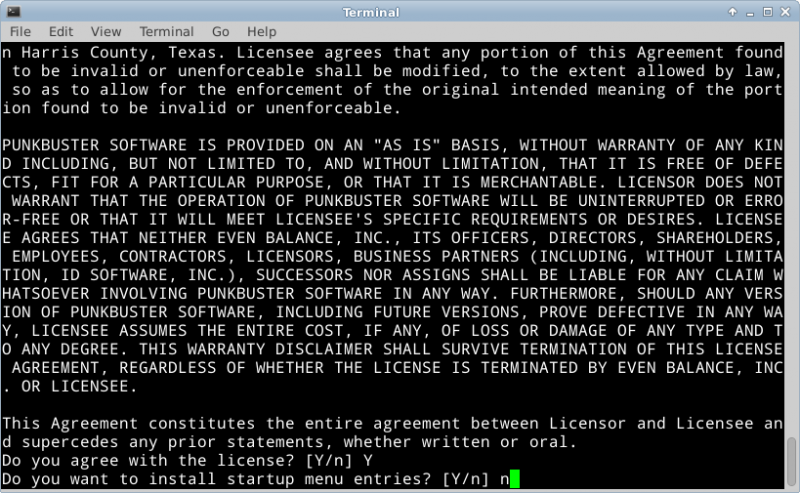
Screenshot - 07202013 - 02:10:29 PM


We do not want to install the startup menu entries, so press “n” and hit enter.

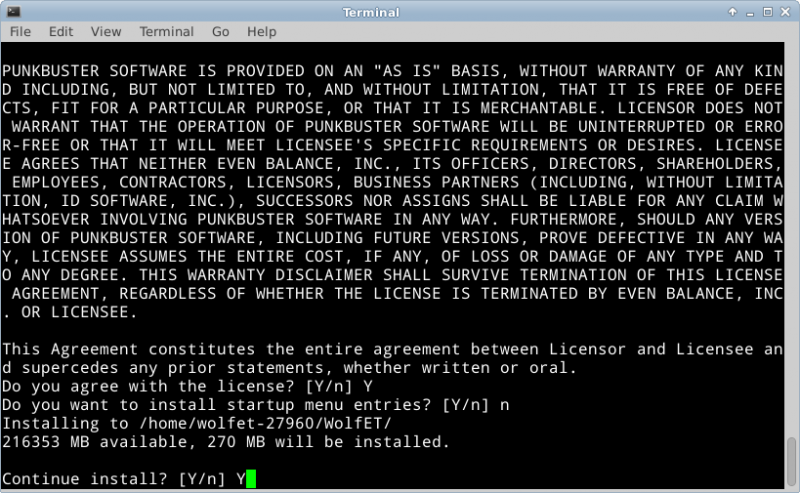
Screenshot - 07202013 - 02:11:30 PM


Press “Y” and hit Enter to continue the installation.

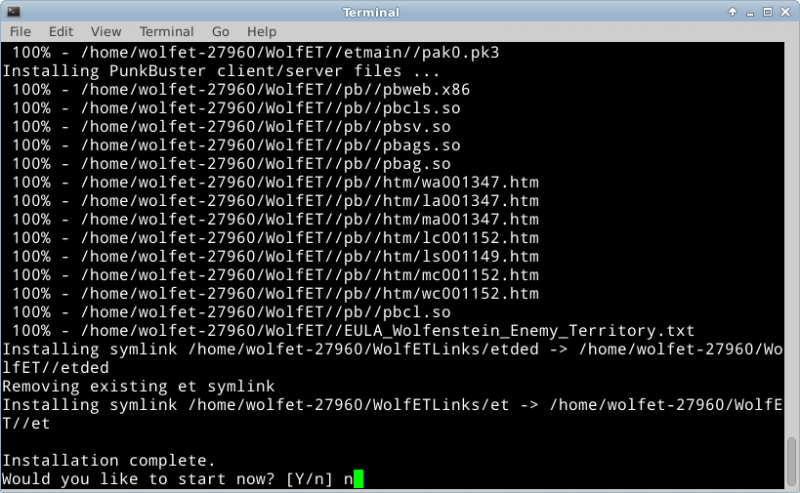
Screenshot - 07202013 - 02:12:27 PM


When the installation is completed, do not start the game now.  Press “n” and hit Enter.

Patch\Update The Game:

The patch files are located in the folder called Enemy Territory 2.60b

cd “Enemy Territory 2.60b/linux”

Copy the two files to the path where you installed Enemy Territory.  This will overwrite the old game files with the patched ones.

cp * /path/to/enemyterritory/

Configuration

The Enemy Territory server is configured by two files primarily: server.cfg and a map rotation cfg of your choice.  You can find these files in the etmain folder.

The vanilla configuration will mostly work for your vanilla server, but there are a few notable settings you might want to change.

server.cfg

Server Access Settings
set sv_maxclients allows you to set the number of slots available to your server.  The default is 20 players.
set g_password sets a join password on the server.  Most servers will want to leave this blank, and doing so is not a security risk.

Server Administrative Settings
set rconpassword sets a remote console password for the server.  You can use this to control the server from the ~ menu in-game.
set refereePassword sets a password to gain “referee” access in game, to change maps and handle basic functions from the GUI.

Server Bandwidth Settings
set sv_maxRate and set sv_dl_maxRate are speed limits.  I usually set them to 9999999999, to provide the best allowable performance to users.

Server Advertisement & MOTD Settings
set sv_hostname sets the name of your server on the Internet lobby.
set server_motd[0-5] sets the Message of The Day (MOTD) for the server.  This is shown during initial connection.  Usually people write server rules or other info here.

For ease of configuration, the rest of server.cfg can be left vanilla until you see a need to tweak it.  An entire post could be written about this file, but these are the basics of what most people will need to change.

Map Rotation Configuration
What I have done in the past, is copy campaigncycle.cfg to a file called servercycle.cfg and do my configuration in there.  For now, we can use campaigncycle.cfg as is the default.  It is possible to make your own custom campaign rotations, but that’s a post for another day.

Launcher
In the past, I’ve discovered that some of the configurations of Enemy Territory out of the box (and set by my own server.cfg) don’t seem to really apply correctly.  So, I’ve used a launcher script to start the game.  Create a file called startet.sh in the root folder (outside etmain, same folder etded.x86 is in) and put your launch instructions in it.  This is my startet.sh:

./etded +set com_hunkmegs 512 +exec servercycle.cfg +set net_ip “192.168.10.5” +exec server.cfg

com_hunkmegs is a reference to the amount of memory you will let the server consume.  I have found that increasing this limit is desirable when running a heavily loaded or modded server.  The rest of that should be fairly self explanatory.  Replace 192.168.10.5 with your server’s IP address.  Replace servercycle.cfg with the map rotation configuration file you made above.  If you renamed server.cfg, change that here as well.

Make the launcher executable:

chmod +x startet.sh

Run the launcher to start your game server.

./startet.sh

You should see a lot of text run down your screen, it will look like this generally:

ET 2.60b linux-i386 May  8 2006
----- FS_Startup -----
Current search path:
/home/wolfet-27960/.etwolf/etmain
/home/wolfet-27960/WolfET/etmain/pak2.pk3 (22 files)
/home/wolfet-27960/WolfET/etmain/pak1.pk3 (10 files)
/home/wolfet-27960/WolfET/etmain/pak0.pk3 (3725 files)
/home/wolfet-27960/WolfET/etmain/mp_bin.pk3 (6 files)
/home/wolfet-27960/WolfET/etmain

----------------------
3763 files in pk3 files
execing default.cfg
couldn't exec language.cfg
couldn't exec autoexec.cfg
Hunk_Clear: reset the hunk ok
Bypassing CD checks
Found high quality video and fast CPU
--- Common Initialization Complete ---
Opening IP socket: 192.168.10.5:27960
Hostname: dauntless.epecweb.com
Alias: localhost
Alias: Dauntless
IP: 127.0.0.1
Started tty console (use +set ttycon 0 to disable)
execing servercycle.cfg
------ Server Initialization ------
Server: oasis
Hunk_Clear: reset the hunk ok
----- FS_Startup -----
Current search path:
/home/wolfet-27960/.etwolf/etmain
/home/wolfet-27960/WolfET/etmain/pak2.pk3 (22 files)
/home/wolfet-27960/WolfET/etmain/pak1.pk3 (10 files)
/home/wolfet-27960/WolfET/etmain/pak0.pk3 (3725 files)
/home/wolfet-27960/WolfET/etmain/mp_bin.pk3 (6 files)
/home/wolfet-27960/WolfET/etmain

----------------------
7526 files in pk3 files
Sys_LoadDll(/home/wolfet-27960/.etwolf/etmain/qagame.mp.i386.so)... 
Sys_LoadDll(/home/wolfet-27960/.etwolf/etmain/qagame.mp.i386.so) failed:
"/home/wolfet-27960/.etwolf/etmain/qagame.mp.i386.so: cannot open shared object file: No such file or directory"
Sys_LoadDll(/home/wolfet-27960/WolfET/etmain/qagame.mp.i386.so)... ok
Sys_LoadDll(qagame) found **vmMain** at  0xd2d3ab90  
Sys_LoadDll(qagame) succeeded!
------- Game Initialization -------
gamename: etmain
gamedate: Mar 10 2005
Not logging to disk.
Gametype changed, clearing session data.
Enable spawning!

There will be some errors in this, notably the failure loading qagame.mp.i386.so.  These errors are OK in my experience…

Once you’re up and running, you’ll see some text like this in your console:

0 teams with 0 entities
-----------------------------------
Setting MOTD...
broadcast: print "Server: g_balancedteams changed to 1\n"
Setting Allied autospawn to Old City
Setting Axis autospawn to Old City
^1Warning: setstate called and no entities found
-----------------------------------
execing preset_high.cfg
Hitch warning: 1969 msec frame time
Resolving etmaster.idsoftware.com
etmaster.idsoftware.com resolved to 192.246.40.60:27950
Sending heartbeat to etmaster.idsoftware.com
Hitch warning: 545 msec frame time

^1Warning: setstate called and no entities found is another OK error.  It just means there is no one in the server right now.

Firewall Rules

If your dedicated server is behind a firewall (and I certainly hope it is) you will need to forward a port to allow Enemy Territory traffic.  That port is 27960 by default.

You’re Done!
Congratulations, if you’ve followed this guide, you now have a functional Enemy Territory server!  To play, connect to your server’s IP address or find the game on the Internet lobby.

If you have any questions about anything in this guide, or Enemy Territory server administration in general, please feel free to ask in the comments.  I am not, by any means, an expert on Enemy Territory servers, but I’ve run one for a number of years and I know more about them than the average person, so go ahead and ask questions!  Thanks for reading.