Tag Archives: Linux

Digital Signage with a Raspberry Pi and Google Slides

I have been looking at an easier way to Digital Signage and I just got my first Raspberry Pi.  I figured the low and High def inputs would allow me to strap a rPi on the back of a TV and provide rich content.

I am looking for a opensource, free/very low cost solution that is easy to manage and simple for the people updating it.  I foresee about 10 devices in my future.

I did a lot of reading and found that there are plenty of projects out there already that enable digital signage for the rPi.  I found this site and started down the list.

I tried a few applications and liked Screenly the best.  It is simple, performs well, and overall just works.  See their online demo for their interface. They provide their own rPi image or allow installation onto raspbian if you want to further customize it.  SSH is available on the Screenly image out of the box.  Screenly allows web pages, images, and videos (MP4) to be streamed to the rPi which gives me plenty of flexibility to mix and match what I like.  They have 2 versions; a centrally managed model or a free, per device management model.

My immediate thoughts were to convert our ancient overused powerpoint into something more rich, but to get users to buy into this solution I would first convert them over to Google Slides which would provide an easy to use, collaborative, updating presentation to all devices without actually touching any of the devices.

I created a simple Google Slide presentation with four or five slides and random comments on it.  I followed these instructions to make it automatically full-screen and play right in the browser.  I took that link and threw it right into Screenly-OSE and viola!

Caveats…

  • Google sets a single time for all slides…  Therefore you cannot make one slide longer than the others (as far as I can tell).  Transitions can be set differently though.
    • You could leverage second presentation and set the delay longer, or use the Screenly interface to get more specific in necessary.
  • One issue I ran into was that if you have Google loop the presentation rather than Screenly, the content never updates.  Obviously this defeats the purpose of using Google Slides in the first place.  Let Google finish the presentation and let Screenly reload the presentation and it will be fairly straightforward.
    • Related to the above post, then timing becomes an issue.  Some simple math should work to fix that though.
      • 5 seconds a slide (as per when publishing within Google) plus 3 seconds for transition time (as set in presentation) times 5 (number of slides) should come out to be about 40 seconds.  Tweak as needed.

Things to investigate:

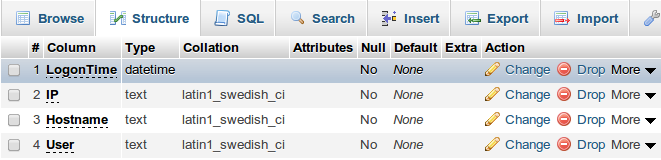
It appears the database being used is simply for the ‘Playlist’.  I would imagine that the application would refresh the playlist frequently.  That being said, would placing the /home folder in a shared NFS location make management easier?  This could also lessen the wear and tear of the SDcard.  If all clients pointed back to this NFS share, would this update all of the clients or would this require a reboot/restart on the clients to apply any updates?  I do not know how the software is triggered or written… So more experiments to come when I get more Pi’s!

Installing & Configuring A Vanilla Wolfenstein Enemy Territory Dedicated Server On Ubuntu Linux

Background

Wolfenstein Enemy Territory is a free-to-play multiplayer game, based on World War II “Allies vs. Axis” style combat.  It is a first-person shooter game, but it has objective-based gameplay.  Players will perform tasks such as escorting tanks, stealing gold, repairing radio transmitters and delivering stolen documents to the transmitter, building tank barriers, dynamiting protection walls, and other objectives based on the map.  The objective-based gameplay makes Enemy Territory a uniquely fun gaming experience, with the classic FPS aspects gamers crave.  Enemy Territory is not one of those games where you look at your kill statistics, you’re too busy defending your objective or advancing on your enemy!

The Goal of This How-To

At the end of this how-to, you should have a vanilla Enemy Territory running.  You will be able to install Enemy Territory on a Windows client, connect to the server, and play Enemy Territory online!

Installing The Vanilla Enemy Territory Server

First, we need to download the Linux Enemy Territory game files.  It is necessary to install the entire game in order to have a dedicated server, but no GUI is needed, you can do all of this through an SSH session if you choose.

You can obtain Wolfenstein Enemy Territory on various websites on the Internet, but for the purposes of longevity of the links in this how-to, I will use the files hosted on The United Federation of Gaming (as I have control over these files).

Download the game:

wget http://www.unitedfederationofgaming.com/dist/wolfet/linux/et-linux-2.60.x86.zip

Download the latest patch for the game:

wget http://www.unitedfederationofgaming.com/dist/wolfet/linux/ET-2.60b-linux.zip

Extract the Zip files:

unzip et-linux-2.60.x86.zip

unzip ET-2.60b-linux.zip

Make the installer executable:

chmod +x et-linux-2.60.x86.run

Run the installer:

./et-linux-2.60.x86.run

Screenshot - 07202013 - 01:53:06 PM


Screenshot - 07202013 - 01:53:22 PM


It is okay to continue as a limited user, and install the game in your home folder.

Screenshot - 07202013 - 01:53:34 PM


Press the Space Bar to quickly scroll through the license agreement.

Screenshot - 07202013 - 01:54:33 PM


Type “Y” and hit Enter to accept the license agreement.

Screenshot - 07202013 - 02:02:26 PM

Press “n” and hit Enter to avoid reading the CHANGES file.

Type in a path to install the game to.  I recommend installing into your home folder, unless you have a good reason not to.  I installed to my home folder, in a folder called WolfET.

When prompted about where to put the symbolic links.  Symbolic links are basically just shortcuts, so this question is very non-important.  I put them in my home folder, in a folder called WolfETLinks.

If you get an error message like “No write permission to /path/to/symlink/folder” make sure the directory exists by using the mkdir command to create it.

When asked about installing the PunkBuster client/server files, type “Y” and hit enter.

Screenshot - 07202013 - 02:09:14 PM


Again, use the Space Bar to scroll through the license agreement.  Press “Y” and hit Enter to accept it.

Screenshot - 07202013 - 02:10:29 PM


We do not want to install the startup menu entries, so press “n” and hit enter.

Screenshot - 07202013 - 02:11:30 PM


Press “Y” and hit Enter to continue the installation.

Screenshot - 07202013 - 02:12:27 PM


When the installation is completed, do not start the game now.  Press “n” and hit Enter.

Patch\Update The Game:

The patch files are located in the folder called Enemy Territory 2.60b

cd “Enemy Territory 2.60b/linux”

Copy the two files to the path where you installed Enemy Territory.  This will overwrite the old game files with the patched ones.

cp * /path/to/enemyterritory/

Configuration

The Enemy Territory server is configured by two files primarily: server.cfg and a map rotation cfg of your choice.  You can find these files in the etmain folder.

The vanilla configuration will mostly work for your vanilla server, but there are a few notable settings you might want to change.

server.cfg

Server Access Settings
set sv_maxclients allows you to set the number of slots available to your server.  The default is 20 players.
set g_password sets a join password on the server.  Most servers will want to leave this blank, and doing so is not a security risk.

Server Administrative Settings
set rconpassword sets a remote console password for the server.  You can use this to control the server from the ~ menu in-game.
set refereePassword sets a password to gain “referee” access in game, to change maps and handle basic functions from the GUI.

Server Bandwidth Settings
set sv_maxRate and set sv_dl_maxRate are speed limits.  I usually set them to 9999999999, to provide the best allowable performance to users.

Server Advertisement & MOTD Settings
set sv_hostname sets the name of your server on the Internet lobby.
set server_motd[0-5] sets the Message of The Day (MOTD) for the server.  This is shown during initial connection.  Usually people write server rules or other info here.

For ease of configuration, the rest of server.cfg can be left vanilla until you see a need to tweak it.  An entire post could be written about this file, but these are the basics of what most people will need to change.

Map Rotation Configuration
What I have done in the past, is copy campaigncycle.cfg to a file called servercycle.cfg and do my configuration in there.  For now, we can use campaigncycle.cfg as is the default.  It is possible to make your own custom campaign rotations, but that’s a post for another day.

Launcher
In the past, I’ve discovered that some of the configurations of Enemy Territory out of the box (and set by my own server.cfg) don’t seem to really apply correctly.  So, I’ve used a launcher script to start the game.  Create a file called startet.sh in the root folder (outside etmain, same folder etded.x86 is in) and put your launch instructions in it.  This is my startet.sh:

./etded +set com_hunkmegs 512 +exec servercycle.cfg +set net_ip “192.168.10.5” +exec server.cfg

com_hunkmegs is a reference to the amount of memory you will let the server consume.  I have found that increasing this limit is desirable when running a heavily loaded or modded server.  The rest of that should be fairly self explanatory.  Replace 192.168.10.5 with your server’s IP address.  Replace servercycle.cfg with the map rotation configuration file you made above.  If you renamed server.cfg, change that here as well.

Make the launcher executable:

chmod +x startet.sh

Run the launcher to start your game server.

./startet.sh

You should see a lot of text run down your screen, it will look like this generally:

ET 2.60b linux-i386 May  8 2006
----- FS_Startup -----
Current search path:
/home/wolfet-27960/.etwolf/etmain
/home/wolfet-27960/WolfET/etmain/pak2.pk3 (22 files)
/home/wolfet-27960/WolfET/etmain/pak1.pk3 (10 files)
/home/wolfet-27960/WolfET/etmain/pak0.pk3 (3725 files)
/home/wolfet-27960/WolfET/etmain/mp_bin.pk3 (6 files)
/home/wolfet-27960/WolfET/etmain

----------------------
3763 files in pk3 files
execing default.cfg
couldn't exec language.cfg
couldn't exec autoexec.cfg
Hunk_Clear: reset the hunk ok
Bypassing CD checks
Found high quality video and fast CPU
--- Common Initialization Complete ---
Opening IP socket: 192.168.10.5:27960
Hostname: dauntless.epecweb.com
Alias: localhost
Alias: Dauntless
IP: 127.0.0.1
Started tty console (use +set ttycon 0 to disable)
execing servercycle.cfg
------ Server Initialization ------
Server: oasis
Hunk_Clear: reset the hunk ok
----- FS_Startup -----
Current search path:
/home/wolfet-27960/.etwolf/etmain
/home/wolfet-27960/WolfET/etmain/pak2.pk3 (22 files)
/home/wolfet-27960/WolfET/etmain/pak1.pk3 (10 files)
/home/wolfet-27960/WolfET/etmain/pak0.pk3 (3725 files)
/home/wolfet-27960/WolfET/etmain/mp_bin.pk3 (6 files)
/home/wolfet-27960/WolfET/etmain

----------------------
7526 files in pk3 files
Sys_LoadDll(/home/wolfet-27960/.etwolf/etmain/qagame.mp.i386.so)... 
Sys_LoadDll(/home/wolfet-27960/.etwolf/etmain/qagame.mp.i386.so) failed:
"/home/wolfet-27960/.etwolf/etmain/qagame.mp.i386.so: cannot open shared object file: No such file or directory"
Sys_LoadDll(/home/wolfet-27960/WolfET/etmain/qagame.mp.i386.so)... ok
Sys_LoadDll(qagame) found **vmMain** at  0xd2d3ab90  
Sys_LoadDll(qagame) succeeded!
------- Game Initialization -------
gamename: etmain
gamedate: Mar 10 2005
Not logging to disk.
Gametype changed, clearing session data.
Enable spawning!

There will be some errors in this, notably the failure loading qagame.mp.i386.so.  These errors are OK in my experience…

Once you’re up and running, you’ll see some text like this in your console:

0 teams with 0 entities
-----------------------------------
Setting MOTD...
broadcast: print "Server: g_balancedteams changed to 1\n"
Setting Allied autospawn to Old City
Setting Axis autospawn to Old City
^1Warning: setstate called and no entities found
-----------------------------------
execing preset_high.cfg
Hitch warning: 1969 msec frame time
Resolving etmaster.idsoftware.com
etmaster.idsoftware.com resolved to 192.246.40.60:27950
Sending heartbeat to etmaster.idsoftware.com
Hitch warning: 545 msec frame time

^1Warning: setstate called and no entities found is another OK error.  It just means there is no one in the server right now.

Firewall Rules

If your dedicated server is behind a firewall (and I certainly hope it is) you will need to forward a port to allow Enemy Territory traffic.  That port is 27960 by default.

You’re Done!
Congratulations, if you’ve followed this guide, you now have a functional Enemy Territory server!  To play, connect to your server’s IP address or find the game on the Internet lobby.

If you have any questions about anything in this guide, or Enemy Territory server administration in general, please feel free to ask in the comments.  I am not, by any means, an expert on Enemy Territory servers, but I’ve run one for a number of years and I know more about them than the average person, so go ahead and ask questions!  Thanks for reading.


Safely Removing Gnome-Keyring From Xubuntu 12.04

EDIT: Your results may vary, I am getting some feedback about this solution indicating which it may not be entirely effective, or may not work any more.

In previous Linux deployments, we have had problems with people’s keyring passwords being forgotten or not working, to the point where the universal response if you ask anyone what to do when the Gnome Keyring prompt comes up, it’s “oh, just hit cancel”.

In the latest image, we have decided to remove gnome-keyring.  You would think you would be able to do this very easily.

sudo apt-get remove gnome-keyring

But in reality, this command is dangerous, and threatens to remove xubuntu-desktop.

The following packages will be REMOVED:
  gnome-keyring oneconf python-ubuntu-sso-client seahorse software-center
  ubuntu-sso-client ubuntu-sso-client-gtk xubuntu-desktop
0 upgraded, 0 newly installed, 8 to remove and 0 not upgraded.
After this operation, 11.5 MB disk space will be freed.
Do you want to continue [Y/n]?

So, I did a bit of Googling, and I found this thread on Ask Ubuntu. They suggested installing aptitude and using aptitude to remove gnome-keyring, because they believe aptitude’s dependency tree is different.  However, this solution does not seem to work.

After doing some of my own digging, I found that under “Session and Startup” settings, there is an option called “Launch GNOME services on startup” listed under Compatibility.

GNOME Compatibility XFCE

Mousing over this option shows that disabling it will prevent Gnome Keyring from launching.  This will do away with our Gnome Keyring for good!

User Tracking and Logon Agents

We believe that tracking when users log into a computer is very good information.  We can easily look up where students log in, track computer usage, aid with helpdesk tasks, etc.  Our primary focus was to show that computer labs and carts are being used, and justify the 1:1 initiative we set forth.

This is was not a difficult task to setup but could be useful to others, so here it is!

First we need a good way to get data from the clients.  With Linux, we could do it a multitude of ways, with windows, it can be a bit limited.  We chose to do our data submission with a simple URL get.  Simple, easy, fast, reliable.  With some reading, it wasn’t too difficult to setup with Windows.

First… Server recording
We need a simple script to take variables and insert them into mysql with the needed information. Really all we need is the computer name and username.  We can use the server time and get the client’s IP from the server so that we know it is consistent.  Here is the server script:

<?php
// Written by Kirk Schnable for Marengo Community High School
// July 20th, 2011

/****************** SAMPLE SYNTAX ********************/
/* http://server/login.php?u=USERNAME&h=COMPUTERNAME */
/*****************************************************/

//# MySQL Connection
$link = mysql_connect("MYSQLSERVER", "DB", "PASSWORD") or die(mysql_error());

//# Gather Information
$user = mysql_real_escape_string($_GET['u']);
$hostname = mysql_real_escape_string($_GET['h']);
$ip = mysql_real_escape_string($_SERVER['REMOTE_ADDR']);
$date = date("Y-m-d H:i:s");

//# Query Database
$result = mysql_query("INSERT INTO `iplookup`.`login_records` (`LogonTime` ,`IP`, `Hostname` ,`User`)VALUES ('$date', '$ip', '$hostname', '$user');");
if(!$result){ /* do something on failure of mysql query */ }

?> 

MySQL Database Structure
Using the server side script we can see who the IP was of the user submitting the record, time stamp that event, see who the user is, and what the hostname of the computer is.
loa

Linux Logon Agent
The Linux logon agent could be written many different ways using several programs; curl, wget, lynx, etc.  Simply put it needs to pull two variables and curl that URL…  This needs to be put in the users (and/or skel’s) startup so that it runs at logon   This could be done in a single command like:

curl -s "http://SERVER/logon-agent/login.php?u=$USER&h=$HOSTNAME"

Windows Logon Agent
Unfortunately windows does not have awesome tools like wget, curl, lynx, etc so it is a bit more in-depth to get it working.  However it is easier to deploy using group policy on the server, you can deploy this script pretty easily. Put this script in the User Logon scripts:

' DECLARE ENVIRONMENT VARIABLES
dim URL

' GET SYSTEM VARIABLES
Set wshShell = CreateObject( "WScript.Shell" )
username = wshShell.ExpandEnvironmentStrings( "%USERNAME%" )
computer = wshShell.ExpandEnvironmentStrings( "%COMPUTERNAME%" )

' SET URL TO CONTACT
URL = "http://SERVER/logon-agent/login.php?u=" & username & "&h=" & computer

' ECHO VARIABLES FOR TESTING
'WScript.Echo URL
'WScript.Echo username
'WScript.Echo computer

on error resume next  
Set objXML = CreateObject("MSXML2.ServerXMLHTTP")  

if err then  
	msgbox("Error: " & err.description)  
	wscript.quit 1  
end if  

' Call the remote machine the request  
objXML.open "GET", URL, False  

objXML.send()  

' return the response  
'msgbox objXML.responSetext  

' clean up  
Set objXML = Nothing

Searching For Data!
This is a simple search web tool we created to locate user/computer/IP history.

<head>
<title>Realtime User Login Lookup</title>
<link rel="stylesheet" type="text/css" href="style.css" />
</head>
<div style="text-align: center;">
<span id="header">Computer Login Database</span>
<form method="post" action="">
<span>Lookup IP: </span><input id="ip" type="text" name="ip" value="<?php echo($_GET['ip']); ?>" />
<br/>
<span>Lookup Host: </span><input id="hostname" type="text" name="hostname" value="<?php echo($_GET['host']); ?>" />
<br/>
<span>Lookup User: </span><input id="user" type="text" name="user" value="<?php echo($_GET['user']); ?>" />
<br/>
<span>Records: </span><input id="records" type="text" name="records" value="10000" />
<br/>
<input type="submit" value="Go" />
</form>
</div>

<?php if($_POST){
$link = mysql_connect("SERVER", "USER", "PASSWORD") or die(mysql_error());
$user = mysql_real_escape_string($_POST['user']);
$hostname = mysql_real_escape_string($_POST['hostname']);
$ip = mysql_real_escape_string($_POST['ip']);
$records = mysql_real_escape_string(intval($_POST['records']));
$standarddate = 'l, F jS, Y \a\t g:ia';

if($ip){ // Lookup IP
	echo("<hr/>");
	echo('<div style="text-align: center;">');
	$rdate = mysql_query("SELECT DISTINCT CAST(`LogonTime` AS DATE) AS dateonly FROM `iplookup`.`login_records` WHERE `IP`='$ip'") or die(mysql_error());
	echo("<p><span>This computer has been logged into on " . mysql_num_rows($rdate) . " different days.</span></p>");
	$r = mysql_query("SELECT * FROM `iplookup`.`login_records` WHERE `IP`='$ip' ORDER BY `LogonTime` DESC LIMIT $records") or die(mysql_error());
	if(mysql_num_rows($r) == 0){ echo("<p><span>No Results for IP <b>$ip</b></span></p>"); }
	elseif(mysql_num_rows($r) == $records){ echo("<p><span>Showing the $records most recent logins on <b>$ip</b></span></p>"); }
	else{ echo("<p><span>Showing all " . mysql_num_rows($r) . " previously recorded logins on <b>$ip</b></span></p>"); }
	while($row = mysql_fetch_assoc($r)){
		$date = $row['LogonTime']; $date = strtotime($date); $date = date($standarddate, $date); $username = $row['User']; $host = $row['Hostname'];
		echo("<span><p><b>$username</b> @$host on $date</span></p>");
	}
	echo('</div>');
}

if($user){ // Lookup Username
	echo("<hr/>");
	echo('<div style="text-align: center;">');
	$rdate = mysql_query("SELECT DISTINCT CAST(`LogonTime` AS DATE) AS dateonly FROM `iplookup`.`login_records` WHERE `User`='$user'") or die(mysql_error());
	echo("<p><span>This user has logged in on " . mysql_num_rows($rdate) . " different days.</span></p>");
	$r = mysql_query("SELECT * FROM `iplookup`.`login_records` WHERE `User`='$user' ORDER BY `LogonTime` DESC LIMIT $records") or die(mysql_error());
	if(mysql_num_rows($r) == 0){ echo("<p><span>No Results for User <b>$user</b></span></p>"); }
	elseif(mysql_num_rows($r) == $records){ echo("<p><span>Showing the $records most recent IPs of <b>$user</b></span></p>"); }
	else{ echo("<p><span>Showing all " . mysql_num_rows($r) . " previously recorded IPs of <b>$user</b></span></p>"); }
	while($row = mysql_fetch_assoc($r)){
		$date = $row['LogonTime']; $date = strtotime($date); $date = date($standarddate, $date); $ip = $row['IP']; $host = $row['Hostname'];
		echo("<span><p><b>$ip</b> ($host) on $date</span></p>");
	}
	echo('</div>');
}

if($hostname){ // Lookup Hostname
	echo("<hr/>");
	echo('<div style="text-align: center;">');
	$rdate = mysql_query("SELECT DISTINCT CAST(`LogonTime` AS DATE) AS dateonly FROM `iplookup`.`login_records` WHERE `Hostname` LIKE '%$hostname%'") or die(mysql_error());
	echo("<p><span>This computer has been logged into on " . mysql_num_rows($rdate) . " different days.</span></p>");
	$r = mysql_query("SELECT * FROM `iplookup`.`login_records` WHERE `Hostname` LIKE '%$hostname%' ORDER BY `LogonTime` DESC LIMIT $records") or die(mysql_error());
	if(mysql_num_rows($r) == 0){ echo("<p><span>No Results for Hostname <b>$hostname</b></span></p>"); }
	elseif(mysql_num_rows($r) == $records){ echo("<p><span>Showing the $records most recent logins on <b>$hostname</b></span></p>"); }
	else{ echo("<p><span>Showing all " . mysql_num_rows($r) . " previously recorded logins on <b>$hostname</b></span></p>"); }
	while($row = mysql_fetch_assoc($r)){
		$date = $row['LogonTime']; $date = strtotime($date); $date = date($standarddate, $date); $ip = $row['IP']; $username = $row['User'];
		echo("<span><p><b>$username</b> ($ip) on $date</span></p>");
	}
	echo('</div>');
}

if(!$hostname && !$user && !$ip){ // Show "all" records.
        echo("<hr/>");
        echo('<div style="text-align: center;">');
        $r = mysql_query("SELECT * FROM `iplookup`.`login_records` ORDER BY `LogonTime` DESC LIMIT $records") or die(mysql_error());
        if(mysql_num_rows($r) == 0){ echo("<p><span>No Results.</span></p>"); }
        elseif(mysql_num_rows($r) == $records){ echo("<p><span>Showing the $records most recent logins.</span></p>"); }
        else{ echo("<p><span>Showing all " . mysql_num_rows($r) . " previously recorded logins.</span></p>"); }
        while($row = mysql_fetch_assoc($r)){
                $date = $row['LogonTime']; $date = strtotime($date); $date = date($standarddate, $date); $ip = $row['IP']; $username = $row['User']; $hostnames = $row['Hostname'];
                echo("<span><p><b>$username</b> ($ip) ($hostnames) on $date</span></p>");
        }
        echo('</div>');
}

}
?>

Its complimentary style.css:

BODY{ background-color: maroon; }
SPAN{ color: white; }
SPAN#header{ font-weight: bold; }

INPUT#ip{ width: 175px; }
INPUT#hostname{ width: 150px; }
INPUT#user{ width: 150px; }
INPUT#records{ width: 50px; }

Custom Reports…
Once you have this information you should be able to run reports however you see fit.  We have created a highly custom report for our use which is specific to our school that shows computer usage.  That code is not ready to be posted at this time however here is a glimpse of what could be done.  Please note that ltcart1,2204, and 2506 have been physically relocated to other rooms but because database entries exists, they show up as 0.
report

With this report we can see that with 30 calendar days, there have been 22 instructional days.  This shows that these rooms are using computers almost every day!


Linux Vinyl Plotting With A Gerber enVision Plotter

I recently had the opportunity to work with an older Gerber enVision plotter from a township.  I had major difficulties getting the old version of Omega working with their USB licensing stick, and I knew that getting anything like this working on Windows without proper licensing would be an inadvisable, and rocky road ahead.

I decided to look into open source solutions, and I found out that Inkscape can do vinyl plotting with an extension called InkCut.

This tutorial will attempt to comprehensively explain how I got this working.  I am by no means an expert, but I found very limited web resources out there on this topic, and I am hopeful that someone will eventually stumble on this article and find it useful.

Background
A simple, free, and open source solution to an expensive and complex problem: How do we plot stuff with our vinyl plotter?

Assumptions
This tutorial will assume that you have some prior experience with the Linux terminal and the Linux desktop.  On my test computer, I was working with a clean installation of Ubuntu 12.04 (12.04.1) LTS.  However, any Ubuntu or Debian flavor should be acceptable.  I am also assuming you have an older Gerber enVision series plotter.  If this is not the case, I imagine most of these instructions will apply fairly well to any kind of vinyl plotter.

The Plotter
Here are some photos of the Gerber enVision plotter I was working with.

2013-01-01 13.20.33

2013-01-01 13.20.42


The plotter interfaced with the computer using a serial connection.

Ubuntu & This Plotter
In order to establish proper communications between the computer and the plotter, I had to ensure some things were true.  I reset my plotter to the factory default settings, which resulted in a condition where I could assume this about my serial connection:

Baud: 9600
Data Length: 8
Parity: None
Stop Bit: 1

In order to ensure communication with non-root users, I took a questionable approach, and I decided to:

chmod 777 /dev/ttyS0

This did not need to be a very secure environment (we didn’t even password protect the workstation’s desktop) so I figured this would be a reasonable approach, rather than troubleshooting why CUPS was getting permission denied errors while printing to the serial port.

Configure The Plotter In CUPS
To install this plotter in CUPS, you’ll want to open up your Printer configuration area from the System menu.

Click “Add” to add a printer.

CUPS Add A Printer

If you don’t have the option for “Serial Port #1”, then use the Device URI “serial:/dev/ttyS0“.

Serial Printer


You will want to select Generic as the make of printer.

Generic Printer


Then, select “Raw Queue”  This will work with InkCut providing the HPGL instructions.

Generic Printer - Raw Queue

Obviously, it doesn’t matter what you name your plotter, or what description you give it, just give it something that makes sense.

Finalize Printer Settings

Install Inkscape

Next, we want to install Inkscape.  You can do this from Apt on Ubuntu, as such:

sudo apt-get install inkscape

Once you’re done with the installation, start Inkscape for the first time.  This will create blank default configuration folders in your profile which are necessary for the next step.

Inkscape


Then, go ahead and close Inkscape, and move on to installing InkCut!

Install InkCut
You can download the latest version of InkCut from their website.  At the time of this writing, the version is 1.0, and can be found here.

Once you’ve downloaded InkCut, go ahead and extract the file using this command.  It will put the files right where they need to be for you!

tar -xzvf InkCut-1.0.tar.gz -C ~/.config/inkscape/extensions/

Now, when you start Inkscape, you should see InkCut on the Extensions menu, under Cutter/Plotter.

InkCut

Screencast How-To’s
 I have also created some screencasts to explain how to set up the document for your plotter, as well as how to plot some basic text.

Document Setup – Screencast
(Download OGV)

Let’s Plot Some Text! – Screencast
(Download OGV)

Remember, when plotting your text, you need to make sure your objects are converted to paths, by highlighting your text and going to Path > Object To Path.  You also want to make sure your paths aren’t grouped, by right clicking each block of text and clicking Ungroup.

Then you should be good to go to Extensions > Cutter/Plotter > InkCut v1.0 and start plotting!