• About Binary Impulse
  • BashBytes
Binary Impulse

Category Archives: How-to’s

Tutorials and step-by-step instructions.

Running Wolfenstein Enemy Territory At Native 1920×1080 Resolution (on Windows)

September 21, 2013 12:08 PM / 12 Comments / Kirk Schnable

A lot of people I play Enemy Territory with have been contemplating switching to a version of the program called ET Legacy, and their reasoning is generally related to screen resolutions.

Wolfenstein Enemy Territory is a very old game, and the designers never conceived that it would ever be played on a 1920×1080 screen resolution, so it was never coded to have that option in the Video Settings.

That being said, you can make a few modifications to your launcher shortcut, and run Enemy Territory at true native 1920×1080 resolution.

Note: The only glitch I’ve encountered with this so far, is that when you’re changing video settings in the game, the game will not revert back to 1920×1080 without a game restart after a settings change (such as texture quality, dynamic lighting, etc changes).  So, go set your quality levels for textures and everything prior to modifying your shortcut, then you should avoid encountering any of those issues.

Linux\Mac: You can use similar command switches on Linux or Mac to achieve this goal, but the process of editing the shortcut\launcher may vary.

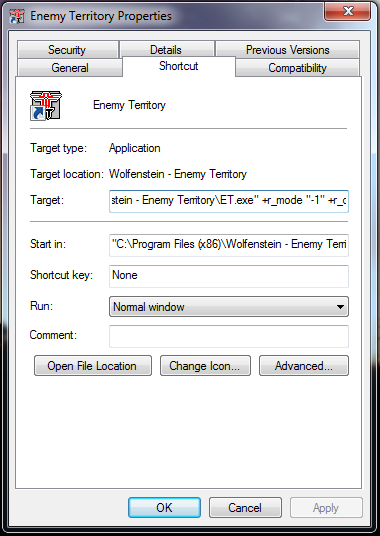
Right click your Enemy Territory shortcut, and hit Properties.

et-icon


You’ll want to add these options to your shortcut:
(com_hunkmegs is not related to the video settings, but a few extra hunkmegs will help your game performance.)

+r_mode "-1" +r_customwidth "1920" +r_customheight "1080" +cg_fov "115" +set com_hunkmegs "768" +vid_restart

You can do so by adding them after the trailing quotation mark surrounding your program name, as show in the following screenshot:

et-settings

My full shortcut application path is as follows, since it’s not entirely visible above.  (The “Target” box above).

"C:\Program Files (x86)\Wolfenstein - Enemy Territory\ET.exe" +r_mode "-1" +r_customwidth "1920" +r_customheight "1080" +cg_fov "115" +set com_hunkmegs "768" +vid_restart

And there you have it!  Next time you launch Enemy Territory, you should be presented with a full screen 1920×1080 gaming experience.  Enjoy!


Posted in: How-To's, Musings / Tagged: Enemy Territory, FPS, Free To Play, Gaming, RTCW, Windows, Wolfenstein

Installing HP Array Configuration Utility (HP ACU) on Ubuntu

September 19, 2013 11:31 PM / 16 Comments / Kirk Schnable

Updated for 16.04.

This guide will help you get up and running with HP’s command line Array Configuration Utility (ACU) on Ubuntu.  This guide may will be especially useful if you have an HP Proliant server, or an HP P400 \ P410 RAID card or similar.

Install the HP Linux Repository

echo "deb http://downloads.linux.hpe.com/SDR/downloads/MCP/ubuntu xenial/current non-free" >> /etc/apt/sources.list.d/hp.list

Install HP Linux Repository GPG Key

wget -qO - http://downloads.linux.hpe.com/SDR/downloads/MCP/GPG-KEY-mcp | sudo apt-key add -

 Prepare For The Installation

sudo apt-get update

Install Packages

sudo apt-get install cpqacuxe hpacucli hpsmh

HP Array Configuration Utility Is Now Installed!

If you’ve never used the Array Configuration Utility before, here’s a cheat sheet for the commands you might want: http://binaryimpulse.com/2013/09/hp-array-configuration-utility-command-cheat-sheet/

I may do a write-up on some of the more useful commands at a later time.  For now, here’s what you should try to see if everything’s working.  (Along with sample output from my server.)

root@Server:~# hpacucli ctrl all show status

Smart Array P410 in Slot 3
   Controller Status: OK
   Cache Status: OK

root@Server:~# hpacucli ctrl all show config

Smart Array P410 in Slot 3                (sn: ##############  )

   array A (SATA, Unused Space: 0  MB)

      logicaldrive 1 (19.1 TB, RAID 5, OK)

      physicaldrive 1I:0:1 (port 1I:box 0:bay 1, SATA, 3 TB, OK)
      physicaldrive 1I:0:2 (port 1I:box 0:bay 2, SATA, 3 TB, OK)
      physicaldrive 1I:0:3 (port 1I:box 0:bay 3, SATA, 3 TB, OK)
      physicaldrive 1I:0:4 (port 1I:box 0:bay 4, SATA, 3 TB, OK)
      physicaldrive 2I:0:5 (port 2I:box 0:bay 5, SATA, 3 TB, OK)
      physicaldrive 2I:0:6 (port 2I:box 0:bay 6, SATA, 3 TB, OK)
      physicaldrive 2I:0:7 (port 2I:box 0:bay 7, SATA, 3 TB, OK)
      physicaldrive 2I:0:8 (port 2I:box 0:bay 8, SATA, 3 TB, OK)

   SEP (Vendor ID PMCSIERA, Model  SRC 8x6G) 250 (WWID: ##############)

root@Server:~#

I may do some subsequent write-ups on the HP Array Configuration Utility.  Please feel free to ask questions in the comments section, but please keep in mind that I’m still learning to use this tool as well.

Posted in: How-To's / Tagged: ACU, HP, hpacucli, P410, Precise, RAID, Ubuntu

HP Array Configuration Utility Command Cheat Sheet

September 19, 2013 11:28 PM / 3 Comments / Kirk Schnable

New to the HP Array Configuration Utility?  Me too, so I did some Googling and found an awesome cheat sheet.  I don’t want to steal any credit from its original authors, but I do think it should be reposted for archival.  I’d like a copy of it for my own reference, so I decided to toss it here on Binary Impulse so others might stumble across it.

Here’s the original article: http://www.datadisk.co.uk/html_docs/redhat/hpacucli.htm

Utility Keyword abbreviations
Abbreviations chassisname = ch
controller = ctrl
logicaldrive = ld
physicaldrive = pd
drivewritecache = dwc
hpacucli utility
hpacucli # hpacucli 

# hpacucli help

Note: you can use the hpacucli command in a script

Controller Commands
Display (detailed) hpacucli> ctrl all show config
hpacucli> ctrl all show config detail
Status hpacucli> ctrl all show status
Cache hpacucli> ctrl slot=0 modify dwc=disable
hpacucli> ctrl slot=0 modify dwc=enable
Rescan hpacucli> rescan 

Note: detects newly added devices since the last rescan

Physical Drive Commands
Display (detailed) hpacucli> ctrl slot=0 pd all show
hpacucli> ctrl slot=0 pd 2:3 show detail 

Note: you can obtain the slot number by displaying the controller configuration (see above)

Status hpacucli> ctrl slot=0 pd all show status
hpacucli> ctrl slot=0 pd 2:3 show status
Erase hpacucli> ctrl slot=0 pd 2:3 modify erase
Blink disk LED hpacucli> ctrl slot=0 pd 2:3 modify led=on
hpacucli> ctrl slot=0 pd 2:3 modify led=off
Logical Drive Commands
Display (detailed) hpacucli> ctrl slot=0 ld all show [detail]
hpacucli> ctrl slot=0 ld 4 show [detail]
Status hpacucli> ctrl slot=0 ld all show status
hpacucli> ctrl slot=0 ld 4 show status
Blink disk LED hpacucli> ctrl slot=0 ld 4 modify led=on
hpacucli> ctrl slot=0 ld 4 modify led=off
re-enabling failed drive hpacucli> ctrl slot=0 ld 4 modify reenable forced
Create # logical drive – one disk
hpacucli> ctrl slot=0 create type=ld drives=1:12 raid=0 

# logical drive – mirrored
hpacucli> ctrl slot=0 create type=ld drives=1:13,1:14 size=300 raid=1

# logical drive – raid 5
hpacucli> ctrl slot=0 create type=ld drives=1:13,1:14,1:15,1:16,1:17 raid=5

Note:
drives – specific drives, all drives or unassigned drives
size – size of the logical drive in MB
raid – type of raid 0, 1 , 1+0 and 5

Remove hpacucli> ctrl slot=0 ld 4 delete
Expanding hpacucli> ctrl slot=0 ld 4 add drives=2:3
Extending hpacucli> ctrl slot=0 ld 4 modify size=500 forced
Spare hpacucli> ctrl slot=0 array all add spares=1:5,1:7
Display (detailed) hpacucli> ctrl all show config
hpacucli> ctrl all show config detail
Status hpacucli> ctrl all show status
Cache hpacucli> ctrl slot=0 modify dwc=disable
hpacucli> ctrl slot=0 modify dwc=enable
Rescan hpacucli> rescan 

Note: detects newly added devices since the last rescan

Posted in: How-To's / Tagged: ACU, HP, hpacucli, P410, Precise, RAID, Ubuntu

Installing & Configuring A Vanilla Wolfenstein Enemy Territory Dedicated Server On Ubuntu Linux

July 20, 2013 2:03 PM / 28 Comments / Kirk Schnable

Background

Wolfenstein Enemy Territory is a free-to-play multiplayer game, based on World War II “Allies vs. Axis” style combat.  It is a first-person shooter game, but it has objective-based gameplay.  Players will perform tasks such as escorting tanks, stealing gold, repairing radio transmitters and delivering stolen documents to the transmitter, building tank barriers, dynamiting protection walls, and other objectives based on the map.  The objective-based gameplay makes Enemy Territory a uniquely fun gaming experience, with the classic FPS aspects gamers crave.  Enemy Territory is not one of those games where you look at your kill statistics, you’re too busy defending your objective or advancing on your enemy!

The Goal of This How-To

At the end of this how-to, you should have a vanilla Enemy Territory running.  You will be able to install Enemy Territory on a Windows client, connect to the server, and play Enemy Territory online!

Installing The Vanilla Enemy Territory Server

First, we need to download the Linux Enemy Territory game files.  It is necessary to install the entire game in order to have a dedicated server, but no GUI is needed, you can do all of this through an SSH session if you choose.

You can obtain Wolfenstein Enemy Territory on various websites on the Internet, but for the purposes of longevity of the links in this how-to, I will use the files hosted on The United Federation of Gaming (as I have control over these files).

Download the game:

wget http://www.unitedfederationofgaming.com/dist/wolfet/linux/et-linux-2.60.x86.zip

Download the latest patch for the game:

wget http://www.unitedfederationofgaming.com/dist/wolfet/linux/ET-2.60b-linux.zip

Extract the Zip files:

unzip et-linux-2.60.x86.zip

unzip ET-2.60b-linux.zip

Make the installer executable:

chmod +x et-linux-2.60.x86.run

Run the installer:

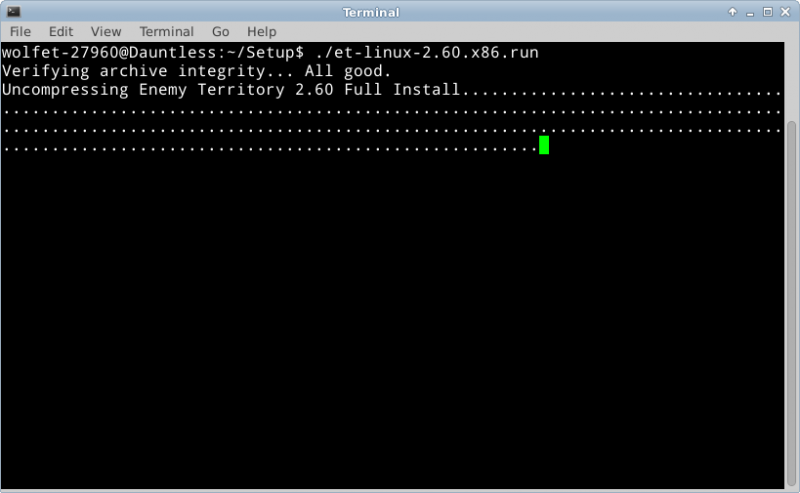
./et-linux-2.60.x86.run

Screenshot - 07202013 - 01:53:06 PM


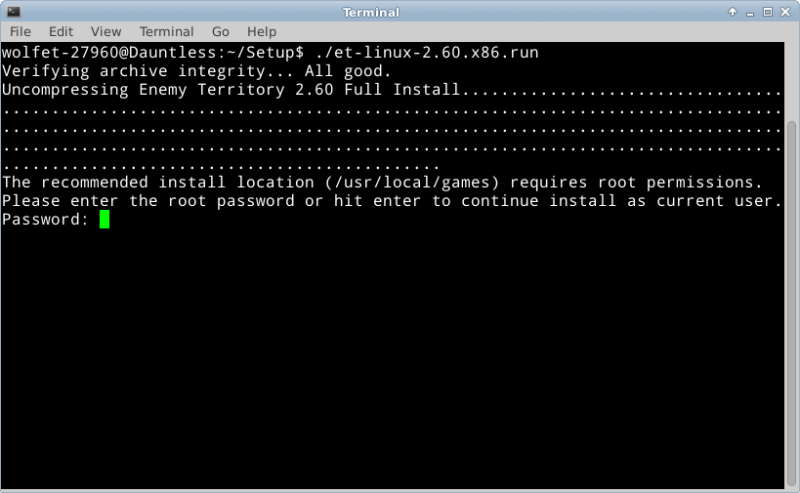
Screenshot - 07202013 - 01:53:22 PM


It is okay to continue as a limited user, and install the game in your home folder.

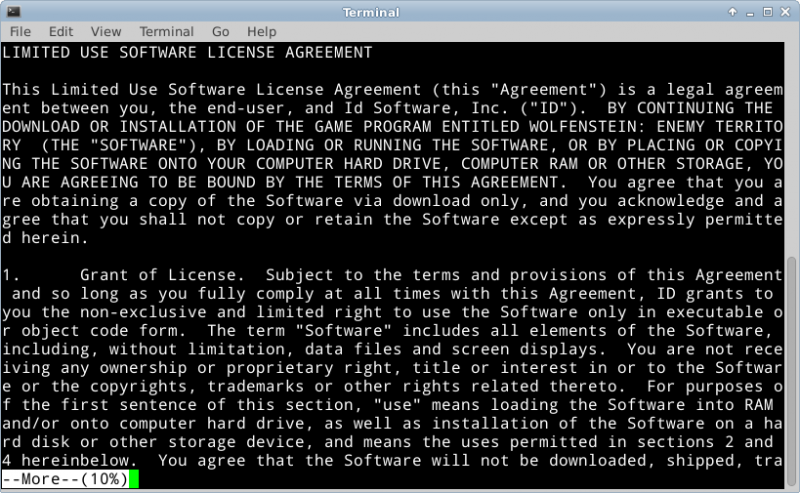
Screenshot - 07202013 - 01:53:34 PM


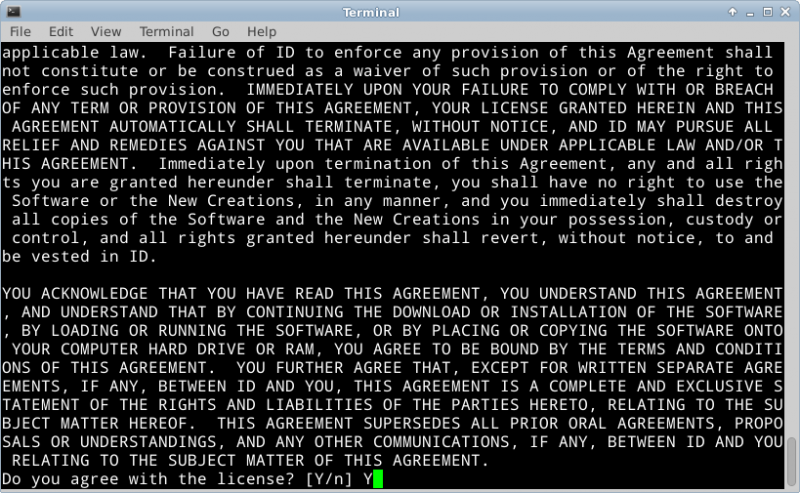
Press the Space Bar to quickly scroll through the license agreement.

Screenshot - 07202013 - 01:54:33 PM


Type “Y” and hit Enter to accept the license agreement.

Screenshot - 07202013 - 02:02:26 PM

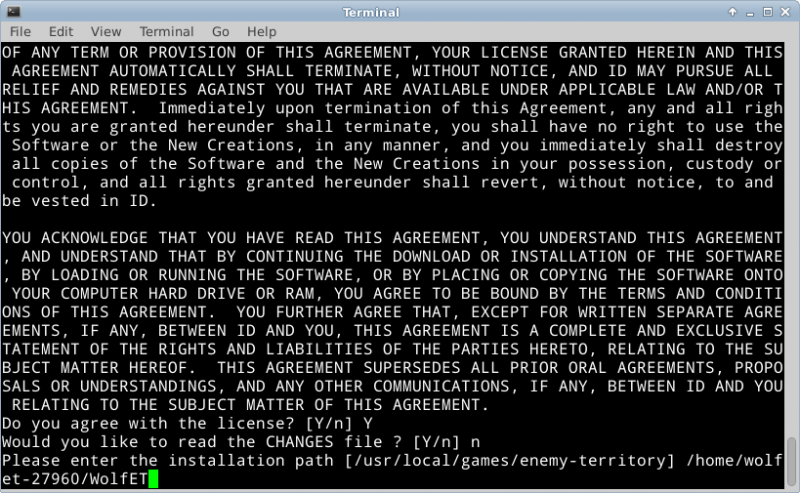
Press “n” and hit Enter to avoid reading the CHANGES file.

Type in a path to install the game to.  I recommend installing into your home folder, unless you have a good reason not to.  I installed to my home folder, in a folder called WolfET.

When prompted about where to put the symbolic links.  Symbolic links are basically just shortcuts, so this question is very non-important.  I put them in my home folder, in a folder called WolfETLinks.

If you get an error message like “No write permission to /path/to/symlink/folder” make sure the directory exists by using the mkdir command to create it.

When asked about installing the PunkBuster client/server files, type “Y” and hit enter.

Screenshot - 07202013 - 02:09:14 PM


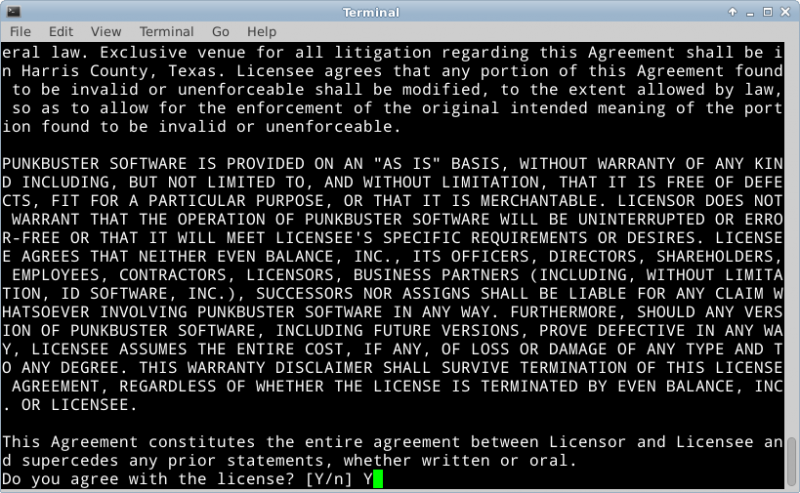
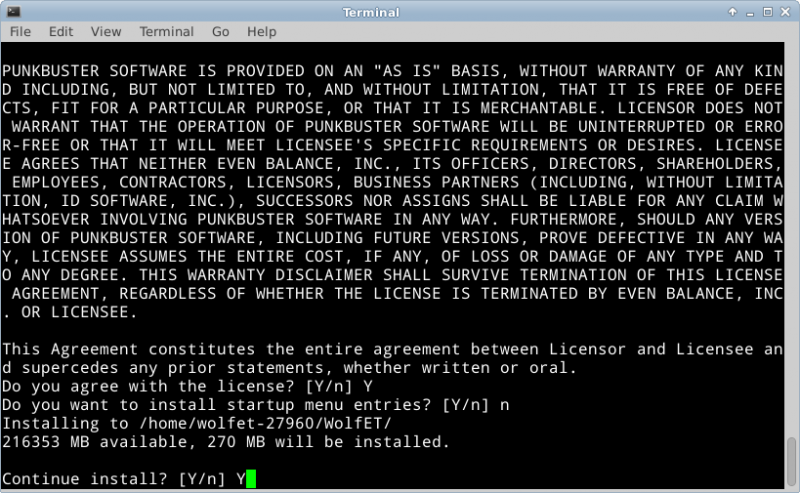
Again, use the Space Bar to scroll through the license agreement.  Press “Y” and hit Enter to accept it.

Screenshot - 07202013 - 02:10:29 PM


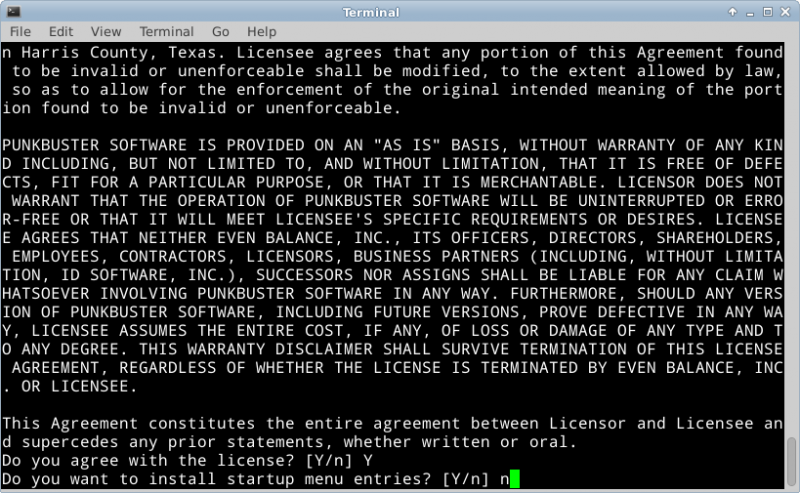
We do not want to install the startup menu entries, so press “n” and hit enter.

Screenshot - 07202013 - 02:11:30 PM


Press “Y” and hit Enter to continue the installation.

Screenshot - 07202013 - 02:12:27 PM


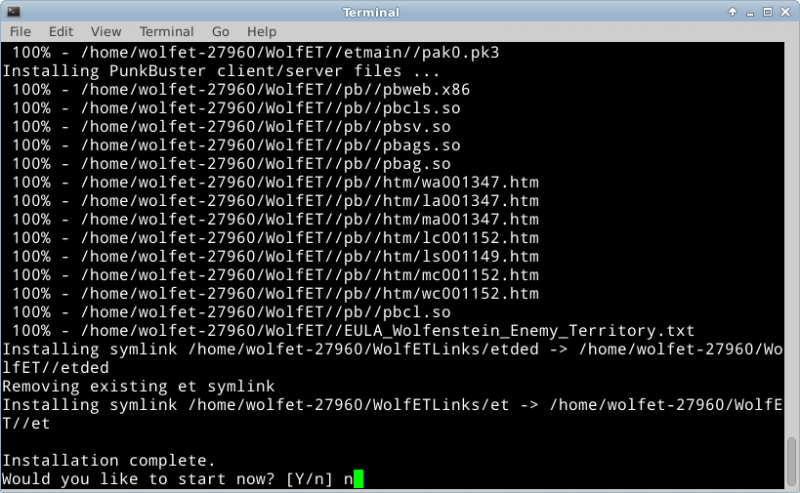
When the installation is completed, do not start the game now.  Press “n” and hit Enter.

Patch\Update The Game:

The patch files are located in the folder called Enemy Territory 2.60b

cd “Enemy Territory 2.60b/linux”

Copy the two files to the path where you installed Enemy Territory.  This will overwrite the old game files with the patched ones.

cp * /path/to/enemyterritory/

Configuration

The Enemy Territory server is configured by two files primarily: server.cfg and a map rotation cfg of your choice.  You can find these files in the etmain folder.

The vanilla configuration will mostly work for your vanilla server, but there are a few notable settings you might want to change.

server.cfg

Server Access Settings
set sv_maxclients allows you to set the number of slots available to your server.  The default is 20 players.
set g_password sets a join password on the server.  Most servers will want to leave this blank, and doing so is not a security risk.

Server Administrative Settings
set rconpassword sets a remote console password for the server.  You can use this to control the server from the ~ menu in-game.
set refereePassword sets a password to gain “referee” access in game, to change maps and handle basic functions from the GUI.

Server Bandwidth Settings
set sv_maxRate and set sv_dl_maxRate are speed limits.  I usually set them to 9999999999, to provide the best allowable performance to users.

Server Advertisement & MOTD Settings
set sv_hostname sets the name of your server on the Internet lobby.
set server_motd[0-5] sets the Message of The Day (MOTD) for the server.  This is shown during initial connection.  Usually people write server rules or other info here.

For ease of configuration, the rest of server.cfg can be left vanilla until you see a need to tweak it.  An entire post could be written about this file, but these are the basics of what most people will need to change.

Map Rotation Configuration
What I have done in the past, is copy campaigncycle.cfg to a file called servercycle.cfg and do my configuration in there.  For now, we can use campaigncycle.cfg as is the default.  It is possible to make your own custom campaign rotations, but that’s a post for another day.

Launcher
In the past, I’ve discovered that some of the configurations of Enemy Territory out of the box (and set by my own server.cfg) don’t seem to really apply correctly.  So, I’ve used a launcher script to start the game.  Create a file called startet.sh in the root folder (outside etmain, same folder etded.x86 is in) and put your launch instructions in it.  This is my startet.sh:

./etded +set com_hunkmegs 512 +exec servercycle.cfg +set net_ip “192.168.10.5” +exec server.cfg

com_hunkmegs is a reference to the amount of memory you will let the server consume.  I have found that increasing this limit is desirable when running a heavily loaded or modded server.  The rest of that should be fairly self explanatory.  Replace 192.168.10.5 with your server’s IP address.  Replace servercycle.cfg with the map rotation configuration file you made above.  If you renamed server.cfg, change that here as well.

Make the launcher executable:

chmod +x startet.sh

Run the launcher to start your game server.

./startet.sh

You should see a lot of text run down your screen, it will look like this generally:

ET 2.60b linux-i386 May  8 2006
----- FS_Startup -----
Current search path:
/home/wolfet-27960/.etwolf/etmain
/home/wolfet-27960/WolfET/etmain/pak2.pk3 (22 files)
/home/wolfet-27960/WolfET/etmain/pak1.pk3 (10 files)
/home/wolfet-27960/WolfET/etmain/pak0.pk3 (3725 files)
/home/wolfet-27960/WolfET/etmain/mp_bin.pk3 (6 files)
/home/wolfet-27960/WolfET/etmain

----------------------
3763 files in pk3 files
execing default.cfg
couldn't exec language.cfg
couldn't exec autoexec.cfg
Hunk_Clear: reset the hunk ok
Bypassing CD checks
Found high quality video and fast CPU
--- Common Initialization Complete ---
Opening IP socket: 192.168.10.5:27960
Hostname: dauntless.epecweb.com
Alias: localhost
Alias: Dauntless
IP: 127.0.0.1
Started tty console (use +set ttycon 0 to disable)
execing servercycle.cfg
------ Server Initialization ------
Server: oasis
Hunk_Clear: reset the hunk ok
----- FS_Startup -----
Current search path:
/home/wolfet-27960/.etwolf/etmain
/home/wolfet-27960/WolfET/etmain/pak2.pk3 (22 files)
/home/wolfet-27960/WolfET/etmain/pak1.pk3 (10 files)
/home/wolfet-27960/WolfET/etmain/pak0.pk3 (3725 files)
/home/wolfet-27960/WolfET/etmain/mp_bin.pk3 (6 files)
/home/wolfet-27960/WolfET/etmain

----------------------
7526 files in pk3 files
Sys_LoadDll(/home/wolfet-27960/.etwolf/etmain/qagame.mp.i386.so)... 
Sys_LoadDll(/home/wolfet-27960/.etwolf/etmain/qagame.mp.i386.so) failed:
"/home/wolfet-27960/.etwolf/etmain/qagame.mp.i386.so: cannot open shared object file: No such file or directory"
Sys_LoadDll(/home/wolfet-27960/WolfET/etmain/qagame.mp.i386.so)... ok
Sys_LoadDll(qagame) found **vmMain** at  0xd2d3ab90  
Sys_LoadDll(qagame) succeeded!
------- Game Initialization -------
gamename: etmain
gamedate: Mar 10 2005
Not logging to disk.
Gametype changed, clearing session data.
Enable spawning!

There will be some errors in this, notably the failure loading qagame.mp.i386.so.  These errors are OK in my experience…

Once you’re up and running, you’ll see some text like this in your console:

0 teams with 0 entities
-----------------------------------
Setting MOTD...
broadcast: print "Server: g_balancedteams changed to 1\n"
Setting Allied autospawn to Old City
Setting Axis autospawn to Old City
^1Warning: setstate called and no entities found
-----------------------------------
execing preset_high.cfg
Hitch warning: 1969 msec frame time
Resolving etmaster.idsoftware.com
etmaster.idsoftware.com resolved to 192.246.40.60:27950
Sending heartbeat to etmaster.idsoftware.com
Hitch warning: 545 msec frame time

^1Warning: setstate called and no entities found is another OK error.  It just means there is no one in the server right now.

Firewall Rules

If your dedicated server is behind a firewall (and I certainly hope it is) you will need to forward a port to allow Enemy Territory traffic.  That port is 27960 by default.

You’re Done!
Congratulations, if you’ve followed this guide, you now have a functional Enemy Territory server!  To play, connect to your server’s IP address or find the game on the Internet lobby.

If you have any questions about anything in this guide, or Enemy Territory server administration in general, please feel free to ask in the comments.  I am not, by any means, an expert on Enemy Territory servers, but I’ve run one for a number of years and I know more about them than the average person, so go ahead and ask questions!  Thanks for reading.


Posted in: How-To's / Tagged: Enemy Territory, Gaming, Linux, RTCW, Ubuntu

SSH Tunneling on Windows Using PuTTY

July 11, 2013 9:42 AM / 1 Comment / Don Oerkfitz

Imagine if you will; you are at work or school and you need to access a site, but its blocked. So being the tech savvy person you are you try a proxy tunnel and that too is blocked.  What do you do?

You create an SSH tunnel proxy on your own machine!

First off, in order to do any of this regardless of your Operating System you need:

  1. an SSH Server
  2. a knowledge of how to configure your computer / browser to use the proxy
  3. some knowledge of writing scripts (optional if you want to run stuff when you startup your computer)


Now, if you are on linux or mac it is simple as opening the terminal and running:

ssh -D 55555 user@your.ssh.server

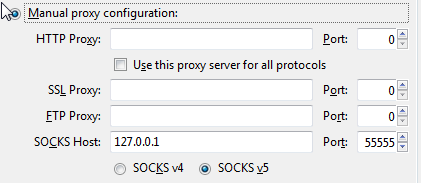
Then just point your browser or computer system network settings over to 127.0.0.1 port 55555 it will look like this (on firefox):

2013-05-16 15_25_03-Connection Settings

However, if you are an unfortunate Windows OS user, your situation isn’t as easy. Sure, you could install Cygwin to get ssh on windows; but that just takes a lot of time and configuring and who has the patience for that?! So instead you use the easiest SSH tool for windows: PuTTY.

PuTTY is a simple executable file that lets you connect to ssh servers easily and effectively. It also allows you to store “Sessions” with special settings for the servers you connect to, but all that can be looked at on your own; now back to the topic at hand.

In order to make connecting to your server as simple as possible I created a script that can be ran. You can even edit this script to include some other programs you want to “auto-launch” once you have the proxy up and running.

Dim objShell
Set objShell = WScript.CreateObject( "WScript.Shell" )
objShell.Run("Path\To\putty.exe -ssh -D 55555 user@your.ssh.server -pw passwordHere")
'Put other autorun code here
Set objShell = Nothing

(take care to replace all the necessary variables in the objShell.Run command i.e. Paths, Passwords, Users, etc.)

now copy this code and paste it into a file and name the file WhateverNameYouWant.vbs (the .vbs portion is crucial as it is how the script will be able to execute). Execute the script and then you’re almost done. All that is left is to configure whatever program (as long as it supports a SOCKS5 proxy) to use the proxy.  Again to do it on firefox:

2013-05-16 15_25_03-Connection Settings

Make sure to leave PuTTY up and running, if you close it out it causes your proxy to shutdown as well.

NOTE: configuring your browser to use the proxy in the way shown above will cause all your traffic all the time to be sent through the proxy.  If you want a way to toggle between proxy and no proxy install an addon onto the browser (I recommend FoxyProxy, it’s compatible with both Firefox and Chrome).


I hope you have enjoyed this little tutorial and if you have any questions leave a comment down below.

Posted in: How-To's

Post Navigation

← Older Posts
Newer Posts →

Pages

  • About Binary Impulse
  • BashBytes

Recent Posts

  • My UBook X Linux Tablet Adventure and how I learned more than I ever thought I would need to know about accelerometer drivers
  • Migrating Proxmox Hypervisor’s Boot Volume ZFS Mirror To New (Smaller) Disks
  • OPNsense Performance Tuning for Multi-Gigabit Internet
  • Reddit Deplatforms Popular Microsoft Software Swap Subreddit
  • Comcast Upgrades Gigabit Pro from 3Gbps to 6Gbps!
May 2025
M T W T F S S
 1234
567891011
12131415161718
19202122232425
262728293031  
« Apr    

Recent Comments

  • jasonistre on OPNsense Performance Tuning for Multi-Gigabit Internet
  • Nick on OPNsense Performance Tuning for Multi-Gigabit Internet
  • Kirk Schnable on OPNsense Performance Tuning for Multi-Gigabit Internet
  • nick on OPNsense Performance Tuning for Multi-Gigabit Internet
  • Eric on My UBook X Linux Tablet Adventure and how I learned more than I ever thought I would need to know about accelerometer drivers

Categories

  • How-To's
  • Humorous
  • Musings
  • Newsworthy
  • Other

Meta

  • Register
  • Log in
  • Entries feed
  • Comments feed
  • WordPress.org
© Copyright 2025 - Binary Impulse
Infinity Theme by DesignCoral / WordPress