Category Archives: How-to’s

Tutorials and step-by-step instructions.

Lenovo ThinkPad W520 – Workaround For Linux Freezing Issue At Boot

Background
I have been a proud Lenovo ThinkPad W520 owner for the past several years, but there has been a persistent issue I have experienced, as I have gone the route of dual booting Windows and Linux on my laptop.

Through the years, I have run Ubuntu 10.04, Xubuntu 12.04, Linux Mint 13, Linux Mint 14, and Linux Mint Debian Edition on this laptop.  Of these distributions, Ubuntu 10.04 is the only one I haven’t had an issue with.

The issue I have experienced is that after a fresh install of Linux, the laptop will freeze every other boot.  Sometimes, it freezes before reaching the login screen, sometimes before even reaching the boot splash screen, and sometimes just moments after logging in.  Other times, it would boot and function normally for hours.  It has been a very flaky issue.

In 2012, I posted a thread on the Ubuntu Forums on how I fixed the issue for 12.04.  I have applied this fix, necessarily, on Linux Mint several times since then as I have done new installs.  I wanted to create this post so others can find this information, and understand that it may apply to other future distributions down the line until this issue gets fixed upstream.


The Workaround
I have consistently resolved this issue by adding a boot flag to GRUB.

Edit /etc/default/grub, and add “nox2apic” to your boot parameters, like so:

GRUB_CMDLINE_LINUX_DEFAULT="nox2apic quiet splash"

After making this change, run update-grub and reboot the computer.

This has saved me so much frustration over the years, I hope it helps you as well!  If you run into a similar issue on another ThinkPad model, please let me know in the comments if this fix worked for you!

Teamviewer with UAC and Administrative Rights

Ran into an issue with a user where I needed to remotely access their computer.  They needed software installed ASAP and of course did not have admin access to the computer.  I had them go to www.teamviewer.com and install the light client which does not require administrative access.  

When going to install the application UAC came up but I could not see, click, or type when UAC was active.  With some quick googleing I was able to find that you can run the client with administrative credentials upon connecting to the client.   PROPS Teamviewer.

See the steps below.

1.

Fire up Teamviewer

 
2.

Ask for the ID number for the user, connect to that ID.

This will be a 9 digit number

 
3.

Local admin already?

If the user is not local admin already (if they are you will be able to interact with UAC), you will be prompted with this screen

 
804c7c24e3a1b7e2e4847b0a91dffee4a5db438c781e5308d18e7c4f45710207_1_big
4.

Click on ‘Click for additional information’

You will be prompted with the next window

 
97f3e68d0457d8c69d46f92ac4678355ce5193e874433fbaf6ef8e842fdb076c_2_big
5.

Authenticate as the local admin account

This basically allows you to restart the clients Teamviewer session with the local administrator account

A46209bd88214ff72860b0e697fa629dcb2a3b90fc1bf8053810e90d20a42ef8_3_big
6.

Connect & interact with UAC on a standard account!

Once you enter correct credentials, the status in the bottom left will tell you that it is restarting, and then you will join the end user’s session, as always

 
9be1c32a98eb178c326cc6756b624230e8ac4afa9ec9f90217bb41d656bc06c1_4_big

Tested and working

Running Land Elevation Surveys With Google Earth

Background Information

Living in a rural area, I am often tasked with finding ways to connect remote sites to the Internet in places where cable and DSL are not available.  In these situations, the best alternative is usually the local wireless Internet service provider (WISP).

Many of these providers utilize point-to-point (PTP) and point-to-multipoint (PTMP) wireless connections running on non-licensed frequencies (900MHz, 2.4GHz, 5GHz, and others) to provide service to these types of hard to reach locations.

These connections work best with a line of sight (LOS) between your location and your ISP tower site.

From the ISP standpoint, determining whether an installation is viable usually comes down to visiting the site and trying to establish a connection, but running a few elevation surveys can help determine whether land barriers may have  a strong probability of obstructing the signal.

ISPs purchase expensive software tools to conduct these surveys, but a lot of it can be done with a reasonable amount of accuracy in Google Earth!

This tutorial will describe the basic steps needed to generate an elevation survey in Google’s free Google Earth desktop software.


1. Download and Install Google Earth.
At the time of this writing, Google Earth can be obtained here.

2. Locate Your Sites
Find the desired install site and the potential tower sites on Google Earth.  You can search by address, GPS coordinates (latitude & longitude), or by simply scrolling around the view.

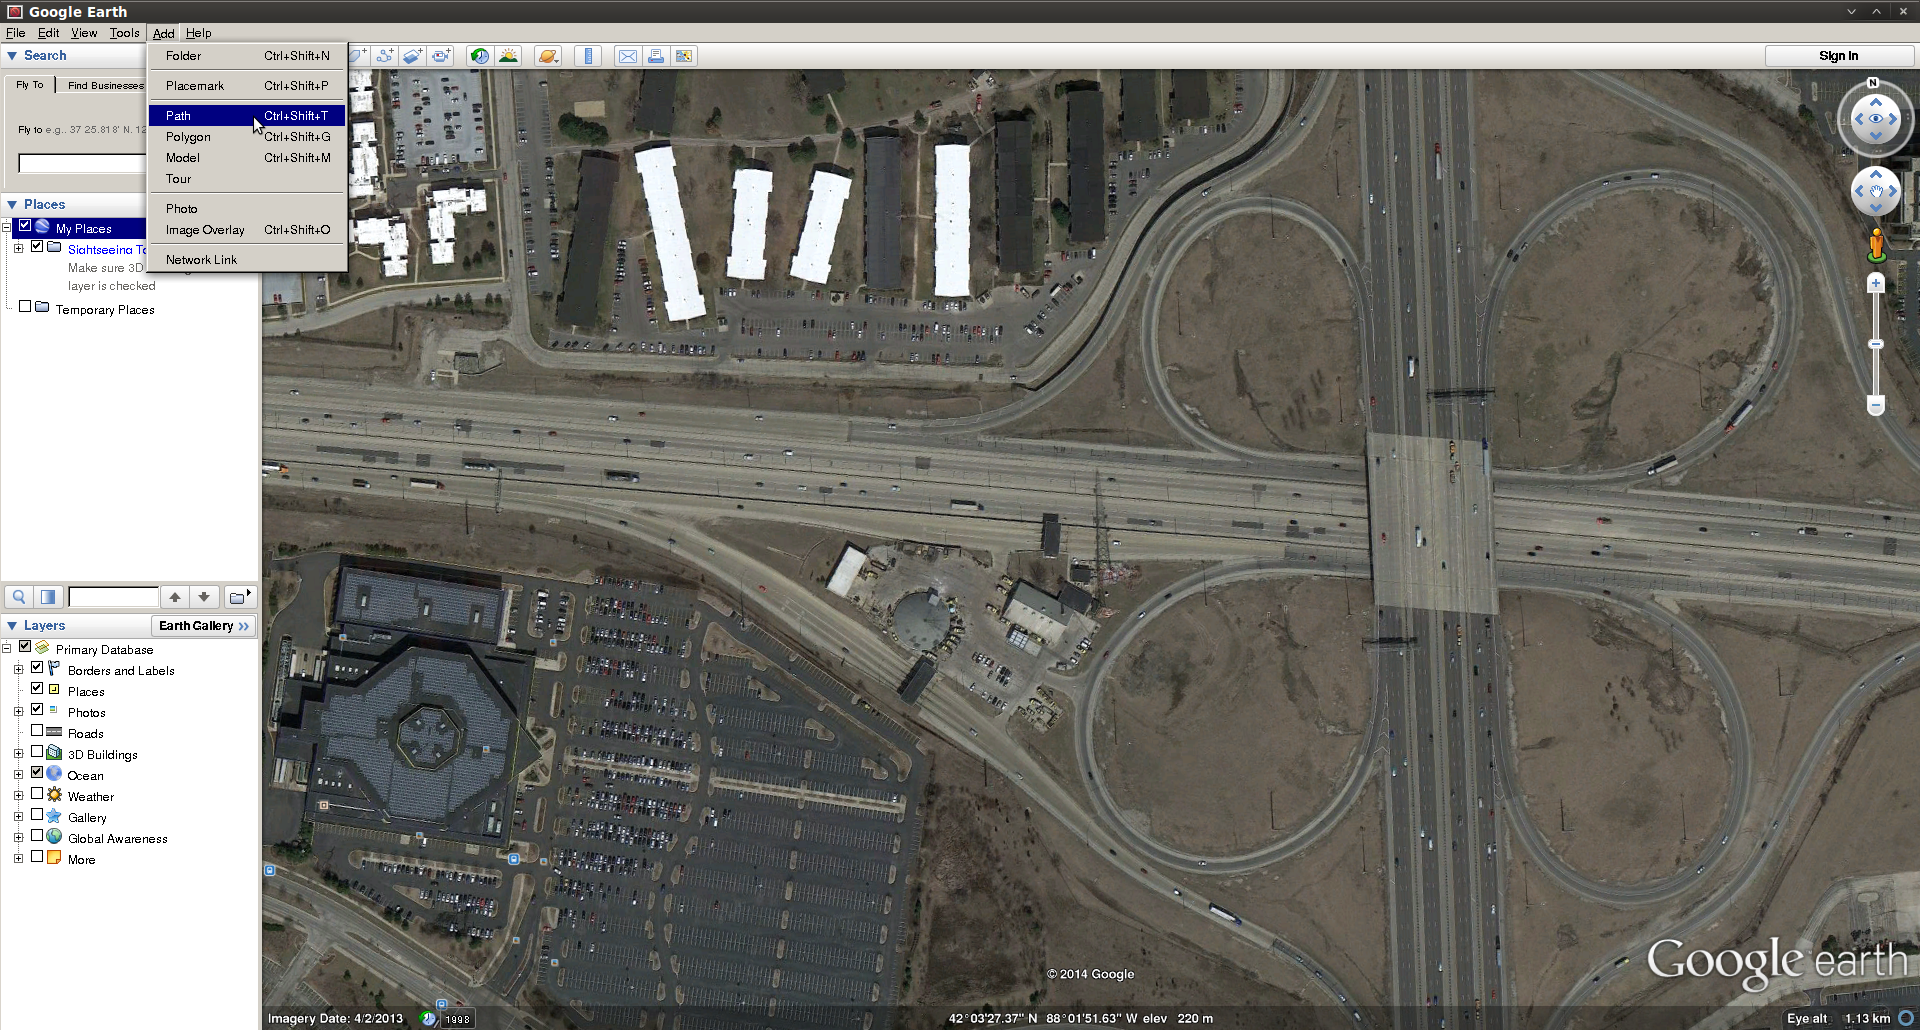
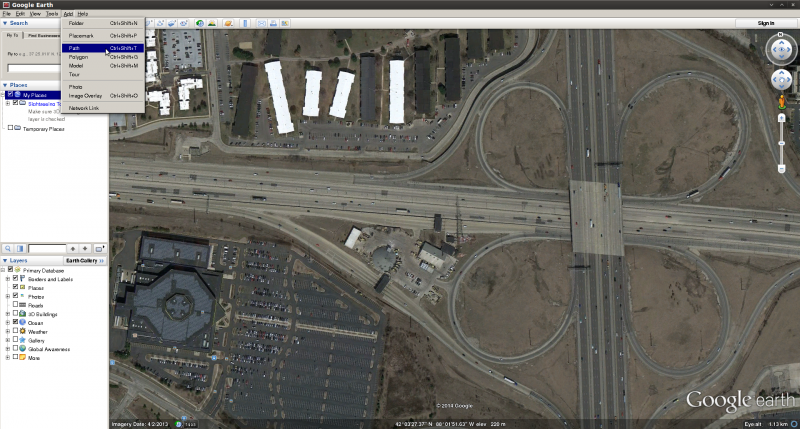
3. Go to the “Add” menu, and click “Path”.
This will open the path editor, and turn your mouse into a tool to create path points.

GoogleEarth-Add-Path


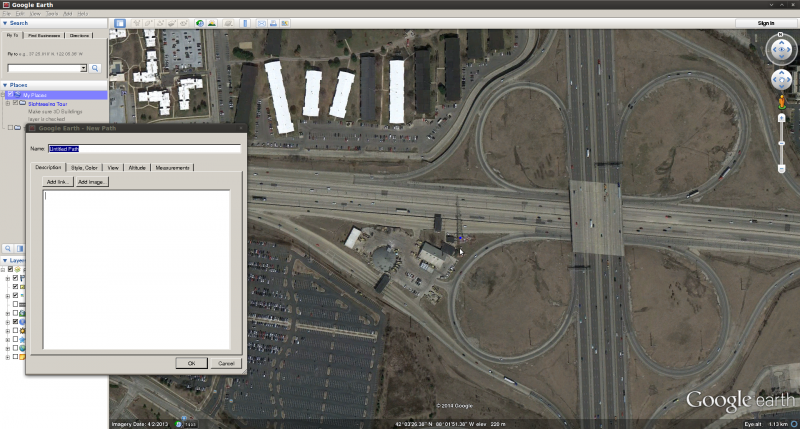
4. Locate your first site, and click once to create a path point.
This will appear on your screen as a blue dot.

GoogleEarth-Path-Dot1


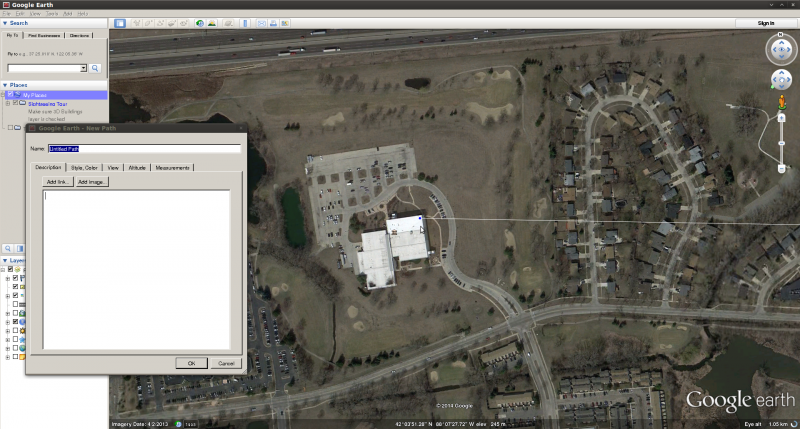
5. Locate your second site, and repeat the procedure, clicking on the site to make a path point.
This will appear on your screen as a second blue dot, and will create a white line which is your path.

GoogleEarth-Path-Dot2


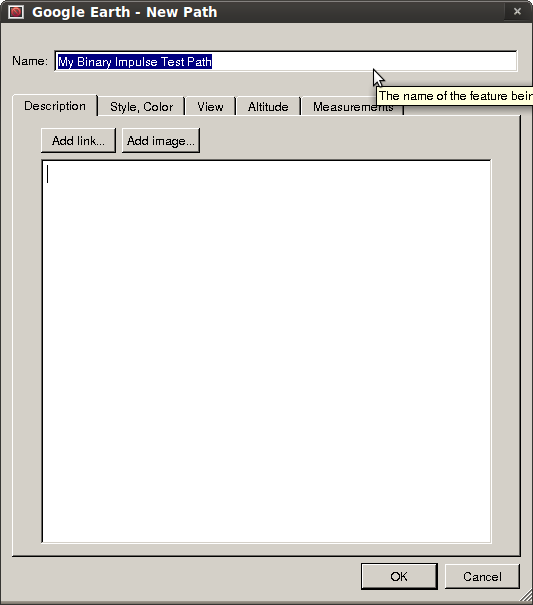
6. Name the path.
Call it something other than “Untitled Path” to describe what the path is.  (eg. Tower Site A to Customer Site B).

GoogleEarth-NamePath


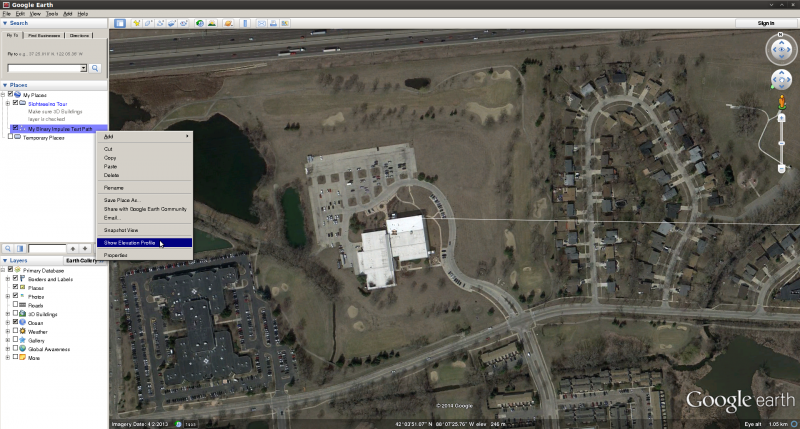
7. Right click the path, and click “Show Elevation Profile”.
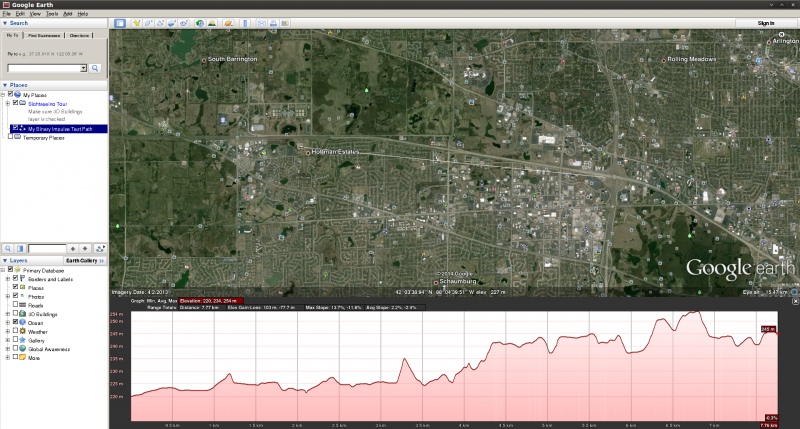
This will open the elevation profile view.

GoogleEarth-Show-Elevation-Profile


GoogleEarth-Showing-Elevation-Profile


8. Expand on this, if you like.

You can create as many paths as you choose, name them accordingly, and even organize them into folders.  You can save Google Earth project files, which can be sent to customers, others at your organization, or anyone who suits your needs.

Keep in mind that the elevation profile is ground level elevation, so you will need to add heights of towers and buildings at either side to make the profile useful.

Also keep in mind that the elevation profile doesn’t know about trees and buildings in the area, so these will need to be factored in as well when determining the viability of a wireless signal.

All in all, this is a guideline and the results are not guaranteed to be useful every time, but can be a helpful tool for the WISP arsenal!

Running Wolfenstein Enemy Territory At Native 1920×1080 Resolution (on Windows)

A lot of people I play Enemy Territory with have been contemplating switching to a version of the program called ET Legacy, and their reasoning is generally related to screen resolutions.

Wolfenstein Enemy Territory is a very old game, and the designers never conceived that it would ever be played on a 1920×1080 screen resolution, so it was never coded to have that option in the Video Settings.

That being said, you can make a few modifications to your launcher shortcut, and run Enemy Territory at true native 1920×1080 resolution.

Note: The only glitch I’ve encountered with this so far, is that when you’re changing video settings in the game, the game will not revert back to 1920×1080 without a game restart after a settings change (such as texture quality, dynamic lighting, etc changes).  So, go set your quality levels for textures and everything prior to modifying your shortcut, then you should avoid encountering any of those issues.

Linux\Mac: You can use similar command switches on Linux or Mac to achieve this goal, but the process of editing the shortcut\launcher may vary.

Right click your Enemy Territory shortcut, and hit Properties.

et-icon


You’ll want to add these options to your shortcut:
(com_hunkmegs is not related to the video settings, but a few extra hunkmegs will help your game performance.)

+r_mode "-1" +r_customwidth "1920" +r_customheight "1080" +cg_fov "115" +set com_hunkmegs "768" +vid_restart

You can do so by adding them after the trailing quotation mark surrounding your program name, as show in the following screenshot:

et-settings

My full shortcut application path is as follows, since it’s not entirely visible above.  (The “Target” box above).

"C:\Program Files (x86)\Wolfenstein - Enemy Territory\ET.exe" +r_mode "-1" +r_customwidth "1920" +r_customheight "1080" +cg_fov "115" +set com_hunkmegs "768" +vid_restart

And there you have it!  Next time you launch Enemy Territory, you should be presented with a full screen 1920×1080 gaming experience.  Enjoy!


Installing HP Array Configuration Utility (HP ACU) on Ubuntu

Updated for 16.04.

This guide will help you get up and running with HP’s command line Array Configuration Utility (ACU) on Ubuntu.  This guide may will be especially useful if you have an HP Proliant server, or an HP P400 \ P410 RAID card or similar.

Install the HP Linux Repository

echo "deb http://downloads.linux.hpe.com/SDR/downloads/MCP/ubuntu xenial/current non-free" >> /etc/apt/sources.list.d/hp.list

Install HP Linux Repository GPG Key

wget -qO - http://downloads.linux.hpe.com/SDR/downloads/MCP/GPG-KEY-mcp | sudo apt-key add -

 Prepare For The Installation

sudo apt-get update

Install Packages

sudo apt-get install cpqacuxe hpacucli hpsmh

HP Array Configuration Utility Is Now Installed!

If you’ve never used the Array Configuration Utility before, here’s a cheat sheet for the commands you might want: http://binaryimpulse.com/2013/09/hp-array-configuration-utility-command-cheat-sheet/

I may do a write-up on some of the more useful commands at a later time.  For now, here’s what you should try to see if everything’s working.  (Along with sample output from my server.)

root@Server:~# hpacucli ctrl all show status

Smart Array P410 in Slot 3
   Controller Status: OK
   Cache Status: OK

root@Server:~# hpacucli ctrl all show config

Smart Array P410 in Slot 3                (sn: ##############  )

   array A (SATA, Unused Space: 0  MB)

      logicaldrive 1 (19.1 TB, RAID 5, OK)

      physicaldrive 1I:0:1 (port 1I:box 0:bay 1, SATA, 3 TB, OK)
      physicaldrive 1I:0:2 (port 1I:box 0:bay 2, SATA, 3 TB, OK)
      physicaldrive 1I:0:3 (port 1I:box 0:bay 3, SATA, 3 TB, OK)
      physicaldrive 1I:0:4 (port 1I:box 0:bay 4, SATA, 3 TB, OK)
      physicaldrive 2I:0:5 (port 2I:box 0:bay 5, SATA, 3 TB, OK)
      physicaldrive 2I:0:6 (port 2I:box 0:bay 6, SATA, 3 TB, OK)
      physicaldrive 2I:0:7 (port 2I:box 0:bay 7, SATA, 3 TB, OK)
      physicaldrive 2I:0:8 (port 2I:box 0:bay 8, SATA, 3 TB, OK)

   SEP (Vendor ID PMCSIERA, Model  SRC 8x6G) 250 (WWID: ##############)

root@Server:~#

I may do some subsequent write-ups on the HP Array Configuration Utility.  Please feel free to ask questions in the comments section, but please keep in mind that I’m still learning to use this tool as well.