• About Binary Impulse
  • BashBytes
Binary Impulse

Category Archives: How-to’s

Tutorials and step-by-step instructions.

Cheap spectrum analysis for wireless

February 9, 2013 2:14 PM / Leave a Comment / Dan

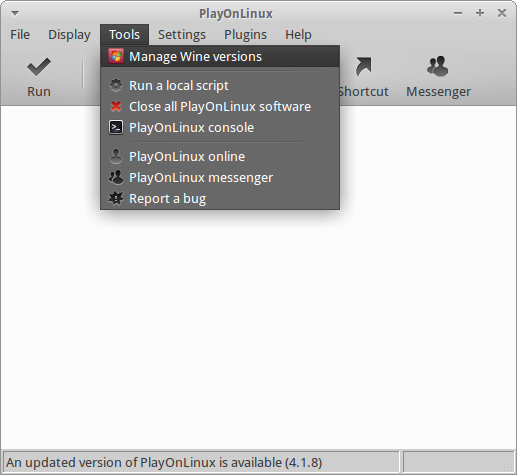
When I was going through college for networking I learned to hate wireless.  I had come to learn that it was insecure, unreliable, unpredictable, and difficult to troubleshoot.  I got into a job I love and then the wireless era began.  We are now implemented hundreds of new wireless network devices a year.  We have built out our infrastructure with a lot of time and planning and so far have been quite successful.  We use primarily Cisco equipment with some Ubiquiti back-hauls for some of our outdoor setups.  Cisco provides some very basic spectrum information, for someone who has done some in-depth work with wireless and Cisco this is enough information.  It doesn’t seem to provide any visual representation of the network which can be had to explain to upper management.  Spectrum analyzers can be thousands of dollars and for what we are doing we don’t need something that granular.  We need something to tell use when channels are overloaded/consumed with interference and if antenna’s are aligned properly during setup.

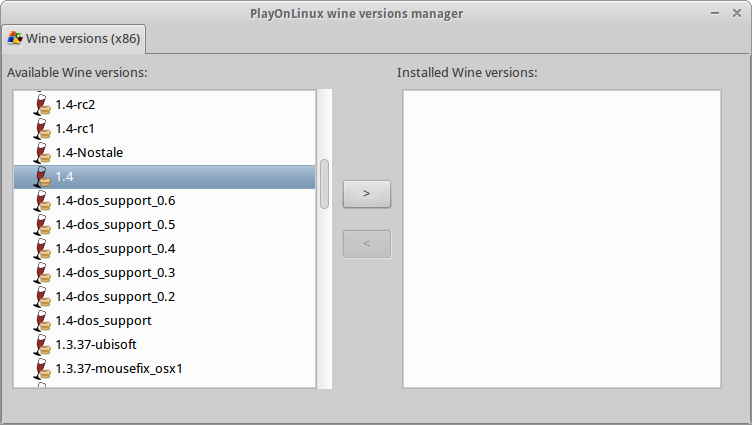
We bought a few Ubiquiti bridges a while back and noticed the AirOS product line has a built in spectrum analysis.  This is handy when selecting channels as it ensures you are not selecting a channel already in use.  We have been watching Ubiquiti for some time now and when we started running into some issues with our client wireless access I went out and bought a Ubiquiti Bullet M5 and an M2.  I think total for the both I paid about $140 (includes adapters and some antennas I had lying around).  As you might guess the M2 runs off of the 2.4Ghz spectrum and the M5 runs off the 5.8Ghz spectrum.  With the Bullets, a switch, and a windows laptop/netbook and power source we can easily run up and diagnose a problem.  This setup is also very mobile and could be brought out into the field to be worked on (barring a power source of course).

At this point in time I have been unsuccessful in getting the spectrum analysis software working in anything other than windows.

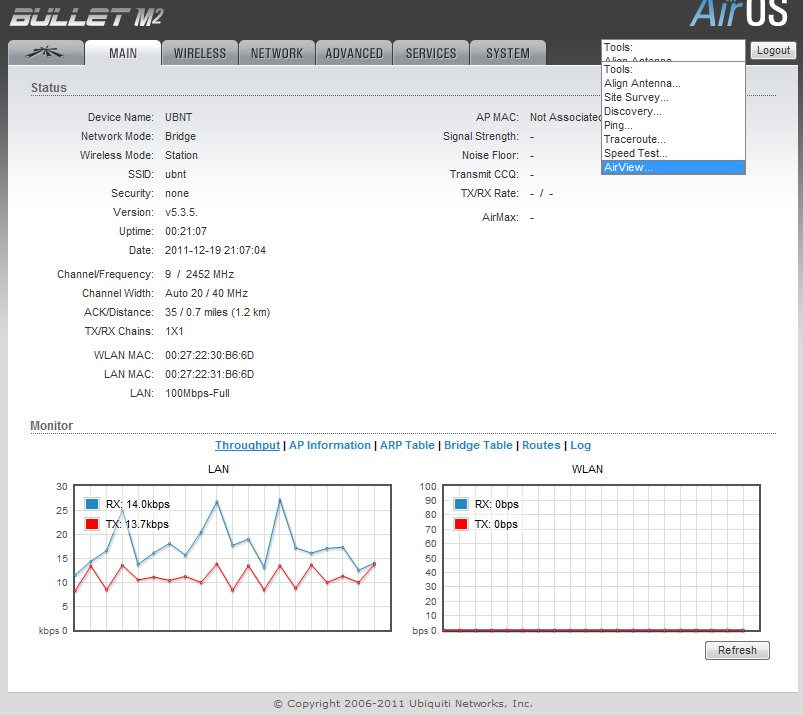
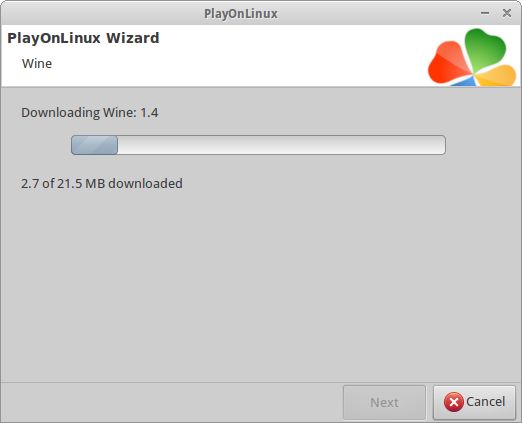
I am going to assume you can get the default information for the Ubiquiti Bullet and login.  My bullet is completely stock, no configuration needed to do what I will show you.  After logging in you get some beautiful throughput graphs and other good troubleshooting information.  There is also a drop down menu near the logout button which provides you with an AirView option.  AirView is the spectrum analyzer software.

Screenshot - 02092013 - 01:15:35 PM

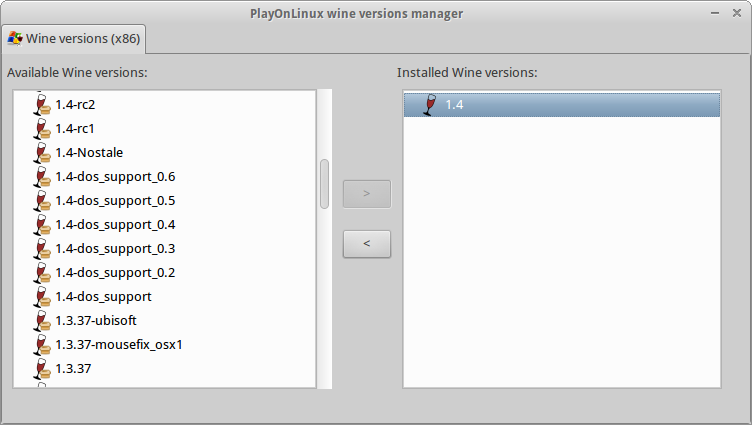
Airview is a Java Network Launch Protocol application which obviously requires Java.  The analyzer in my virtual machine runs about 9 frames a second and shows pretty close to real time the actual spectrum.  Here is a 2.4Ghz snapshot of my work where our 2.4Ghz spectrum is very overloaded. Sadly this is with only a few clients in the area.


Screenshot - 02092013 - 01:54:43 PM

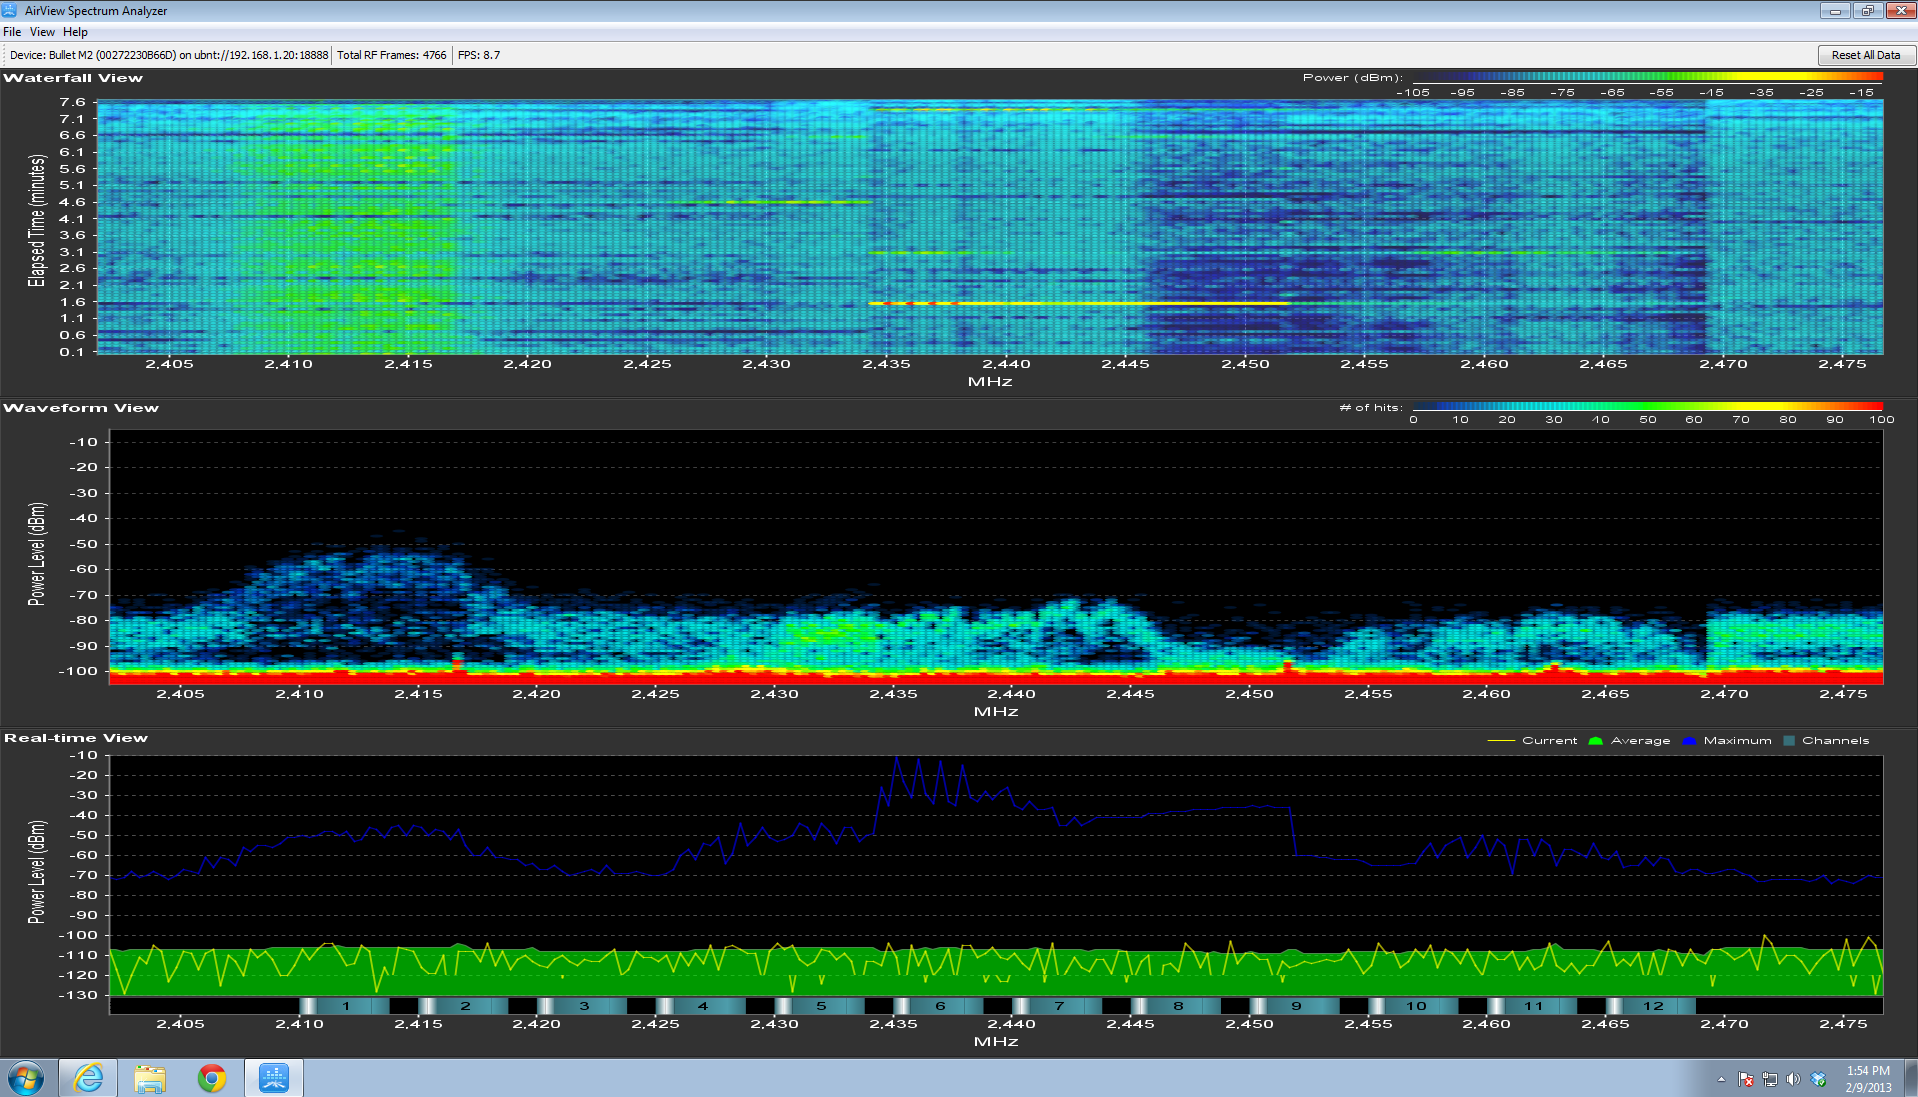
The top visual: Waterfall ViewThis is a good representation of channel utilization over time.  You can clearly see if a client is connected and on what channel.

The middle visual: Waveform View
This is a good visual of how often you get a signal at a certain power or signal strength.

The bottom view:  Real-time View
This is good for seeing what is happening right this second compared to the average and maximum power levels recorded.  After letting this run for a few minutes you can compare spikes and hopefully identify any problems.

I plan on using these to make future recommendations to clients and potential trend information over a period of time.  This could help identify possible interferers that could be as simple and intermittent as a microwave.  These pictures will be invaluable when trying to explain to upper management how or why we are having problems, and what should be done to correct it.


Posted in: How-To's, Musings / Tagged: analysis, cheap, spectrum, Ubiquiti

Quick and easy MSRDP script

January 30, 2013 10:06 AM / Leave a Comment / Dan

I love Linux, but as we all know we have to work on windows computers usually on a day-to-day basis.  We have servers we constantly have to RDP (remote desktop) into to work with active directory, etc.  The Terminal server client in 10.04 was all buggy and when you closed the window it would reconnect in 30 seconds.  This was especially annoying when you left a session open on your locked computer on the other side of the building and needed to hop on real quick to do something.

ubuntu-Terminal-Server-Client

I found out that the problem was that certain libraries had bee updated and caused this bug.   I decided using rdesktop for a while would suffice and created a launcher on my panel to run this command.  It wasn’t pretty for the longest time, a bash terminal asking for usernames, etc.  I really didn’t like it.  I stumbled across zenity a while ago and decided to use that to hide the password and pass that to the rdesktop command.  It is pretty simple actually.
I prefer to hard-code my username and domain in so that I don’t have to constantly fill it out, however more zenity windows could easily be added if more security or flexibility would be needed.  I saved this into a script, made it executable, and then created a launcher to run the script.  I haven’t spent much time on it but I could not just put this code into a launcher and run it (on XFCE, I suppose other frontends like gnome2 or unity might work).

rdesktop -u <Username> -d <domain> -g 1280x1024 $(zenity --entry --text="Hostname/IP please...") -p $(zenity --password --text="Password Please...")

The code above in a launcher provides these dialogue boxes:

Username

password


Zenity provides a lot of flexibility in bash scripting so end users don’t have to see a techy/confusing bash window to do something simple.  Zenity options:

OPTIONS
       This program follows the usual  GNU  command  line  syntax,  with  long
       options starting with two dashes (`-').

       Dialog options

       --calendar
              Display calendar dialog

       --entry
              Display text entry dialog

       --error
              Display error dialog

       --file-selection
              Display file selection dialog

       --info Display info dialog

       --list Display list dialog

       --notification
              Display notification

       --progress
              Display progress indication dialog

       --question
              Display question dialog

       --text-info
              Display text information dialog

       --warning
              Display warning dialog

       --scale
              Display scale dialog

       --color-selection
              Display color selection dialog

       --password
              Display password dialog

       --forms
              Display forms dialog

We will definitely be using zenity to make some things more user friendly…

Posted in: How-To's, Musings / Tagged: bash, mstsc, rdp, script, zenity

Linux Vinyl Plotting With A Gerber enVision Plotter

January 13, 2013 7:00 PM / Leave a Comment / Kirk Schnable

I recently had the opportunity to work with an older Gerber enVision plotter from a township.  I had major difficulties getting the old version of Omega working with their USB licensing stick, and I knew that getting anything like this working on Windows without proper licensing would be an inadvisable, and rocky road ahead.

I decided to look into open source solutions, and I found out that Inkscape can do vinyl plotting with an extension called InkCut.

This tutorial will attempt to comprehensively explain how I got this working.  I am by no means an expert, but I found very limited web resources out there on this topic, and I am hopeful that someone will eventually stumble on this article and find it useful.

Background
A simple, free, and open source solution to an expensive and complex problem: How do we plot stuff with our vinyl plotter?

Assumptions
This tutorial will assume that you have some prior experience with the Linux terminal and the Linux desktop.  On my test computer, I was working with a clean installation of Ubuntu 12.04 (12.04.1) LTS.  However, any Ubuntu or Debian flavor should be acceptable.  I am also assuming you have an older Gerber enVision series plotter.  If this is not the case, I imagine most of these instructions will apply fairly well to any kind of vinyl plotter.

The Plotter
Here are some photos of the Gerber enVision plotter I was working with.

2013-01-01 13.20.33

2013-01-01 13.20.42


The plotter interfaced with the computer using a serial connection.

Ubuntu & This Plotter
In order to establish proper communications between the computer and the plotter, I had to ensure some things were true.  I reset my plotter to the factory default settings, which resulted in a condition where I could assume this about my serial connection:

Baud: 9600
Data Length: 8
Parity: None
Stop Bit: 1

In order to ensure communication with non-root users, I took a questionable approach, and I decided to:

chmod 777 /dev/ttyS0

This did not need to be a very secure environment (we didn’t even password protect the workstation’s desktop) so I figured this would be a reasonable approach, rather than troubleshooting why CUPS was getting permission denied errors while printing to the serial port.

Configure The Plotter In CUPS
To install this plotter in CUPS, you’ll want to open up your Printer configuration area from the System menu.

Click “Add” to add a printer.

CUPS Add A Printer

If you don’t have the option for “Serial Port #1”, then use the Device URI “serial:/dev/ttyS0“.

Serial Printer


You will want to select Generic as the make of printer.

Generic Printer


Then, select “Raw Queue”  This will work with InkCut providing the HPGL instructions.

Generic Printer - Raw Queue

Obviously, it doesn’t matter what you name your plotter, or what description you give it, just give it something that makes sense.

Finalize Printer Settings

Install Inkscape

Next, we want to install Inkscape.  You can do this from Apt on Ubuntu, as such:

sudo apt-get install inkscape

Once you’re done with the installation, start Inkscape for the first time.  This will create blank default configuration folders in your profile which are necessary for the next step.

Inkscape


Then, go ahead and close Inkscape, and move on to installing InkCut!

Install InkCut
You can download the latest version of InkCut from their website.  At the time of this writing, the version is 1.0, and can be found here.

Once you’ve downloaded InkCut, go ahead and extract the file using this command.  It will put the files right where they need to be for you!

tar -xzvf InkCut-1.0.tar.gz -C ~/.config/inkscape/extensions/

Now, when you start Inkscape, you should see InkCut on the Extensions menu, under Cutter/Plotter.

InkCut

Screencast How-To’s
 I have also created some screencasts to explain how to set up the document for your plotter, as well as how to plot some basic text.

Document Setup – Screencast
(Download OGV)

Let’s Plot Some Text! – Screencast
(Download OGV)

Remember, when plotting your text, you need to make sure your objects are converted to paths, by highlighting your text and going to Path > Object To Path.  You also want to make sure your paths aren’t grouped, by right clicking each block of text and clicking Ungroup.

Then you should be good to go to Extensions > Cutter/Plotter > InkCut v1.0 and start plotting!

Posted in: How-To's, Musings / Tagged: InkCut, Inkscape, Linux, Plotter, Vinyl Cutting

Installing Zimbra Collaboration Suite On Ubuntu 12.04

January 12, 2013 9:54 PM / 20 Comments / Kirk Schnable

Background
Zimbra Collaboration Suite is a fantastic email and collaboration solution made by VMware.   Zimbra is my email server solution of choice, because it’s very easy to setup, and the features you get are unmatched by other open source email solutions.  Ubuntu 12.04 is the current Ubuntu LTS, which will be supported for servers until 2017, so this is a great time to use it on a server you don’t want to have to take offline for frequent updates, like a mail server.

How is Zimbra different from SquirrelMail or RoundCube?
Popular open source solutions for webmail are SquirrelMail and RoundCube, which interface with an existing IMAP \ SMTP server to provide webmail access.  Zimbra is a fully integrated mail solution, which sets up a POP, IMAP, and SMTP server, and provides HTTP and\or HTTPS webmail out of the box.  Zimbra also provides a desktop AJAX, desktop HTML, and mobile HTML access option set.  No matter what device you’re on, you can access your webmail in a friendly way.

Other Features of Zimbra
Zimbra offers a number of other features, such as:

  • Address Book
  • Calendar
  • Tasks Management
  • File\Document Briefcase
  • File\Document\Folder Sharing
  • Incoming Email Filtering\Antivirus
  • Social Media Integration

You can look at the official list of features, and other information, on Zimbra’s website.  This is their page on the Open Source Edition.


Installing Zimbra Collaboration Suite 8.0.2 Open Source Edition on Ubuntu 12.04
If you’ve decided that you’d like to try Zimbra Collaboration Suite, let’s get on to the installation!

Install Dependencies
These packages will be necessary for Zimbra to be installed on your system.

sudo apt-get install netcat libidn11 libpcre3 libgmp3c2 libexpat1 libstdc++6 libperl5.14 sysstat sqlite3

Download Zimbra ZCS
At the time of this writing, you can use the link in the Code box below.  As this tutorial ages, and newer versions of Zimbra are released, you will want to go to the download page and get the latest link.

wget http://files2.zimbra.com/downloads/8.0.2_GA/zcs-8.0.2_GA_5569.UBUNTU12_64.20121210115059.tgz

zcs-wget

Extract The Downloaded Archive

tar -zxvf zcs-8.0.2_GA_5569.UBUNTU12_64.20121210115059.tgz

Enter The Folder You Extracted

cd zcs-8.0.2_GA_5569.UBUNTU12_64.20121210115059

DNS Configuration
If your DNS was not setup properly, you might get an error like DNS Error resolving yourhostname.com.  There is an error which will follow regarding your MX configuration.  These errors are OK to ignore, as long as you’re not planning on using your hostname to send\receive email.  You can add properly configured domains later.

However, you do want to make sure this domain name can be resolved.  Put it in /etc/hosts for 127.0.0.1 if necessary.  If you do not do this, you will encounter an error during the final setup stage.

Run The Installer

./install.sh

Press Y and hit enter to agree to the license agreement.

ZCS-install-1


Now, if you installed all the dependencies at the start of this tutorial, you should have everything you need!

ZCS-Install-2


If you aren’t sure what you want to install, then just install the items as suggested.

zimbra-ldap – Yes
zimbra-logger – Yes
zimbra-mta – Yes
zimbra-snmp – Yes
zimbra-store – Yes
zimbra-apache – Yes
zimbra-spell  – Yes
zimbra-memcached – No
zimbra-proxy – No

When asked if you want to continue, press Y and hit enter to proceed with the installation.

ZCS-Install-3

The Zimbra installer will take care of extracting and installing the packages for you.  This part of the process might take some time, depending on the speed of your machine.


Configuration Menu
Go through all of the items on the configuration and make sure they are what you want.  I like to make sure these options are set:

Don’t stress out about the domain names too much, you can add additional domains to your email server later, very easily.

  • Common Configuration > Hostname\Ldap Master Host — Should be your server’s main domain, like mydomain.com.
  • Common Configuration > LDAP Admin Password — The administrative password for Zimbra’s LDAP Server.  Make it something you’ll remember if you ever think you’ll want to integrate anything with the built-in LDAP later.
  • LDAP > Domain To Create — Should be your server’s main domain, like mydomain.com.
  • LDAP > LDAP Root\Replication\Postfix\Amavis\Nginx\Bes Searcher Passwords — I like to change these too.
  • Zimbra Store > Admin User\Password — These will be used to login to the Zimbra Admin Area.
  • Zimbra Store > Spell Server URL — Make sure this is a web address that can be accessed, it will be used when people press Spell Check.
  • Zimbra Store > SMTP Host — Should be your server’s main domain, like mydomain.com.
  • Zimbra Store > Version Update Email Addresses — Should be an email address for an administrator.

When you’re satisfied with all of your settings, press “S” and hit enter to write your settings to the configuration file.   The default file location is fine.   Then press “A” and hit enter to apply your settings and start the server!

Zimbra will ask you to confirm the changes to your system.  Type “Yes” and hit enter.

Zimbra will now run through an installation procedure, which may take a few minutes, depending on the speed of your machine.

If all went well, Zimbra is now installed on your server.  If it didn’t, you will be given a log file location, where you can look and see what might have gone wrong.


Firewall Rules
Hopefully your server has, or is at least behind, a firewall solution.  If so, these are the ports you should definitely be unblocking for the proper use of your server.  These ports are assuming you’re running a default configuration, and you did not change your ports during the setup procedure.

Webmail: 80/tcp for standard access, 443/tcp for encrypted access.
Administration Console: 7071/tcp (can be blocked in the firewall if you only plan to do administration over VPN, locally, etc)
Aspell: 7780/tcp (Zimbra runs a spell check server on this custom port, which users will access when they press the Spell Check button on the web interface)
SMTP: 25/tcp for standard access, 465/tcp for encrypted access.
POP: 110/tcp for standard access, 995/tcp for encrypted access.
IMAP: 143/tcp for standard access, 993/tcp for encrypted access.


Accessing Your Zimbra Server
You can login to your Zimbra accounts for webmail access at your Zimbra server’s IP or DNS on the standard https port 443.  You can access your Administration Console over HTTPS using port 7071.

Point your web browser to http://your.zimbra.server.ip:7071/

Zimbra Admin Console

Once you’re logged in, your admin interface will look something like this.

Zimbra Admin 2

The Zimbra setup procedures in the web interface are very straightforward, and are up to you to play with on your own now that Zimbra is installed and working!

Posted in: How-To's / Tagged: Linux, Zimbra

Installing Dragon Naturally Speaking 12 on Ubuntu 12.04 (Using PlayOnLinux)

January 6, 2013 12:58 PM / 23 Comments / Kirk Schnable

After having very much difficulty installing Dragon Naturally Speaking 12 on Ubuntu 12.04 with the latest version of WINE (WINE 1.5.20) I decided to look again at the AppDB.  I found that Dragon Naturally Speaking had a Platinum rating for WINE 1.4, so I decided to give that version of WINE a try with PlayOnLinux, which I believe is a very effective tool for managing different WINE versions and profiles.

Obviously, PlayOnLinux is not a requirement for having WINE 1.4 installed on your machine.  You could install WINE yourself and obtain this version, but for the scope of this tutorial, we will be using PlayOnLinux to manage the installation.

Install PlayOnLinux
It will be to your benefit to grab the latest version of PlayOnLinux from their repository, as this will probably be more recent than the version in your distro’s repository.  This step is optional, but if you ignore it, you might not get the version of PlayOnLinux described in this procedure, and you might be missing new bugfixes and improvements.

sudo wget -q "http://deb.playonlinux.com/public.gpg" -O- | sudo apt-key add -
sudo wget http://deb.playonlinux.com/playonlinux_precise.list -O /etc/apt/sources.list.d/playonlinux.list
sudo apt-get update

Now, let’s install PlayOnLinux!

sudo apt-get install playonlinux

Install WINE 1.4 Inside PlayOnLinux
Go to the Tools menu, and select Manage WINE Versions.

1-PlayOnLinux

Select WINE 1.4, and press the Right Arrow to install the version.

2-PlayOnLinux

PlayOnLinux will download and install WINE 1.4 for you.

3-PlayOnLinux

Once it’s installed, it will appear to the right.

4-PlayOnLinux


Close out of the WINE installation screen.  Next, you’ll want to press the Install button in the PlayOnLinux window, to start installing a new Windows program.

5-PlayOnLinux

Select “Install a new program in a new virtual drive.”

6-PlayOnLinux

You can name your drive whatever you want.  I called mine “DragonNaturallySpeaking12”.

7-PlayOnLinux

Go ahead and check “Use another version of WINE” and hit Next.  This will allow us to manually select which version of WINE we want to use.

8-PlayOnLinux

If you have used PlayOnLinux for other things, you may have more than one version of WINE installed, and that’s OK.  We want to select 1.4.  If you don’t have this option, please go back to the beginning of the tutorial and make sure you’ve installed WINE 1.4 using the “Manage WINE Versions” option on the Tools menu.

9-PlayOnLinux

Now, PlayOnLinux will set up your virtual drive for you.

10-PlayOnLinux

Assuming you have the Dragon Naturally Speaking 12 DVD, which I did, you want to select “CD-ROM” as the place to install your program from.  As shown here.  Then, hit Next.

11-PlayOnLinux

PlayOnLinux will do some steps to prepare for the installation.

12-PlayOnLinux

After a moment or two, the Dragon Naturally Speaking installer will start.  As with any normal installer, click Next to begin.

13-PlayOnLinux

Read the license agreement.  (Hah!)  Then check “I accept the terms in the license agreement” and press Next.

14-PlayOnLinux

In the next window, you’ll want to substitute my filler information with your own.  The serial number for my Dragon Naturally Speaking 12 installation was on the back of the paper DVD holder that contained my installation disk.  Yours will probably be there as well.  Once you’ve filled in your information, go ahead and hit Next.

15-PlayOnLinux

I chose to do a Typical/Complete installation.  I chose to leave the default location.  The location will not interfere with any other WINE programs, unless you didn’t create a brand new virtual drive.  If you did, then the default location should work just fine for you.  If you have no idea, just leave this screen how it is, and press Next.  (That will be fine for most cases.)

17-PlayOnLinux

The installer will now copy some files.

I got this error message.  I ignored it and pressed OK.

18-PlayOnLinux(Error)


I decided I didn’t want to have Dragon Naturally Speaking check for updates on its own, as I have no idea how those will be installed… and I am using my Dragon Naturally Speaking in a professional installation where I will not be the user.  I don’t want to put my end-user through a hostile upgrade experience later, I just assume update it myself down the road if necessary.

Once you’ve decided whether you want to risk the automated updates, hit Finish.

19-PlayOnLinux(Finished)

The installer created a .lnk file on my Ubuntu desktop, but I found that shortcut did not work, so I deleted it.  I created my shortcut using the PlayOnLinux shortcut maker.  You can find this by pressing the Configure button on top of your PlayOnLinux screen.

Select your virtual drive, and click the “Make a new shortcut from this virtual drive” button.

1-Shortcut-FromVdrive

Find “natspeak.exe” and press Next.

2-Shortcut-NatSpeak.exe

Obviously, you can name your shortcut whatever you want.   I chose to name mine “Dragon Naturally Speaking 12”.

3-Shortcut-TypeName

Close out of the shortcut maker when it’s finished, and you should now have a shortcut on your desktop to launch Dragon Naturally Speaking.  Go ahead and launch it.

On first run, I had to activate Dragon Naturally Speaking.  This process worked fine for me, so just press Activate Now.


1-Dragon-1strun-activation


Then, Dragon Naturally Speaking will fire up.  Everything looks like it’s working well so far.

2-Dragon-1strun-Splash


I did encounter some minor issues with Dragon Naturally Speaking, but all in all, it worked well enough that I am comfortable deploying it.


Some Issues I Had:

The Sidebar.  I disabled the sidebar, because it seemed like every other time it launched, it caused the application to crash.

Where You Can Dictate.  It seemed like dictation into Linux programs didn’t work.  I could only dictate into DragonPad and Dragon Naturally Speaking itself.  Even other WINE programs, like Notepad, seemed out of reach of Dragon’s dictation power.


I was quite surprised that some of the features like “Search Google for ____” actually worked, and actually launched my native Mozilla Firefox application.   I did not have a huge amount of time to test the installation, but it will be going into production, so I’m sure if there are any other issues, I will find out about them.  If anyone has any questions, please feel free to ask in the comments, and I will answer what I can.  Keep in mind, I did not install Dragon Naturally Speaking on my own laptop, and my work only had a single license.

The reason I created this tutorial was not as a comprehensive guide, but so that someone who is searching Google for these instructions can find something.  I was very disappointed at how little information I found on Dragon Naturally Speaking 12 with WINE.   I am by no means an expert, just someone who spent a little too much time trying to get this working (see my other two blog posts here and here)… I hope someone found this useful and that I saved someone some time!

Posted in: How-To's / Tagged: Dragon Naturally Speaking, Linux, PlayOnLinux, WINE

Post Navigation

 
Newer Posts →

Pages

  • About Binary Impulse
  • BashBytes

Recent Posts

  • My UBook X Linux Tablet Adventure and how I learned more than I ever thought I would need to know about accelerometer drivers
  • Migrating Proxmox Hypervisor’s Boot Volume ZFS Mirror To New (Smaller) Disks
  • OPNsense Performance Tuning for Multi-Gigabit Internet
  • Reddit Deplatforms Popular Microsoft Software Swap Subreddit
  • Comcast Upgrades Gigabit Pro from 3Gbps to 6Gbps!
May 2025
M T W T F S S
 1234
567891011
12131415161718
19202122232425
262728293031  
« Apr    

Recent Comments

  • jasonistre on OPNsense Performance Tuning for Multi-Gigabit Internet
  • Nick on OPNsense Performance Tuning for Multi-Gigabit Internet
  • Kirk Schnable on OPNsense Performance Tuning for Multi-Gigabit Internet
  • nick on OPNsense Performance Tuning for Multi-Gigabit Internet
  • Eric on My UBook X Linux Tablet Adventure and how I learned more than I ever thought I would need to know about accelerometer drivers

Categories

  • How-To's
  • Humorous
  • Musings
  • Newsworthy
  • Other

Meta

  • Register
  • Log in
  • Entries feed
  • Comments feed
  • WordPress.org
© Copyright 2025 - Binary Impulse
Infinity Theme by DesignCoral / WordPress